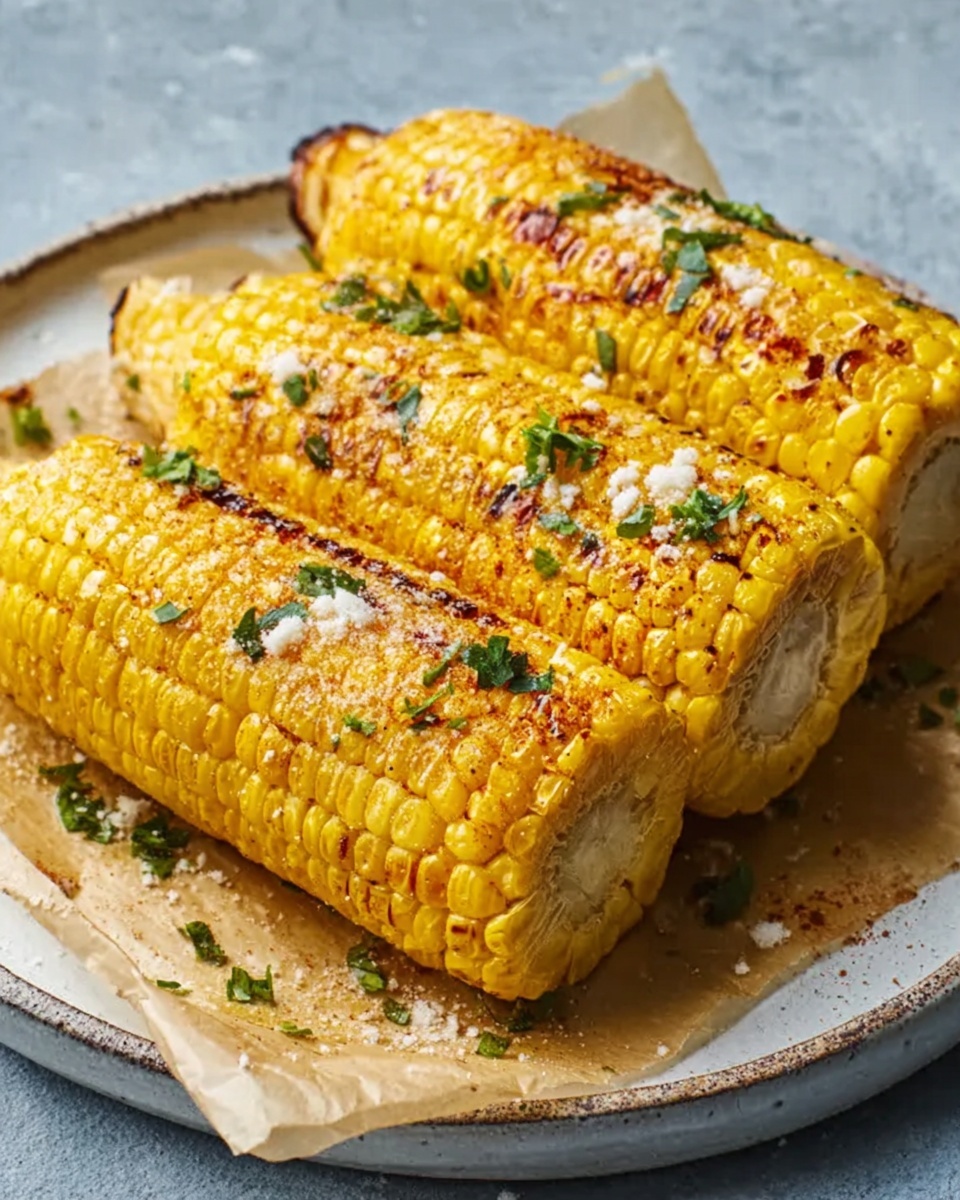
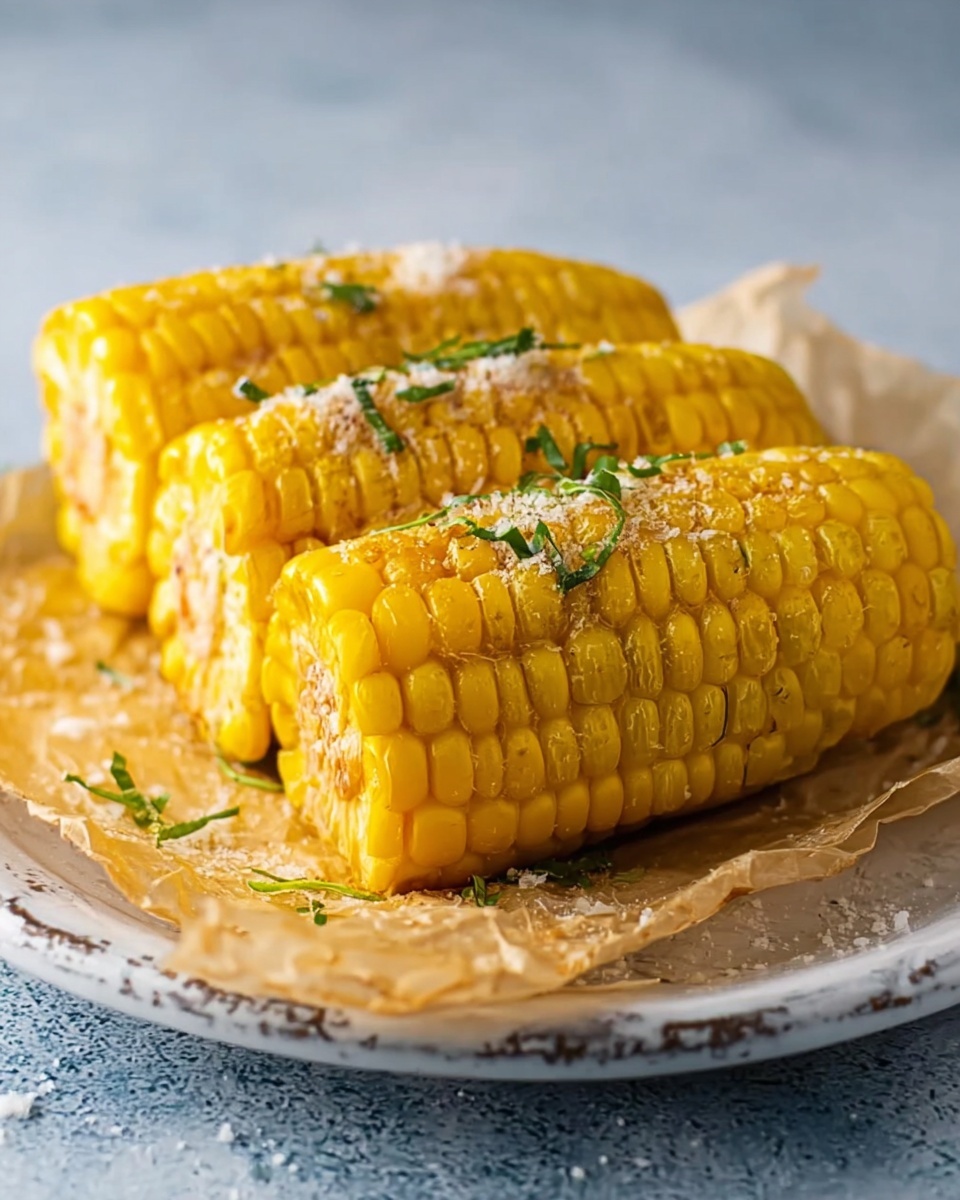
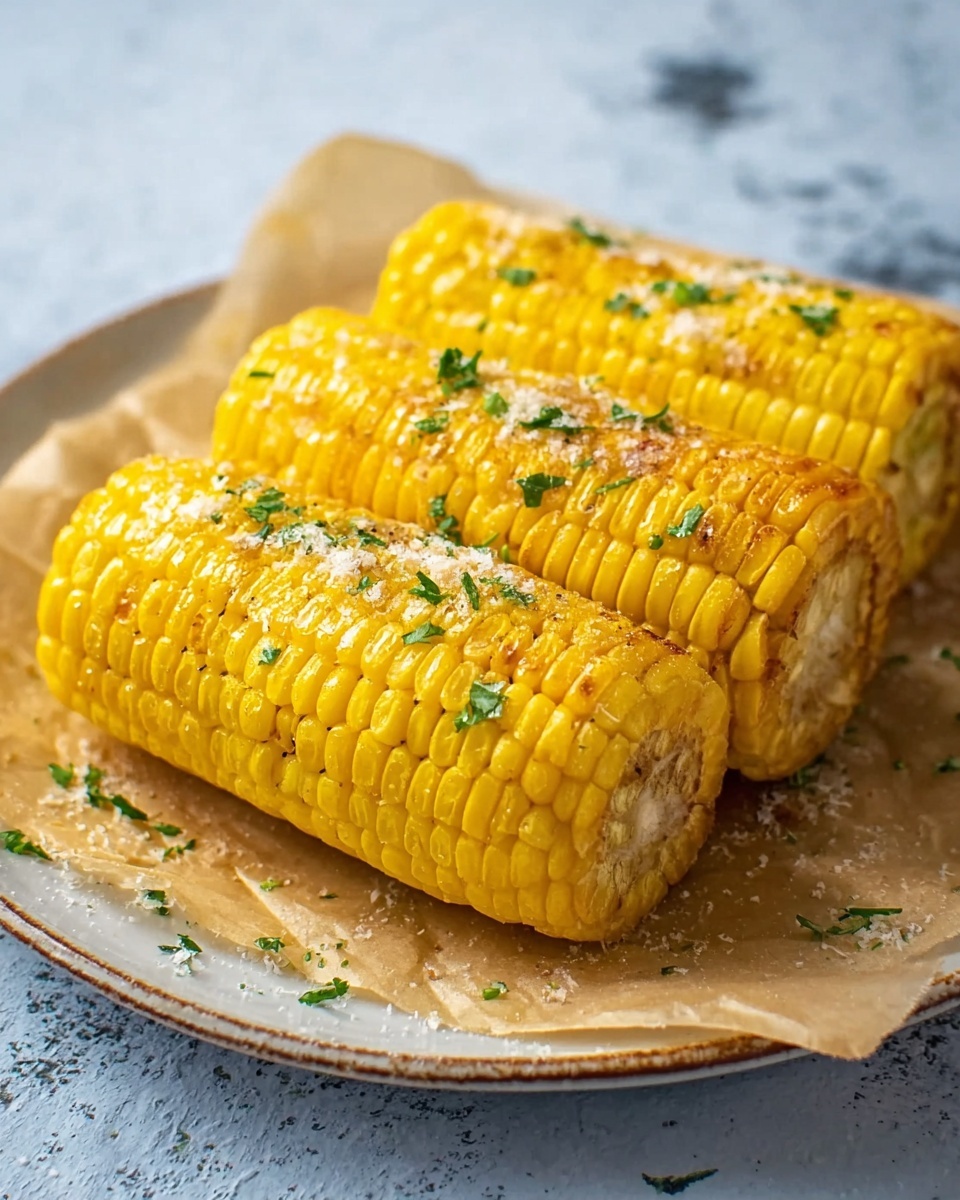
If you crave a quick, easy, and tasty way to enjoy fresh corn, this Microwaved Corn on the Cob Recipe is your new best friend. It transforms humble corn into a sweet, juicy delight in just minutes, saving you time and extra dishes. Whether you leave the husk on or shuck it beforehand, this method locks in moisture and flavor, creating perfectly tender kernels that practically pop with freshness. I love how minimal the ingredients are—just corn, water, butter, and a pinch of salt—yet the results are spectacular every time. Let me share this simple, reliable way to elevate your corn game, especially when you need a delicious side in a flash.
Ingredients You’ll Need
These ingredients are straightforward but crucial for getting that signature sweet and buttery flavor with the perfect texture. Each ingredient plays its part in coaxing the best from your corn on the cob.
- 2 tablespoons water: Adds the steam needed to gently cook the corn kernels to tenderness without drying them out.
- 2 cobs of corn, shucked or not: The main event—choose fresh and plump ears for the juiciest results.
- 2 tablespoons butter: Adds richness and a creamy finish that melts into every kernel beautifully.
- ¼ teaspoon salt: Just enough to enhance the natural sweetness of the corn without overwhelming it.
How to Make Microwaved Corn on the Cob Recipe
Step 1: Prepare the Microwave-Safe Plate
Start by pouring 2 tablespoons of water onto a large microwave-safe dinner plate. This water will create steam to cook your corn evenly and keep it juicy.
Step 2: Place the Corn on the Plate
Arrange two whole cobs of corn directly on the plate on top of the water. You can keep the husks on for extra steaming or shuck the corn beforehand if you prefer a quicker serve.
Step 3: Cover with an Inverted Plate
Place a second dinner plate upside down over the corn, creating a mini steaming enclosure that traps heat and moisture for perfect cooking.
Step 4: Microwave Until Tender
Microwave the corn for 4 to 5 minutes. You’ll notice the kernels deepen in color and become tender as they steam in their own moisture. Timing may vary based on your microwave, so keep an eye on the texture.
Step 5: Remove Husk (if not shucked)
If you cooked the corn in its husk, wait a moment for it to cool slightly, then cut off about half an inch from the stem end of each cob. Using oven mitts, grasp the husks at the pointed end and gently squeeze towards the cut end to slide the corn free.
Step 6: Drain Water and Add Corn Holders
Carefully drain any water left on the plate. If you have corn holders, this is the perfect time to insert them into each end of the cobs for easier handling.
Step 7: Butter and Salt to Finish
Spread butter all over the warm corn and sprinkle with salt to taste. The heat will melt the butter beautifully, making each bite indulgently flavorful and satisfying.
How to Serve Microwaved Corn on the Cob Recipe
Garnishes
For a fresh twist, sprinkle your corn with freshly chopped herbs like parsley, chives, or cilantro. A dash of smoked paprika or chili powder can add a smoky or spicy kick that pairs wonderfully with the sweet corn. Don’t be shy with a squeeze of lime for a zesty brightness that awakens the flavors.
Side Dishes
Microwaved corn on the cob pairs beautifully with a variety of meals—from grilled chicken and steak to barbecued ribs or light summer salads. Its natural sweetness makes it a crowd-pleasing side at picnics, potlucks, or casual weeknight dinners.
Creative Ways to Present
Want to impress guests? Thread cooked kernels off the cob into colorful skewers, or cut the corn into rounds for a fun bite-sized option. You can also serve it alongside flavored compound butters—try garlic herb, chipotle lime, or honey cinnamon—to customize the experience.
Make Ahead and Storage
Storing Leftovers
Wrap your cooked corn tightly in plastic wrap or place it in an airtight container and keep it refrigerated. It stays fresh for up to 2 days but tastes best when reheated and enjoyed the same day.
Freezing
While freezing whole cooked corn on the cob isn’t ideal due to texture changes, you can cut the kernels off the cob and freeze them in a sealed container or freezer bag for up to 3 months. This way, you’ll have a quick corn side on hand anytime.
Reheating
To reheat, place the corn back on a microwave-safe plate, cover with a damp paper towel to retain moisture, and microwave for about 1-2 minutes until heated through. Avoid overcooking to keep the kernels juicy and tender.
FAQs
Can I microwave corn on the cob without shucking it?
Absolutely! Microwaving corn with the husks on helps steam the kernels inside their natural wrapper, often resulting in more flavorful, juicy corn. Just be sure to cut the stem end off after cooking to easily remove the husks.
How long does it take to microwave corn on the cob?
Typically, 4 to 5 minutes on high power is perfect for two ears of corn. Your microwave’s wattage may cause slight variations, so start with 4 minutes and add more if needed until the kernels are tender.
Is microwaving corn as good as boiling or grilling?
Microwaving is a fantastic quick-cook alternative that retains moisture and sweetness. While grilling adds a smoky char and boiling softens the corn in water, microwaving gives you tender, juicy corn without extra heat or mess.
Can I use frozen corn on the cob for this recipe?
Fresh corn works best for microwaving whole, but if you have frozen corn on the cob, you can microwave it following the same steps. Just check for tenderness and adjust cooking time since frozen corn might need a bit longer.
Do I need to add water when microwaving corn on the cob?
Yes! Adding a small amount of water on the plate is crucial as it creates steam that cooks the corn kernels gently and evenly while keeping them moist and plump.
Final Thoughts
This Microwaved Corn on the Cob Recipe has truly become my go-to for a quick, satisfying way to enjoy one of summer’s sweetest treats no matter the season. It’s foolproof, speedy, and delivers a buttery, tender result that everyone will love. Next time you want a no-fuss, delicious side that feels like a special occasion, give this recipe a try—you might find it becomes a staple in your kitchen too!
Print
Microwaved Corn on the Cob Recipe
- Prep Time: 1 minute
- Cook Time: 4 minutes
- Total Time: 5 minutes
- Yield: 2 servings
- Category: Side Dish
- Method: Microwaving
- Cuisine: American
Description
A quick and easy recipe for perfectly cooked corn on the cob using a microwave. This method steams the corn in just minutes, preserving its natural sweetness and tenderness without the need for boiling or grilling.
Ingredients
Ingredients
- 2 Tbsp. water
- 2 cobs of corn, shucked or not shucked
- 2 Tbsp. butter
- ¼ tsp. salt
Instructions
- Add Water: Pour 2 tablespoons of water onto a large microwave-safe dinner plate to create steam during cooking.
- Place Corn: Arrange the two corn cobs on the plate, whether shucked or still in their husks.
- Cover Corn: Place a second dinner plate upside down over the corn to trap steam.
- Microwave: Cook the corn in the microwave for 4 to 5 minutes until the kernels deepen in color and become tender.
- Remove Husks: If the corn was not shucked, cut off about half an inch from the stem end of each cob. Wearing oven mitts, grasp the husks at the pointed end and squeeze toward the cut end to loosen and remove the husks and silk.
- Drain Water: Carefully remove the top plate and drain any water from the bottom plate. Insert corn holders if desired for easier handling.
- Season: Spread the butter over the hot corn and sprinkle with salt to taste before serving.
Notes
- Cooking times may vary depending on the microwave’s power, so adjust as needed.
- Use oven mitts when removing the corn as it will be hot and steamy.
- This method works well even if the corn is shucked or still in the husk.
- Consider adding other seasonings such as pepper, paprika, or Parmesan for variety.
