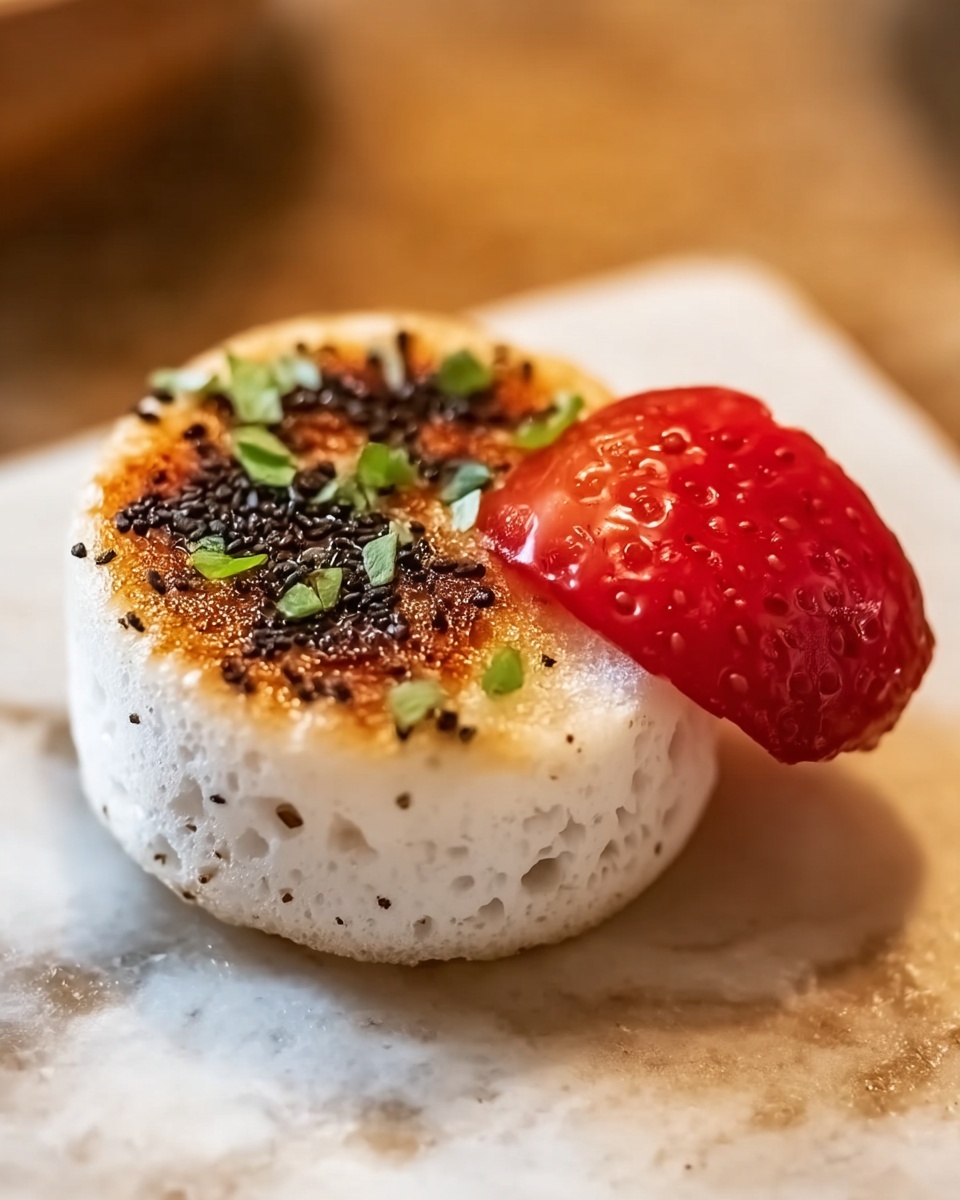
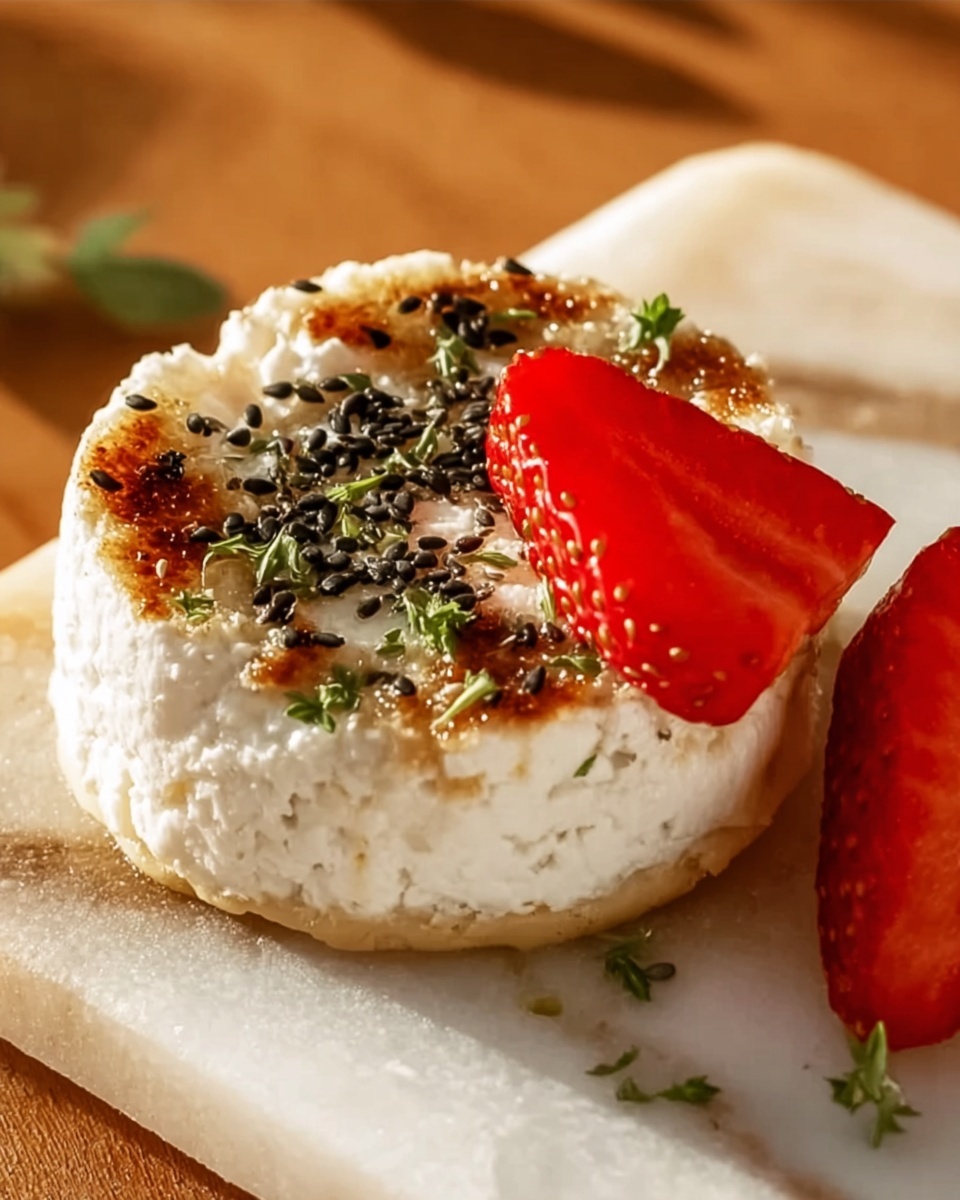
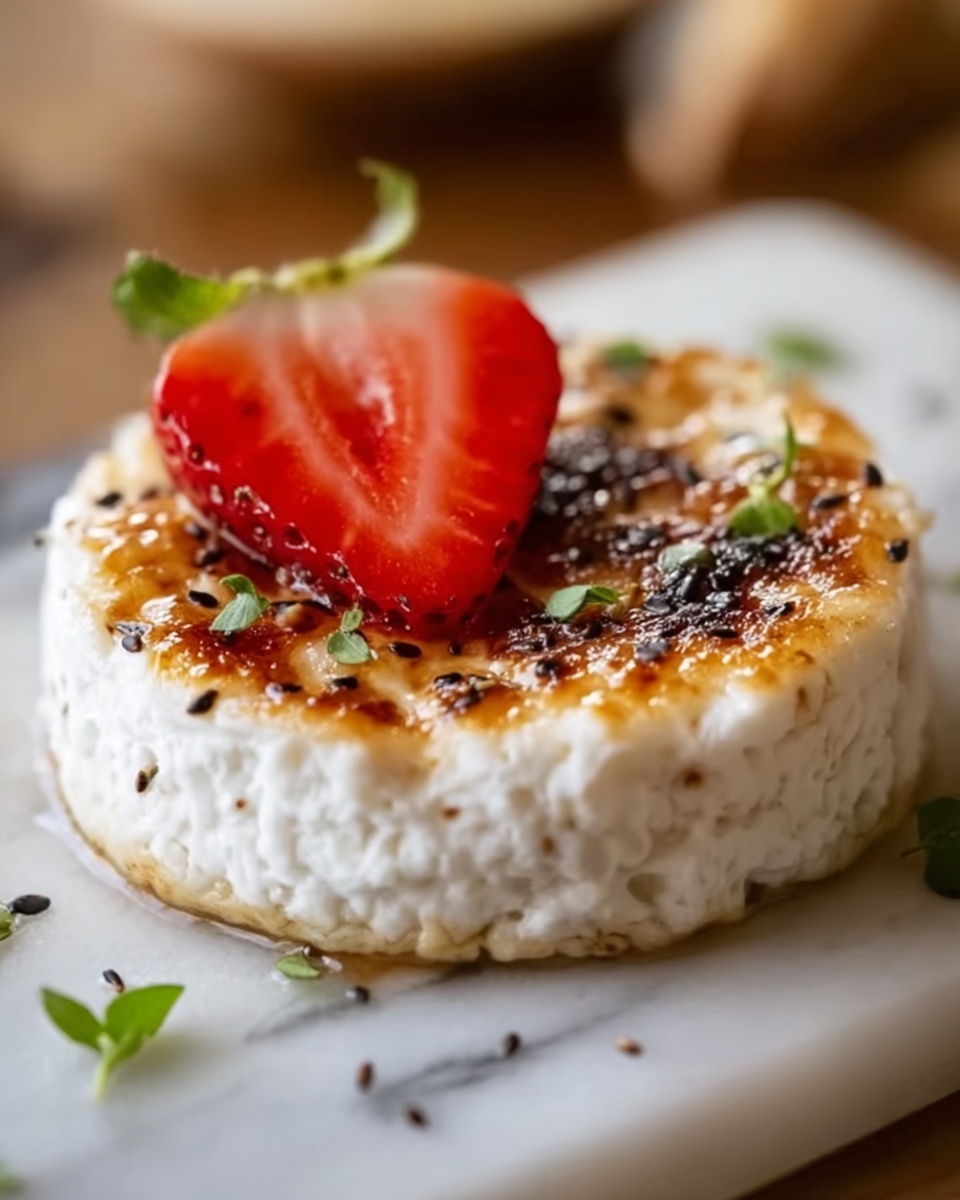
If you’re looking for a dish that brings together creamy, buttery goodness with a satisfying crispy texture, you are going to absolutely love this Butter Yogurt Rice Cakes Recipe. It’s a charming fusion creation that takes simple, humble ingredients like cooked rice and yogurt and transforms them into golden, savory cakes that are perfect any time of day. Whether you want a comforting breakfast, a crowd-pleasing side, or a snack that’s a little out of the ordinary, these rice cakes really hit the spot with their rich flavor and delightful texture.
Ingredients You’ll Need
Getting started is a breeze when you have these straightforward, everyday ingredients on hand. Each one plays a vital role in building the taste, texture, and appearance of your Butter Yogurt Rice Cakes Recipe, so don’t skip any!
- 1 cup plain yogurt: Adds tanginess and moisture that keeps the cakes tender yet creamy inside.
- 2 tablespoons unsalted butter, melted: Brings a luscious buttery flavor and helps with crisping as you cook.
- 2 cups cooked white rice (preferably short-grain): The hearty base that holds everything together and provides that classic chewy texture.
- 1 large egg: Acts as the natural binder giving structure to these rice cakes.
- 2 tablespoons all-purpose flour: Lightly thickens the batter, ensuring your cakes don’t fall apart.
- 1/4 teaspoon salt: Enhances all the flavors and balances the tang of the yogurt.
- 1/4 teaspoon baking powder: Gives a gentle lift to your cakes so they’re soft and not dense.
- Optional chopped green onions or herbs: Adds a fresh, herbal brightness as a garnish.
How to Make Butter Yogurt Rice Cakes Recipe
Step 1: Mix the Ingredients
In a large bowl, you want to combine the cooked rice, plain yogurt, melted butter, egg, flour, salt, and baking powder. Stir everything thoroughly until the mixture forms a slightly thick batter. This blend is what creates the magic — the yogurt keeps it moist while the butter adds richness, and the rice brings a lovely chewy base.
Step 2: Let the Batter Rest
Give your mixture a little break — let it rest for about 5 to 10 minutes. This step is crucial because it allows the flour to absorb the moisture from the yogurt and egg, making the batter thicker and easier to cook without falling apart.
Step 3: Heat the Skillet
Grab a nonstick skillet or a griddle and heat it over medium. Lightly grease the surface with a bit of butter or oil to ensure your rice cakes don’t stick and get that perfectly golden crust we’re after.
Step 4: Cook the Cakes
Scoop about 1/4 cup of the batter per rice cake onto the hot skillet. Press down gently with a spatula to flatten them slightly. Cook each side for 3 to 4 minutes or until you get that gorgeous golden brown color and a crispy outer layer. Transfer the cooked cakes to a plate and keep warm while finishing the rest.
How to Serve Butter Yogurt Rice Cakes Recipe
Garnishes
Add a sprinkle of freshly chopped green onions or your favorite herbs like parsley or dill. Not only does this add color, but it also gives a bright, fresh contrast to the buttery richness of the rice cakes.
Side Dishes
These rice cakes are wonderfully versatile and pair well with a crisp salad dressed in lemon vinaigrette, a side of sautéed veggies, or even a dollop of sour cream or chutney for an extra burst of flavor.
Creative Ways to Present
Try stacking your Butter Yogurt Rice Cakes Recipe and layering them with slices of avocado and a drizzle of spicy mayo. You can also serve them alongside grilled meats or use them as a base for savory toppings, making for a playful and delicious appetizer.
Make Ahead and Storage
Storing Leftovers
If you have any leftovers (though it’s hard to resist!), store them in an airtight container in the fridge for up to 3 days. This helps maintain their texture and keeps them tasting fresh.
Freezing
You can freeze these rice cakes by placing parchment paper between each cake to prevent sticking and storing them in a freezer-safe container or bag. They’ll keep well for up to 1 month, perfect for quick meals down the road.
Reheating
To bring your rice cakes back to life, reheat them in a skillet over medium heat rather than the microwave. This method restores the crisp exterior while warming the inside to that lovely creamy texture we crave.
FAQs
Can I use brown rice instead of white rice?
Absolutely! Brown rice will add a nuttier flavor and extra fiber, though the texture might be a bit firmer. Just keep the rice slightly moist to help the cakes bind well.
What can I add to make the rice cakes more flavorful?
Feel free to mix in finely grated cheese, minced garlic, or your favorite leftover vegetables before cooking. These additions make the rice cakes even more hearty and flavorful.
Are Butter Yogurt Rice Cakes Recipe suitable for vegans?
This recipe relies on dairy yogurt, butter, and egg, so it’s not vegan. However, swapping to plant-based yogurt, a vegan butter substitute, and an egg replacer could work with some experimentation.
Can I bake these rice cakes instead of frying?
You could try baking! Place dollops of the batter on a greased baking sheet and bake at 375°F (190°C) for about 15-20 minutes or until golden, flipping halfway through. The texture may be less crispy but still delicious.
How do I prevent the rice cakes from falling apart?
Ensuring the batter has thickened during the resting stage is key. Also, use a nonstick pan and don’t flip too early—wait until the edges are set and the bottom is golden to help keep them intact.
Final Thoughts
There’s something incredibly satisfying about these Butter Yogurt Rice Cakes Recipe—simple ingredients coming together to create a dish that feels both comforting and a bit special. Whether you make them for a quick breakfast or an elegant side, they’re guaranteed to bring smiles and second helpings. Give this recipe a whirl and watch how this humble dish quickly becomes a favorite in your kitchen!
Print
Butter Yogurt Rice Cakes Recipe
- Prep Time: 10 minutes
- Cook Time: 15 minutes
- Total Time: 25 minutes
- Yield: 6 rice cakes
- Category: Side Dish
- Method: Stovetop
- Cuisine: Fusion
- Diet: Vegetarian
Description
Delicious and easy-to-make Butter Yogurt Rice Cakes that are crispy on the outside and soft inside, combining cooked rice with creamy yogurt and rich butter for a flavorful savory treat perfect as a side dish or snack.
Ingredients
Main Ingredients
- 1 cup plain yogurt
- 2 tablespoons unsalted butter, melted
- 2 cups cooked white rice (preferably short-grain)
- 1 large egg
- 2 tablespoons all-purpose flour
- 1/4 teaspoon salt
- 1/4 teaspoon baking powder
Optional Garnishes
- Chopped green onions
- Fresh herbs
Instructions
- Mix Ingredients: In a large bowl, combine the cooked rice, yogurt, melted butter, egg, flour, salt, and baking powder. Stir well until all ingredients are fully incorporated. Allow the mixture to rest for 5 to 10 minutes to let it thicken slightly.
- Heat Skillet: Place a nonstick skillet or griddle over medium heat. Lightly grease the surface with additional butter or oil to prevent sticking.
- Form Rice Cakes: Using about 1/4 cup of the rice mixture per cake, scoop onto the heated skillet and flatten each slightly with a spatula to form cakes.
- Cook Rice Cakes: Cook each rice cake for 3 to 4 minutes on one side until golden brown and crispy. Flip carefully and cook the other side for an additional 3 to 4 minutes until also golden and cooked through.
- Serve: Transfer the cooked rice cakes to a plate and keep warm while cooking the remaining cakes. Serve warm, optionally garnished with chopped green onions or fresh herbs.
Notes
- Add finely grated cheese, minced garlic, or leftover vegetables for extra flavor.
- Best enjoyed warm but can be stored in the refrigerator and reheated in a pan.


