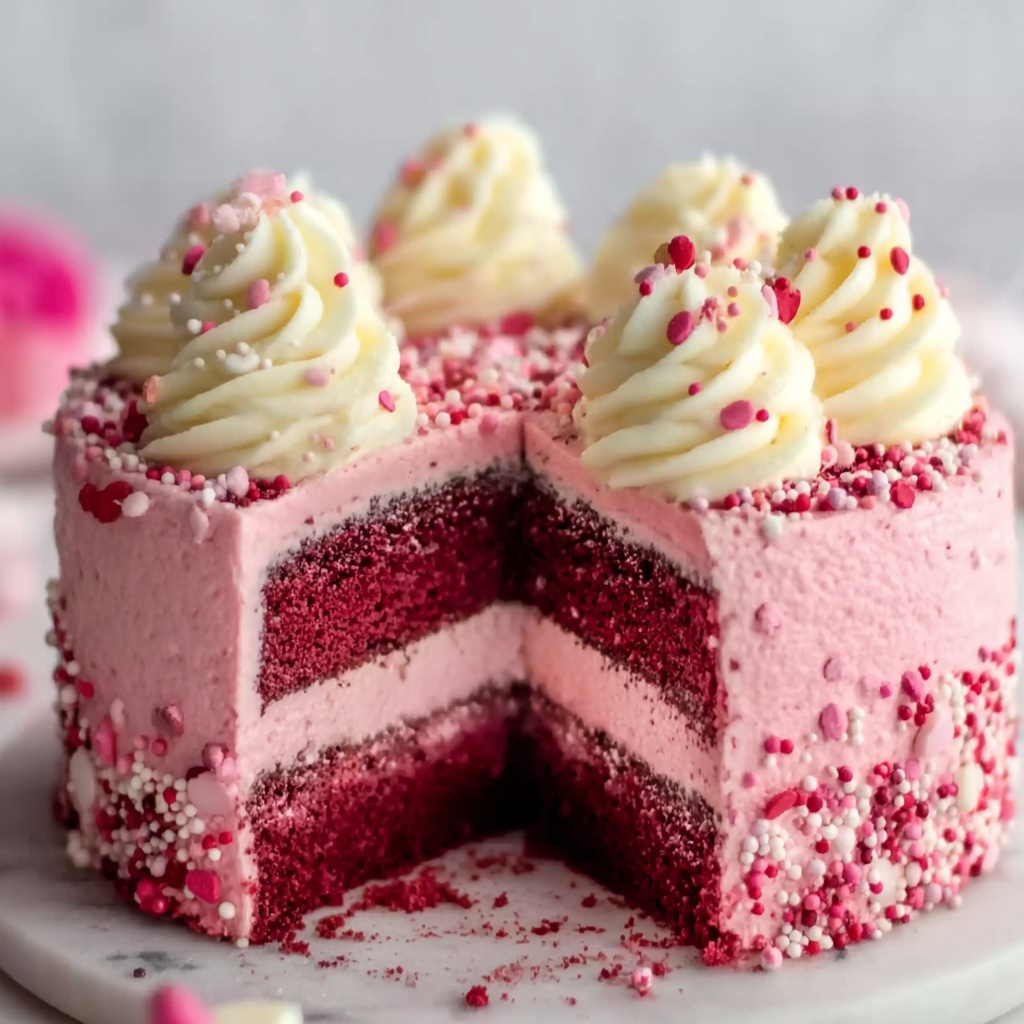
There’s something utterly magical about the Pink Velvet Dream Cake Recipe that makes every celebration feel extra special. Picture this: a tender, moist cake with a delicate pink hue that catches the eye and a subtle cocoa whisper that surprises the palate. Paired with a luscious cream cheese frosting, this delightful dessert is both comforting and elegant, perfect for sharing with friends or indulging in a cozy moment alone. The balance of flavors and the gorgeous color make this cake a true dream come true for any baker or cake lover.
Ingredients You’ll Need
Gathering the right ingredients is the first step toward baking your Pink Velvet Dream Cake Recipe. Each one is simple yet essential, working together to create the unique taste, texture, and stunning pink color this cake is known for.
- 2 1/2 cups all-purpose flour: The foundation of your cake, providing structure and softness.
- 1 1/2 cups granulated sugar: Adds sweetness and helps with the cake’s tender crumb.
- 1 tsp baking soda: Your leavening agent, ensuring a light and airy cake.
- 1 tsp salt: Enhances all the flavors without overpowering them.
- 1 tsp cocoa powder: Just a hint for that classic velvet touch and subtle richness.
- 1 1/2 cups vegetable oil: Keeps the cake moist and wonderfully tender.
- 1 cup buttermilk, room temperature: Adds tang and tenderness, creating a perfect crumb.
- 2 large eggs, room temperature: Provide structure and bring the ingredients together beautifully.
- 2 tbsp red food coloring: The secret to achieving that dreamy pink color with a bold, vibrant pop.
- 1 tsp white vinegar: Reacts with baking soda to help the cake rise perfectly.
- 1 tsp vanilla extract: Adds warmth and depth to the flavor profile.
- Cream cheese frosting: The crowning glory that adds creamy tang and smooth sweetness.
How to Make Pink Velvet Dream Cake Recipe
Step 1: Prepare Your Pans and Preheat
Start by preheating your oven to 350°F (175°C). Grease and lightly flour two 9-inch round cake pans to ensure your beautiful cake will slide right out when it’s done baking, no sticking worries here!
Step 2: Mix the Dry Ingredients
In a medium bowl, sift together the flour, sugar, baking soda, salt, and cocoa powder. Sifting helps blend everything evenly and removes any lumps for that perfect smooth batter.
Step 3: Combine the Wet Ingredients
Grab a larger mixing bowl and whisk together the vegetable oil, room-temperature buttermilk, eggs, red food coloring, white vinegar, and vanilla extract. Mixing these until smooth makes for a consistent base that’s both flavorful and moist.
Step 4: Blend Dry and Wet Mixtures
Slowly pour the dry ingredients into the wet, stirring gently but thoroughly to create a smooth, lump-free batter. This step is where everything starts coming together into your Pink Velvet Dream Cake Recipe.
Step 5: Bake Your Cake Layers
Divide the batter evenly between your prepared pans—this is crucial for even baking and layers that stack beautifully. Slide them into the oven and bake for 25 to 30 minutes. You’ll know it’s done when a toothpick inserted in the center comes out clean.
Step 6: Cool Your Cakes Properly
Patience is key here! Let the cakes rest in the pans for about 10 minutes so they firm up just enough to remove without breaking. Then transfer them to a wire rack to cool completely. This keeps the cake tender and ready for frosting.
Step 7: Frost and Assemble
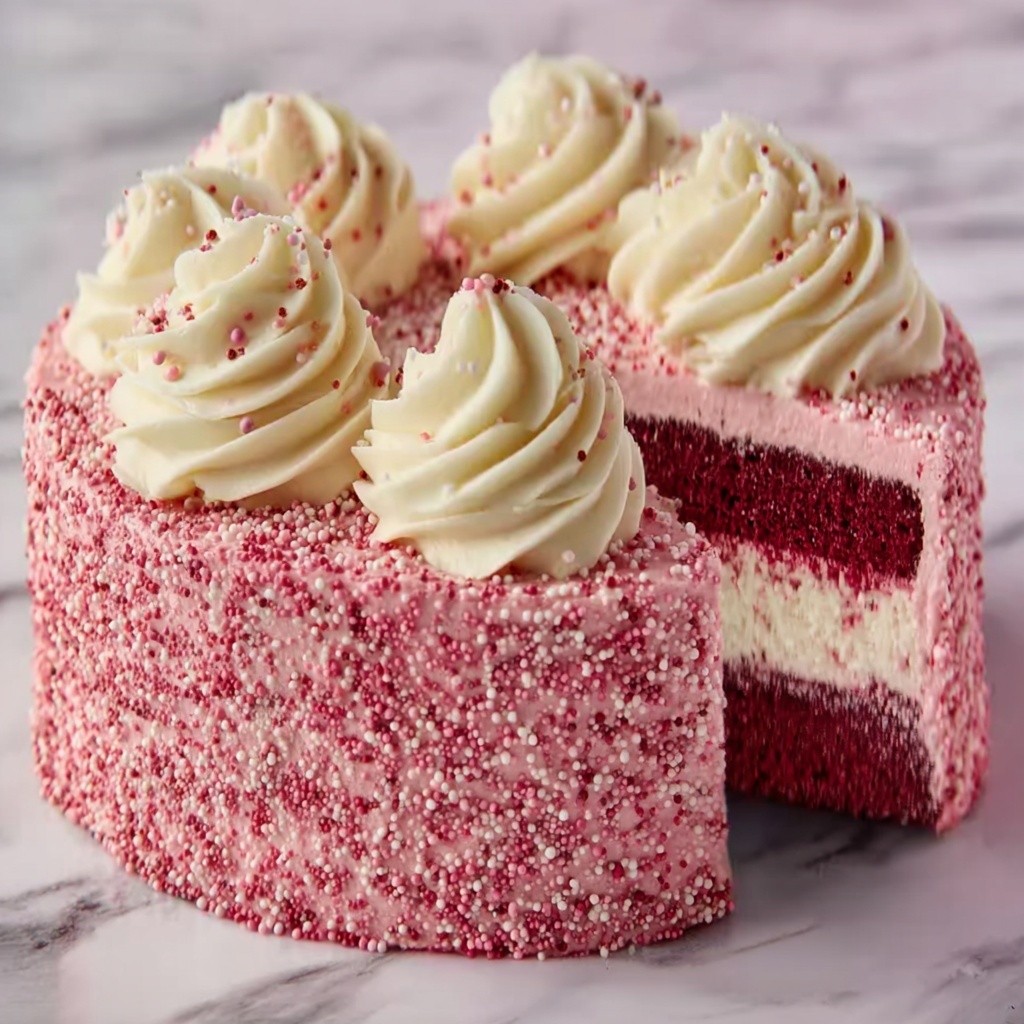
Once the cakes are fully cooled, spread a generous layer of cream cheese frosting on top of one layer, stack the second layer on top, and then cover the entire cake with frosting. Don’t forget the sides—those smooth edges make this Pink Velvet Dream Cake Recipe look truly Instagram-worthy.
How to Serve Pink Velvet Dream Cake Recipe
Garnishes
A sprinkle of edible rose petals, a few fresh berries, or a light dusting of pink sanding sugar can elevate the look and add a bit of crunch or floral sweetness. These simple touches make your Pink Velvet Dream Cake Recipe even more inviting.
Side Dishes
This cake shines on its own but pairs wonderfully with a cup of rich coffee, a smooth latte, or even refreshing herbal tea. For something decadent, try a scoop of vanilla bean ice cream alongside to create a delightful contrast of temperatures and textures.
Creative Ways to Present
Serve your cake on a classic cake stand, or go playful and cut it into petite squares for bite-sized treats at a party. Layer this cake in a trifle bowl with fresh whipped cream and strawberries for a stunning twist on the Pink Velvet Dream Cake Recipe.
Make Ahead and Storage
Storing Leftovers
If you have any leftovers, keep the cake covered tightly in an airtight container at room temperature for up to two days. This helps maintain moisture and keeps the frosting fresh and luscious.
Freezing
You can freeze the unfrosted cake layers wrapped in plastic wrap and aluminum foil for up to three months. When you’re ready to indulge, thaw them overnight in the refrigerator and frost as usual for that freshly baked feel.
Reheating
For warmed slices, pop pieces in the microwave for about 10-15 seconds to bring back a little softness. Avoid overheating to preserve the cream cheese frosting’s perfect texture.
FAQs
Can I use regular milk instead of buttermilk?
Yes, you can substitute with regular milk mixed with one tablespoon of white vinegar or lemon juice to mimic buttermilk’s tanginess and acidity, which is important for the cake’s texture.
What type of red food coloring works best?
Gel food coloring is preferred for the Pink Velvet Dream Cake Recipe because it provides vibrant color without altering the batter’s consistency.
Can I make this cake gluten-free?
Absolutely! Use a gluten-free all-purpose flour blend that’s designed for baking. It may slightly change the texture, but the flavor will still be delightfully close to the original.
Why is there cocoa powder in pink velvet cake?
A small amount of cocoa powder adds depth and richness without turning the cake into a traditional red velvet, contributing to the unique flavor profile of the Pink Velvet Dream Cake Recipe.
How long does the frosted cake last in the fridge?
Once frosted, the cake can stay fresh in the refrigerator for up to 4-5 days if stored in an airtight container or covered tightly with plastic wrap.
Final Thoughts
There you have it—a recipe that’s truly close to my heart, the Pink Velvet Dream Cake Recipe. It’s not just a cake; it’s a celebration of flavor, color, and comfort all in one beautiful bite. Whether it’s for a special occasion or just because you deserve a little sweetness today, I encourage you to give this recipe a try. Your taste buds will thank you, and the smiles you’ll inspire are just the cherry on top!
Print
Pink Velvet Dream Cake Recipe
- Prep Time: 20 minutes
- Cook Time: 30 minutes
- Total Time: 50 minutes
- Yield: 12 servings
- Category: Dessert
- Method: Baking
- Cuisine: American
- Diet: Vegetarian
Description
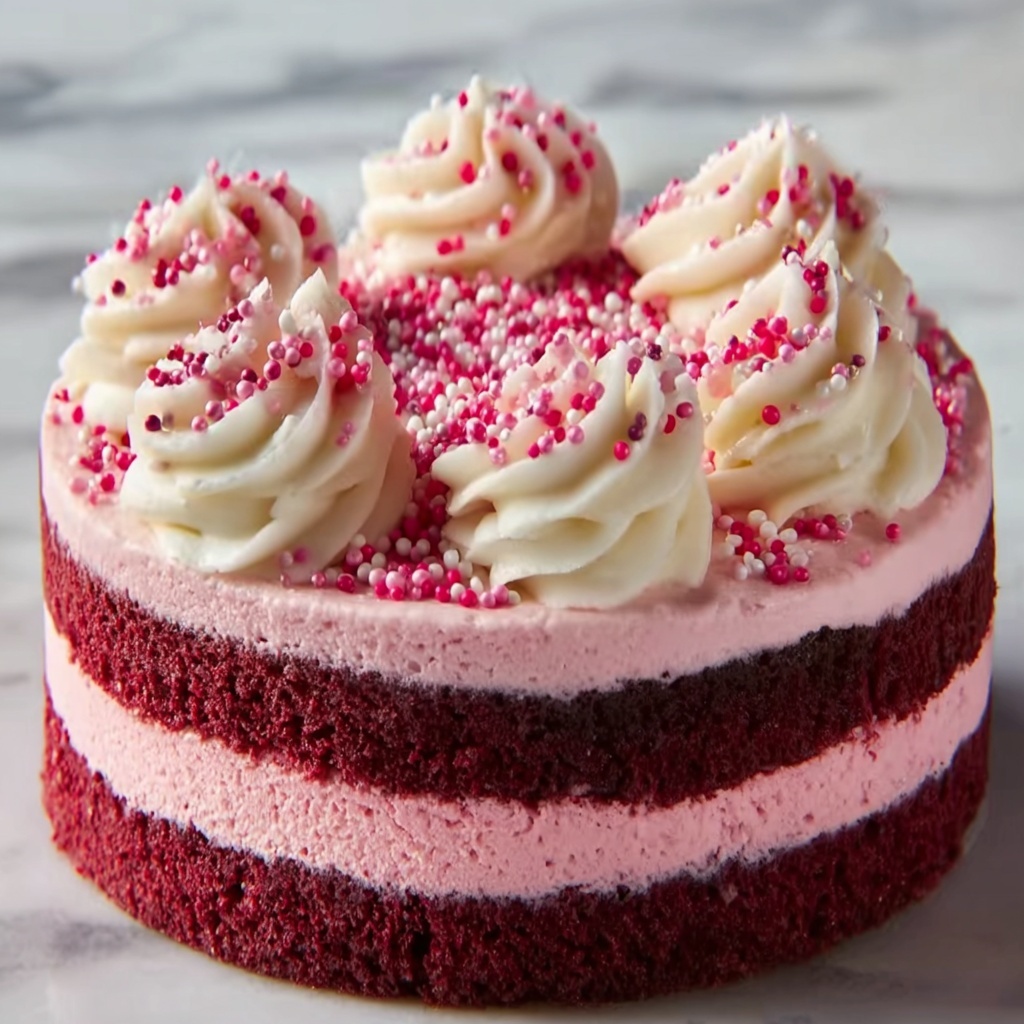
This Pink Velvet Dream Cake is a delightful twist on the traditional red velvet, featuring a vibrant pink color and a moist, tender crumb. Made with simple ingredients like buttermilk, vegetable oil, and a touch of cocoa powder, this cake is perfectly balanced with creamy, tangy cream cheese frosting. Ideal for celebrations or any time you crave a sweet, visually stunning treat.
Ingredients
Dry Ingredients
- 2 1/2 cups all-purpose flour
- 1 1/2 cups granulated sugar
- 1 tsp baking soda
- 1 tsp salt
- 1 tsp cocoa powder
Wet Ingredients
- 1 1/2 cups vegetable oil
- 1 cup buttermilk, room temperature
- 2 large eggs, room temperature
- 2 tbsp red food coloring
- 1 tsp white vinegar
- 1 tsp vanilla extract
Frosting
- Cream cheese frosting
Instructions
- Preheat and Prepare Pans: Preheat your oven to 350°F (175°C). Grease and flour two 9-inch round cake pans to ensure easy removal of the cake layers.
- Mix Dry Ingredients: In a medium bowl, sift together the all-purpose flour, granulated sugar, baking soda, salt, and cocoa powder until well combined and smooth.
- Combine Wet Ingredients: In a large mixing bowl, whisk together the vegetable oil, buttermilk, eggs, red food coloring, white vinegar, and vanilla extract until the mixture is smooth and fully incorporated.
- Combine Wet and Dry Mixtures: Gradually add the dry ingredients into the wet ingredients, stirring gently until the batter is smooth, lump-free, and evenly mixed.
- Divide and Bake: Divide the batter evenly between the two prepared cake pans. Bake in the preheated oven for 25-30 minutes, or until a toothpick inserted into the center comes out clean.
- Cool the Cakes: Allow the cakes to cool in the pans for about 10 minutes, then transfer them onto a wire rack to cool completely before frosting.
- Frost the Cake: Once completely cooled, frost the top of one cake layer with cream cheese frosting. Place the second layer on top, then frost the entire cake, including the sides, for a smooth, finished look.
Notes
- Use room temperature ingredients for better batter consistency.
- You can substitute the vegetable oil with canola oil or another neutral oil if preferred.
- If you don’t have buttermilk, mix 1 cup milk with 1 tablespoon lemon juice and let sit for 5 minutes as a substitute.
- To get a more intense pink hue, increase the red food coloring slightly but avoid too much to prevent coloring from affecting flavor.
- Store the finished cake refrigerated due to the cream cheese frosting, and bring to room temperature before serving for best taste.


