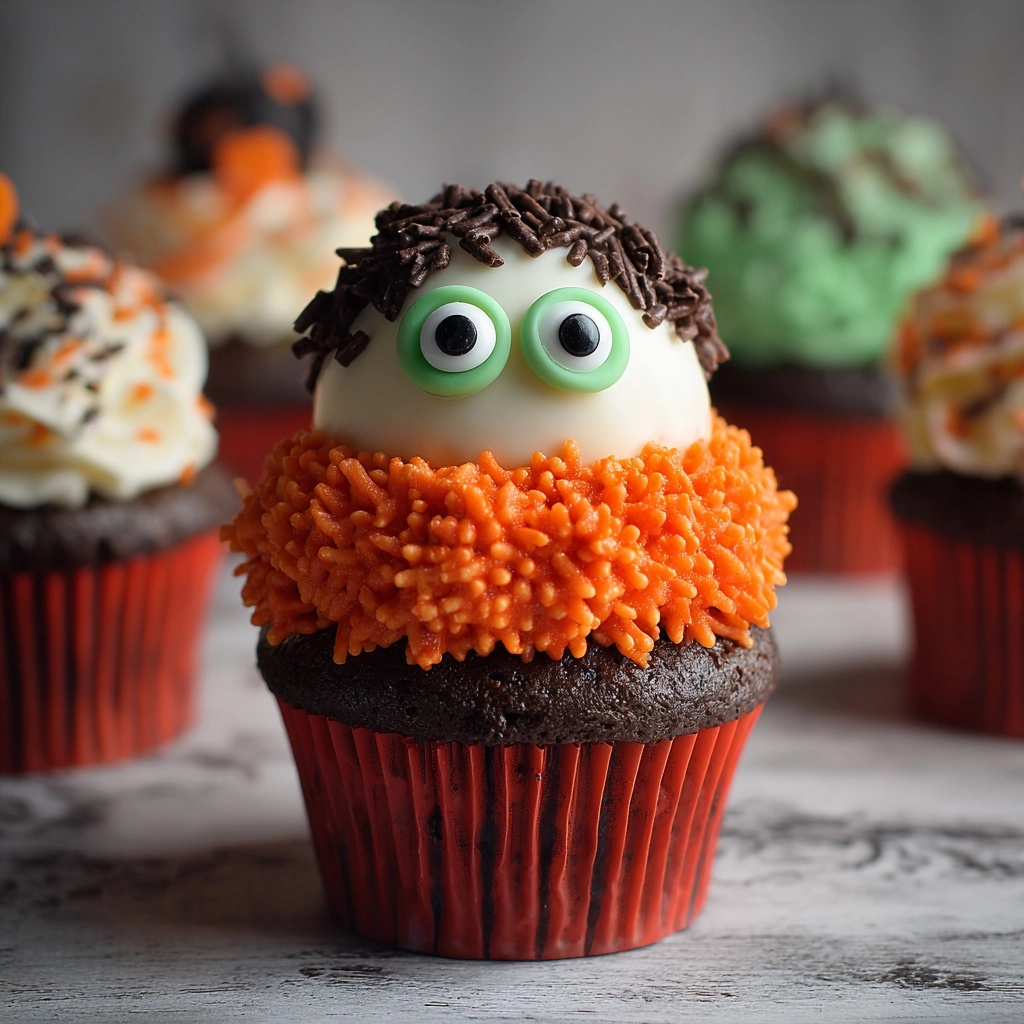
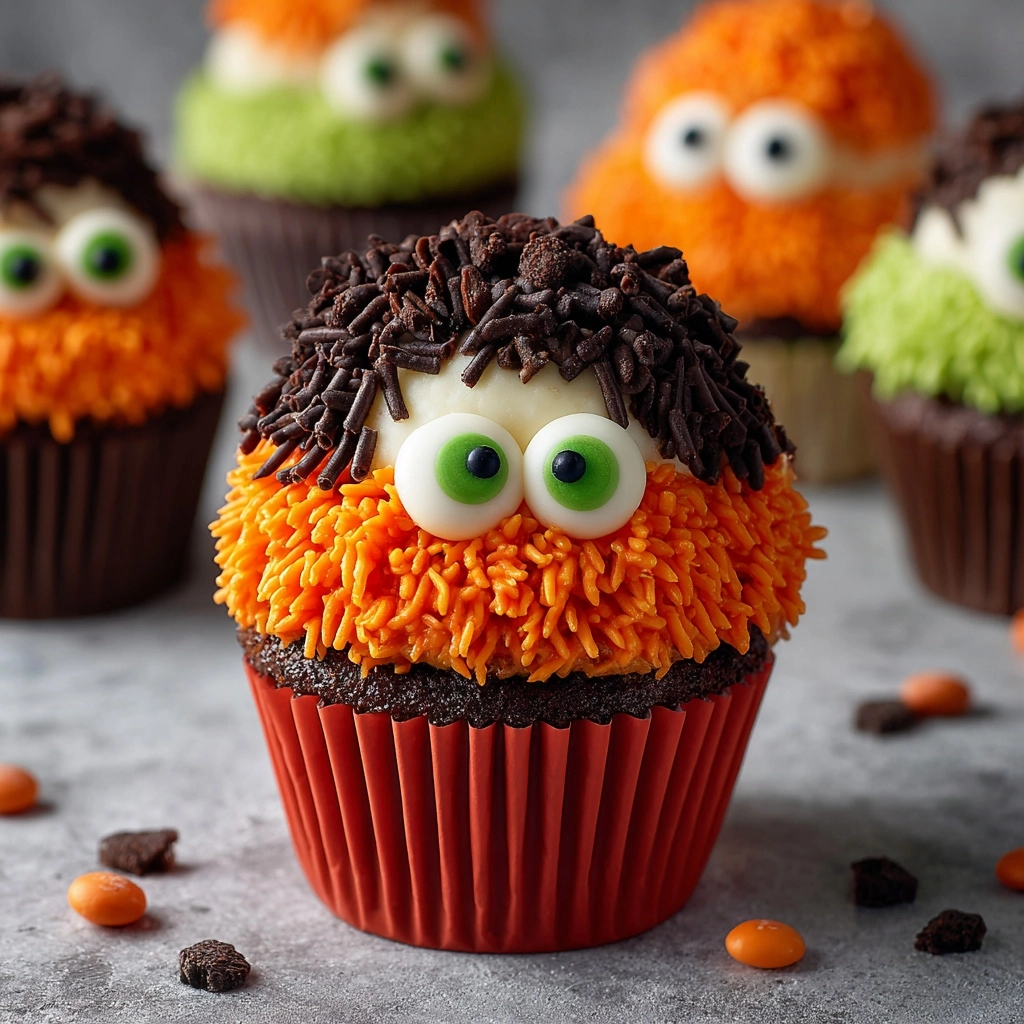
If you are looking to wow your guests this Halloween, these Stamped Halloween Cupcakes – A Spooky Treat with Four Fun Designs Recipe will do the trick and the treat! Imagine rich, moist chocolate cupcakes topped with silky buttercream in bold orange and black hues, each crowned with intricate stamped images of bats, pumpkins, spiderwebs, and skulls. This recipe blends classic flavors with a fun, festive presentation that turns ordinary cupcakes into a Halloween centerpiece, guaranteed to impress both kids and adults alike. Whether you’re hosting a party or just want to add a bit of spooky charm to your dessert table, these cupcakes are pure magic in every bite.
Ingredients You’ll Need
This recipe shines because it uses simple, readily available ingredients that come together beautifully to create cupcakes that are moist, flavorful, and striking in appearance. Each ingredient plays an important role, whether it’s the sour cream adding tenderness, the butter making the frosting rich and creamy, or the gel colors bringing those Halloween shades to life.
- 1 box chocolate cake mix: Provides a quick and reliable base with deep chocolate flavor—no need to start from scratch!
- Eggs, oil, and water: These are usually called for on the cake mix box and create the perfect batter consistency.
- 1/2 cup sour cream: Adds moisture and a slight tang to keep cupcakes tender and flavorful.
- 1 teaspoon vanilla extract: Enhances the chocolate and gives a warm, inviting aroma.
- 1 cup unsalted butter, softened: The foundation for creamy, luscious buttercream frosting.
- 3–4 cups powdered sugar: Sweetens and thickens the frosting to the perfect spreadable texture.
- 2–3 tablespoons milk or heavy cream: Adjusts frosting consistency for easy piping or spreading.
- Black gel food coloring: Creates dramatic, spooky frosting shades and stamping effects.
- Orange gel food coloring: Brings that classic Halloween pumpkin-orange vibrance to your frosting.
- Halloween-themed cookie stamps or stencils: Essential for adding those festive, professional-looking stamped designs.
- Cocoa powder or black edible dust: Provides the contrasting powder for striking stamped images.
- Optional sprinkles or candy eyes: Extra touches that amp up the spooky fun.
How to Make Stamped Halloween Cupcakes – A Spooky Treat with Four Fun Designs Recipe
Step 1: Prepare the Cupcake Batter
Start by preheating your oven to 350°F (175°C) and lining your cupcake tins with fun Halloween-themed liners. In a large bowl, mix your chocolate cake mix according to the package directions, but don’t stop there—fold in sour cream and vanilla extract to boost moisture and flavor. This little addition turns average cupcakes into something incredibly tender and rich.
Step 2: Bake the Cupcakes
Divide the batter evenly among the cupcake liners, filling each about two-thirds full to avoid any messy overflow. Bake for 18–22 minutes until a toothpick inserted in the center comes out clean. This is the sign your cupcakes are perfectly cooked through and ready to cool on a wire rack.
Step 3: Make the Buttercream Frosting
While your cupcakes cool, beat the softened butter until fluffy and pale. Gradually add powdered sugar, mixing well after each addition for smoothness. Slowly pour in milk or cream to achieve a spreadable yet pipeable frosting. Don’t forget to divide your frosting and tint separate portions with vibrant black and orange gel food coloring; these bright colors are what make your Halloween cupcakes pop visually.
Step 4: Frost the Cupcakes
Once the cupcakes are completely cool, it’s time to frost! You can either pipe swirls or spread the buttercream with a knife or spatula. Aim for a smooth, even layer so your stamped designs will come out crisp and clear.
Step 5: Stamp Your Halloween Designs
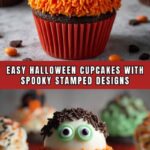
Lightly dust your cookie stamps or stencils with cocoa powder or black edible dust. For best results, chill the frosted cupcakes in the fridge for about 10 minutes before stamping to firm up the frosting. Gently press the stamps onto the cupcakes to create detailed and spooky designs—bats, skulls, pumpkins, or spiderwebs, whatever chills your thrills! Finish with optional candy eyes or sprinkles for an extra dash of Halloween spirit.
How to Serve Stamped Halloween Cupcakes – A Spooky Treat with Four Fun Designs Recipe

Garnishes
To really elevate these cupcakes, add festive garnishes that complement your spooky stamped designs. Candy eyes crawling along spiderwebs, edible glitter for a magical shimmer, or Halloween-themed sprinkles make the cupcakes look both professional and playful. These finishing touches turn each cupcake into a mini work of art that’s fun to eat.
Side Dishes
Pair these cupcakes with other Halloween treats like caramel apple slices, pumpkin-spiced popcorn, or a dark chocolate mousse for a decadent dessert spread. The rich chocolate base of the cupcakes pairs wonderfully with fruity or creamy flavors, balancing the menu for all palates.
Creative Ways to Present
Display your cupcakes on a tiered cake stand decorated with faux cobwebs and mini pumpkins for instant Halloween vibes. Alternatively, arrange them on black platters with orange and purple napkins underneath, or set them inside a decorative box as a gift. With the stamped designs stealing the spotlight, the presentation just becomes part of the fun atmosphere.
Make Ahead and Storage
Storing Leftovers
If you have any leftovers (which may be unlikely), store the cupcakes in an airtight container at room temperature for up to two days. Keep them away from heat and direct sunlight to preserve the frosting and the delicate stamped patterns.
Freezing
You can freeze unfrosted cupcakes wrapped tightly in plastic wrap and foil for up to three months. Thaw completely before frosting and stamping. Frosted cupcakes are best enjoyed fresh because freezing can affect the texture and appearance of buttercream and stamping details.
Reheating
Cupcakes are best eaten at room temperature and generally don’t require reheating. If desired, remove the frosting and warm the cupcake itself for a few seconds in the microwave, then add fresh frosting. This keeps the texture moist without melting decorations.
FAQs
Can I make these cupcakes without a cake mix?
Absolutely! While the box mix makes things quick, you can substitute your favorite homemade chocolate cake recipe. Just remember to add the sour cream and vanilla extract to keep the cupcakes moist and flavorful.
What if I don’t have black or orange gel food coloring?
You can use natural colorings like activated charcoal (for black) or carrot juice/pumpkin puree mixed with a bit of powdered sugar for orange tones, though gel colors give the most vibrant and consistent results for stamping.
How do I clean the stamps or stencils after use?
Simply wipe the stamps with a damp cloth or rinse under warm water and dry thoroughly before the next use. Keeping them clean ensures crisp designs every time.
Can I make this recipe vegan?
Yes! Swap the cake mix for a vegan version, use vegan butter or margarine for the frosting, and replace eggs with flax eggs or applesauce. Just check your cookie stamps and decorations are also vegan-friendly.
What are the best designs to stamp on Halloween cupcakes?
Bats, pumpkins, spiderwebs, skulls, and witches’ hats are all crowd-pleasers. Pick a mix of designs to keep the cupcakes visually interesting and fun for your Halloween celebration.
Final Thoughts
I can’t recommend the Stamped Halloween Cupcakes – A Spooky Treat with Four Fun Designs Recipe enough for adding that perfect mix of delicious flavor and festive flair to your Halloween festivities. They’re surprisingly simple to make, delightfully spooky to look at, and totally irresistible to eat. Whether you’re baking for a crowd or a cozy family night, these cupcakes bring joyful Halloween magic that will have everyone coming back for more. So grab your stamps, whip up the batter, and let the Halloween fun begin!
Print
Stamped Halloween Cupcakes – A Spooky Treat with Four Fun Designs Recipe
- Prep Time: 30 minutes
- Cook Time: 20 minutes
- Total Time: 50 minutes
- Yield: 24 cupcakes
- Category: Dessert
- Method: Baking
- Cuisine: American
- Diet: Vegetarian
Description
Celebrate Halloween with these Stamped Halloween Cupcakes featuring rich chocolate cake topped with creamy buttercream frosting and spooky stamped designs. Perfect for parties, these fun cupcakes are decorated with Halloween-themed stamps and colorful gel food coloring for a festive touch.
Ingredients
Cake
- 1 box chocolate cake mix (plus ingredients listed on the box: typically eggs, oil, and water)
- 1/2 cup sour cream
- 1 teaspoon vanilla extract
Frosting
- 1 cup unsalted butter (softened)
- 3–4 cups powdered sugar
- 2–3 tablespoons milk or heavy cream
- Black gel food coloring
- Orange gel food coloring
Decoration
- Halloween-themed cookie stamps or stencils
- Cocoa powder or black edible dust
- Optional sprinkles or candy eyes for decoration
Instructions
- Preheat and Prep: Preheat your oven to 350°F (175°C) and line a cupcake pan with Halloween-themed paper liners for a festive touch and easy cleanup.
- Prepare Cake Batter: In a large bowl, prepare the chocolate cake mix according to the package instructions. Enhance the batter by adding 1/2 cup sour cream and 1 teaspoon vanilla extract for extra moisture and flavor. Mix until smooth.
- Fill Cupcake Liners: Divide the batter evenly among the cupcake liners, filling each about two-thirds full to allow room for rising while baking.
- Bake: Bake in the preheated oven for 18–22 minutes. Check doneness by inserting a toothpick into the center of a cupcake—if it comes out clean, they are ready.
- Cool: Remove cupcakes from the oven and let them cool completely on a wire rack before frosting to ensure the buttercream does not melt.
- Prepare Buttercream Frosting: Beat 1 cup of softened unsalted butter until creamy. Gradually add 3 to 4 cups powdered sugar, mixing well. Add 2 to 3 tablespoons of milk or heavy cream to reach your desired consistency.
- Color Frosting: Divide the frosting into portions and tint with orange and black gel food coloring as needed for decorating.
- Frost Cupcakes: Pipe or spread the colored frosting evenly onto the cooled cupcakes, creating a smooth surface for stamping.
- Stamp Designs: Lightly dust Halloween-themed cookie stamps or stencils with cocoa powder or edible black dust. Gently press the stamps onto the frosted cupcakes to create spooky stamped patterns like bats, skulls, pumpkins, or spiderwebs.
- Decorate: Optionally, add sprinkles or candy eyes for extra festive flair.
Notes
- Chilling the frosted cupcakes for 10 minutes before stamping helps the powdered design stay sharp and prevents smudging.
- Use a variety of stamped designs such as bats, skulls, pumpkins, and spiderwebs to create a visually interesting assortment.
- Ensure cupcakes are completely cooled before frosting to avoid melting the buttercream.
- If cocoa powder is not available, black edible dust or black food coloring dust can be used for stamping.