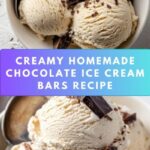
If you have a sweet tooth and a love for all things chocolate, this Homemade Delicious Chocolate Ice Cream Bars Recipe is going to become your new favorite treat. Imagine smooth, creamy ice cream on a stick, covered in a crispy, glossy chocolate shell that you can customize with your favorite toppings. It’s an indulgent yet surprisingly simple dessert that looks impressive and tastes even better than store-bought versions. Whether enjoyed on a hot afternoon or as a delightful finish to a dinner party, these bars bring joy in every bite.
Ingredients You’ll Need
The beauty of this Homemade Delicious Chocolate Ice Cream Bars Recipe lies in its straightforward ingredients. Each component plays a vital role, contributing to the perfect combination of creaminess and chocolatey crunch you crave.
- 2 cups heavy cream: The base for rich, creamy ice cream that melts beautifully in your mouth.
- 1 cup sweetened condensed milk: Adds sweetness and a silky texture without the need for an ice cream maker.
- 1 teaspoon vanilla extract (optional): Enhances flavor depth, balancing the chocolate’s richness perfectly.
- 300g dark or milk chocolate: Your choice here affects the final flavor, whether you want deep intensity or a sweeter finish.
- 2 tablespoons coconut oil: Helps the chocolate shell harden with a smooth, shiny finish and that satisfying crunch.
- Optional toppings like chopped nuts, caramel sauce, crushed cookies, and sea salt: These add delightful texture and complementary flavors that elevate every bite.
How to Make Homemade Delicious Chocolate Ice Cream Bars Recipe
Step 1: Whip the Cream
Start by whipping the heavy cream until soft peaks form; this creates the luscious texture at the heart of your ice cream bars. The lightness of the whipped cream balances the dense sweetness of the condensed milk, making the end product satisfyingly smooth.
Step 2: Fold in Sweetened Condensed Milk and Vanilla
Gently fold the sweetened condensed milk and vanilla extract into the whipped cream. This step is crucial — folding carefully maintains all that fluffy air you’ve just whipped in, so your ice cream won’t get dense or heavy.
Step 3: Pour Into Molds and Insert Sticks
Next, pour the creamy mixture into your ice cream molds or a small loaf pan if you prefer to cut bars yourself later. Insert popsicle sticks, which will act as handles for your delectable frozen treats.
Step 4: Freeze Until Firm
Freeze the bars for at least 4 to 6 hours or until completely set. The patience here is worth it because solid ice cream ensures the perfect dip in chocolate later without melting or cracking.
Step 5: Prepare the Chocolate Coating
While waiting, melt the chocolate with coconut oil in a double boiler or microwave. Stir carefully until the mixture is smooth and fluid. The coconut oil is a game-changer, giving the shell its signature snap and gleam.
Step 6: Cool the Chocolate Slightly
Allow the chocolate to cool just a bit but keep it liquid for dipping. This ensures the coating clings nicely without melting the ice cream when you dip the bars.
Step 7: Dip and Decorate
Take each frozen bar and quickly dip it into the chocolate. Coat thoroughly to cover the entire surface. If you’re feeling adventurous, drizzle caramel or sprinkle crushed nuts before the chocolate sets, adding a personal touch of flavor and texture.
Step 8: Freeze to Set Chocolate Shell
Return the dipped bars to the freezer for a few minutes so the chocolate shell hardens perfectly. This quick chill seals in the creamy goodness inside and gets your bars ready to enjoy.
Step 9: Enjoy!
Now comes the best part—bite into your homemade masterpiece and savor the luscious, chocolate-coated ice cream that you crafted yourself. Sharing these is optional but recommended because they’re just that good!
How to Serve Homemade Delicious Chocolate Ice Cream Bars Recipe
Garnishes
Sprinkling a pinch of sea salt or chopped nuts right after dipping adds a sophisticated contrast that makes the chocolate shine even more. Drizzling caramel or melted peanut butter on top before the chocolate sets brings delightful flair and sweetness.
Side Dishes
Serve your ice cream bars alongside fresh berries or a warm berry compote to add bursts of freshness. A small scoop of whipped cream or a drizzle of chocolate sauce can turn these bars into an impressive dessert centerpiece.
Creative Ways to Present
For entertaining, consider wrapping each bar with a ribbon or placing them on a bed of crushed cookies in individual dessert cups. You can even sprinkle edible gold dust on the chocolate shell for a touch of glamour that wows your guests.
Make Ahead and Storage
Storing Leftovers
Any uneaten bars should be stored in an airtight container in the freezer to keep their texture and flavor intact. Avoid stacking them directly on top of one another to prevent sticking or breaking the chocolate shell.
Freezing
This recipe freezes beautifully. Whether you make the bars a day ahead or stock up for a week of sweet treats, the texture and taste won’t change, so keep plenty on hand for spontaneous dessert moments.
Reheating
Since these are frozen bars, reheating isn’t necessary or recommended. Instead, just remove them from the freezer a few minutes before serving if you want a slightly softer bite, and enjoy the cool, creamy texture.
FAQs
Can I use different types of chocolate for the shell?
Absolutely! Dark, milk, or even white chocolate all work well. Just remember that the flavor and sweetness level will change depending on your choice, so pick what suits your taste perfectly.
Do I need an ice cream maker to make these bars?
Nope! This Homemade Delicious Chocolate Ice Cream Bars Recipe is designed to be simple and accessible, using whipped cream and sweetened condensed milk instead of churning in an ice cream machine.
Can I make these bars vegan or dairy-free?
Yes! Substitute heavy cream with coconut cream and use sweetened condensed coconut milk alternatives, plus dairy-free chocolate for the shell. The texture might differ slightly but will still be delicious.
How long can I store these ice cream bars in the freezer?
They’re best eaten within 2 weeks for optimal freshness, but they can stay frozen up to a month. Just be sure they’re well-wrapped and stored airtight to prevent freezer burn.
What is the best way to prevent the chocolate coating from cracking?
Make sure your bars are completely frozen before dipping and dip quickly. The coconut oil in the chocolate mixture also helps the shell set with a nice, flexible snap that resists cracking.
Final Thoughts
This Homemade Delicious Chocolate Ice Cream Bars Recipe is not only a treat to eat but also a joy to make. It’s simple, customizable, and guaranteed to impress anyone who tries one. Trust me, once you make these, you’ll be reaching for the freezer every time you want a homemade dessert that feels like a luxurious escape. So, grab your ingredients and get ready to make magic!
Print
Homemade Delicious Chocolate Ice Cream Bars Recipe
- Prep Time: 15 minutes
- Cook Time: 0 minutes
- Total Time: 4 hours 15 minutes
- Yield: About 6-8 bars (depending on mold size)
- Category: Dessert
- Method: Freezing
- Cuisine: American
Description
These Homemade Delicious Chocolate Ice Cream Bars combine a rich, creamy ice cream base with a decadent homemade chocolate shell. Easy to make and customizable with your favorite toppings, these bars offer a perfect treat for hot days or anytime you crave a classic frozen dessert with an indulgent chocolate coating.
Ingredients
Ice Cream Base
- 2 cups heavy cream
- 1 cup sweetened condensed milk
- 1 teaspoon vanilla extract (optional)
Chocolate Shell
- 300g dark or milk chocolate (your choice)
- 2 tablespoons coconut oil
Optional Toppings/Garnishes
- Chopped nuts (almonds, hazelnuts, etc.)
- Caramel sauce
- Crushed cookies
- Sea salt
Instructions
- Whip the Cream: Start by whipping the heavy cream in a chilled bowl until stiff peaks form, ensuring a fluffy and creamy ice cream texture.
- Combine Ingredients: Gently fold in the sweetened condensed milk and vanilla extract into the whipped cream, mixing carefully to maintain airiness in the mixture.
- Fill Molds: Pour the ice cream mixture into ice cream molds or a small loaf pan, then insert popsicle sticks if using molds, preparing for freezing.
- Freeze Base: Freeze the molds or pan for at least 4 to 6 hours, or until the ice cream is completely solid and set.
- Melt Chocolate: While the ice cream freezes, melt the chocolate with coconut oil in a heatproof bowl over a pot of simmering water or gently in the microwave, stirring often until smooth.
- Cool Chocolate: Allow the melted chocolate to cool slightly but keep it in a liquid state, perfect for dipping the ice cream bars.
- Remove Ice Cream from Molds: Once frozen, carefully remove the ice cream bars from their molds or slice the loaf pan into bar-sized portions with the sticks embedded.
- Dip in Chocolate: Quickly dip each ice cream bar into the melted chocolate to coat thoroughly. While the chocolate is still soft, drizzle caramel sauce or sprinkle chopped nuts, crushed cookies, or a pinch of sea salt, if desired.
- Set Chocolate Shell: Place the chocolate-coated bars back in the freezer for a few minutes to let the chocolate harden completely and form a crisp shell.
- Serve and Enjoy: Remove from freezer and enjoy your homemade chocolate ice cream bars immediately for the best texture and flavor.
Notes
- Ensure the cream is whipped properly to get the best ice cream texture without an ice cream machine.
- Use high-quality chocolate for the shell to enhance flavor and smoothness.
- If using molds, run the molds briefly under warm water to help release the bars easily.
- Customize toppings to your liking – nuts, sea salt, caramel, or cookie crumbs enhance both flavor and texture.
- Store finished ice cream bars in an airtight container in the freezer to maintain freshness.
