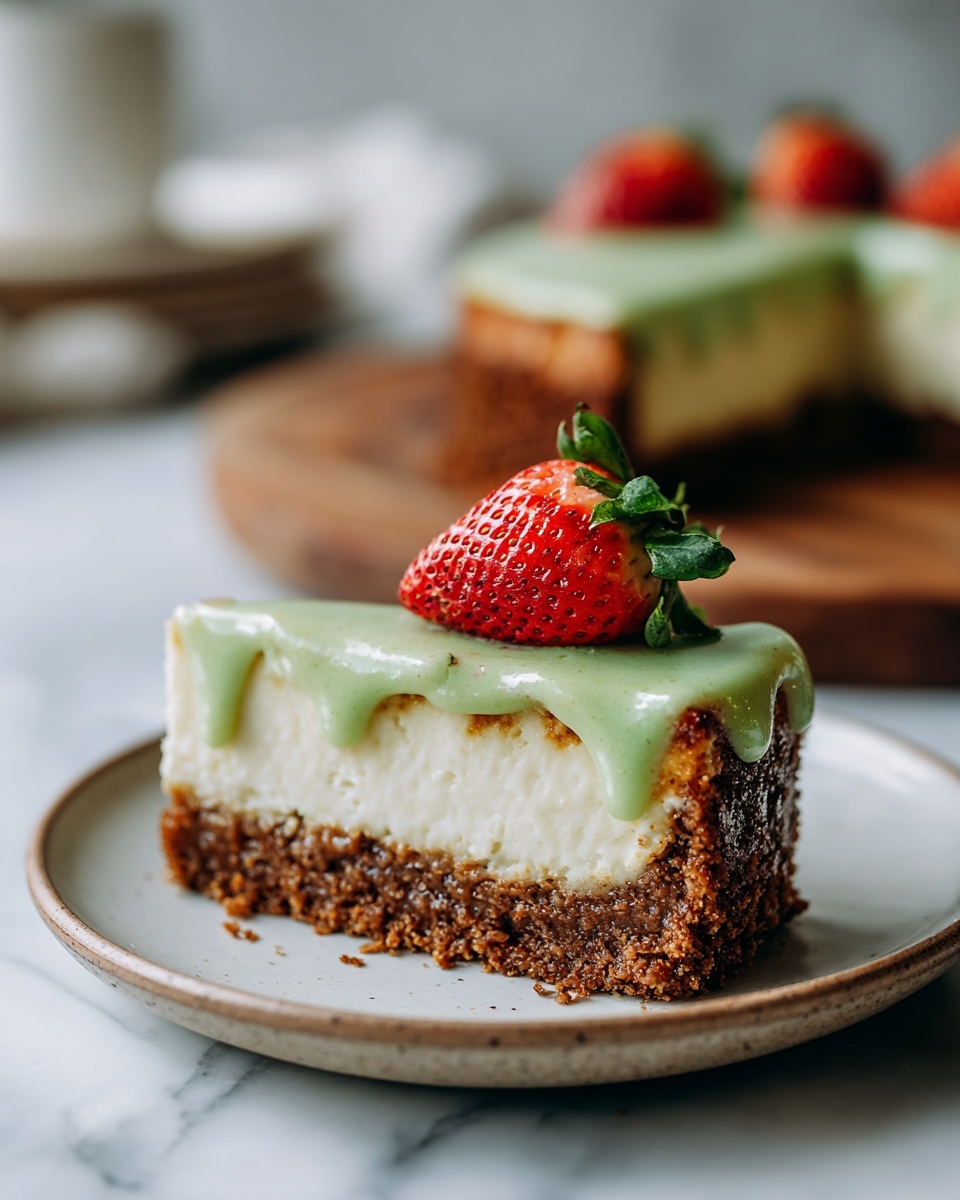
There is something utterly magical about a creamy, dreamy cheesecake that does not require an oven but still delivers on flavor and texture. This No-Bake Pistachio Cheesecake Recipe strikes the perfect balance between nutty pistachio richness and smooth cream cheese decadence, all nestled on a crisp and buttery biscuit crust. Whether you are an experienced baker or just someone looking for a show-stopping dessert that’s effortless, this recipe is your new best friend in the kitchen.
Ingredients You’ll Need
Every ingredient in this recipe is chosen to build layers of flavor and texture that make this cheesecake unforgettable. From the crunchy biscuits to the luscious pistachio spread, each component plays a crucial role in crafting this delightful dessert.
- 200 grams biscuits: Provides the crunchy, buttery base essential for a sturdy crust.
- 45 grams melted butter: Binds the crushed biscuits together while adding richness.
- 500 grams cream cheese: Delivers a smooth and tangy creamy texture crucial for cheesecake filling.
- 150 grams pistachio spread: Infuses the filling with distinctive nutty flavor and natural color.
- 100 grams powdered sugar: Sweetens the filling without graininess for a silky finish.
- 200 grams heavy whipping cream (35%): Adds lightness and fluffiness when whipped, balancing the richness.
- 100 grams pistachio spread (for topping): Provides a glossy, intense pistachio layer to crown the cheesecake.
- Strawberries: Brings a fresh, fruity contrast and a pop of color for garnish.
How to Make No-Bake Pistachio Cheesecake Recipe
Step 1: Prepare the Biscuit Crust
Begin by finely crushing your biscuits using a food processor, blender, or even a rolling pin for that satisfying crumb texture. Melt your butter gently, then mix it thoroughly with the crushed biscuits until the texture resembles wet sand – this guarantees a buttery, crispy crust once set. Ensuring the crumbs are well coated helps the crust hold together perfectly when chilled.
Step 2: Form and Chill the Crust
Lightly grease your cheesecake pan to prevent sticking later. Press your biscuit-butter mixture firmly and evenly into the base and slightly up the sides of the pan. This step creates the firm structure of your cheesecake foundation. Pop this into the freezer so the crust can chill and set firmly while you move on to the filling.
Step 3: Mix Cream Cheese and Pistachio Spread
In a clean bowl, combine room-temperature cream cheese with 150 grams of pistachio spread, stirring until the mixture becomes luxuriously smooth and lump-free. This combination forms the rich, nutty heart of your cheesecake’s filling – a balance of tang and indulgent pistachio flavor.
Step 4: Whip the Cream
Using a chilled bowl, whip the heavy cream with powdered sugar until it forms soft peaks. This light and airy whipped cream integrates into the dense cream cheese mixture to give your cheesecake an irresistible fluffy texture without losing creaminess. Avoid over-whipping to keep that perfect softness.
Step 5: Fold Whipped Cream Into Filling
Gently fold the whipped cream into the cream cheese and pistachio mix in three additions. The folding technique is key here: it maintains the airy lightness that makes this no-bake cheesecake feel so sumptuous and tender. Under-mixing risks weighty filling, overmixing deflates the airiness; find that perfect gentle balance.
Step 6: Assemble and Chill
Pour your creamy pistachio filling into the chilled biscuit crust, smoothing the surface for a flawless finish. Cover it tightly with plastic wrap or a tray, then refrigerate for at least 8 hours or overnight. This chilling period allows the cheesecake to set properly, developing deep flavors and firm, sliceable structure without baking.
Step 7: Top and Decorate
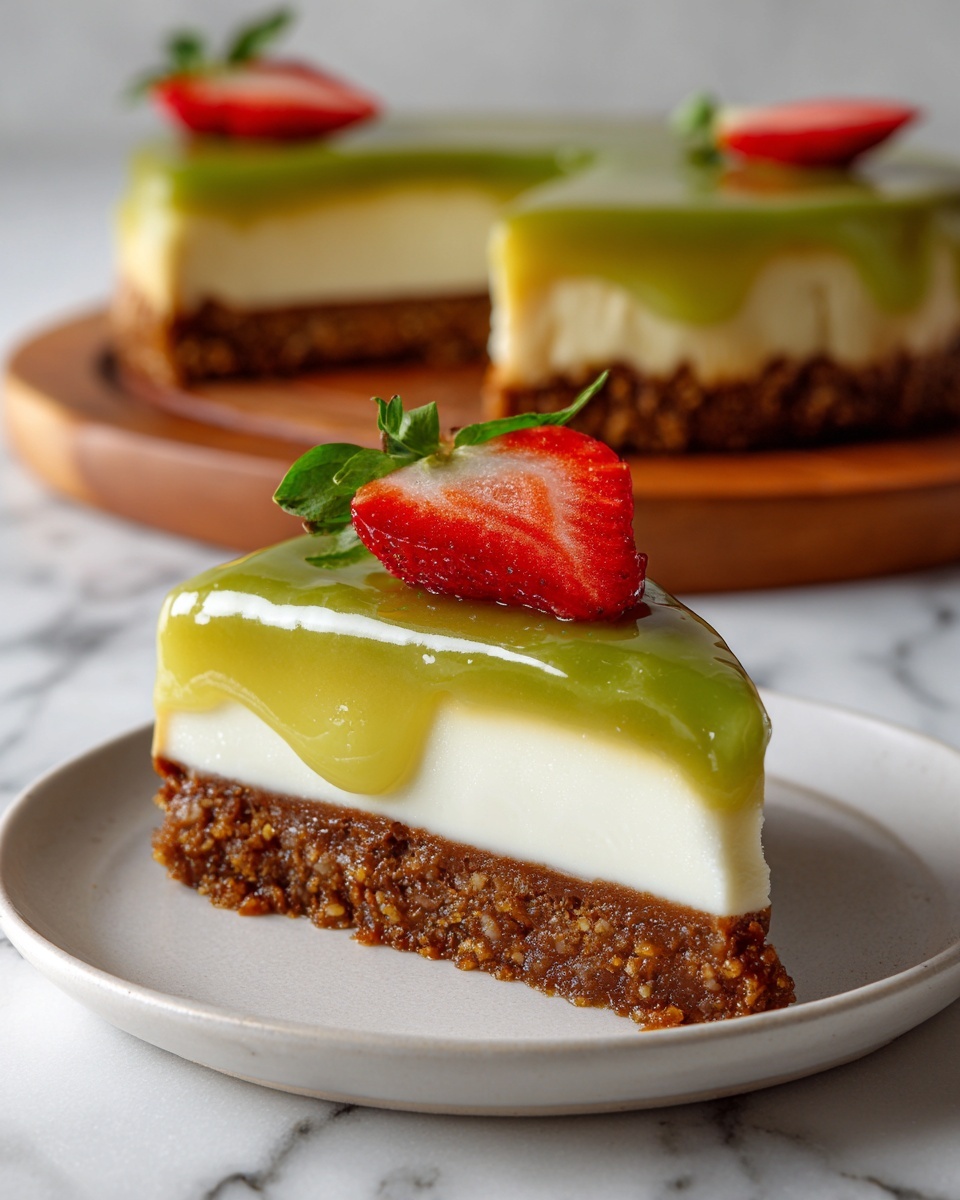
Once your No-Bake Pistachio Cheesecake Recipe has properly set, gently spread the remaining pistachio spread atop the filling. Tilting the pan helps it settle into an even, glossy layer. For a finishing touch, decorate with fresh strawberries or a sprinkle of crushed pistachios to enhance both flavor and presentation. Slice carefully to admire those gorgeous layers.
How to Serve No-Bake Pistachio Cheesecake Recipe

Garnishes
Fresh strawberries add a vibrant burst of color and a hint of tartness that contrasts beautifully with the rich pistachio flavors. A handful of crushed or whole pistachios sprinkled on top adds a delightful crunch and visual appeal. You can also try mint leaves for a fresh herbal hint that wakes up your palate.
Side Dishes
Complement this cheesecake with light, fruity sides like a fresh berry salad or a citrus sorbet. These fresh accompaniments cut through the richness and bring a refreshing balance to the dessert experience. For a cozy touch, serve with a cup of fragrant green tea or lightly brewed coffee.
Creative Ways to Present
Try serving your cheesecake in individual clear glass cups for a charming layered look that shows off the crust and creamy pistachio filling. Alternatively, create mini versions using muffin tins to wow guests with personalized portions. Drizzle some melted white chocolate over the top or add edible flowers for a stunning centerpiece dessert.
Make Ahead and Storage
Storing Leftovers
This cheesecake keeps beautifully in the refrigerator for up to 4 days when stored in an airtight container or covered firmly with plastic wrap. Proper storage ensures it remains moist and fresh, preventing it from absorbing any fridge odors while maintaining its creamy texture.
Freezing
You can freeze slices of this no-bake pistachio cheesecake for up to 2 months. Wrap each slice individually in plastic wrap and then place them in a freezer-safe bag to prevent freezer burn. Thaw overnight in the refrigerator before serving to retain the best texture and taste.
Reheating
Since this is a no-bake cheesecake, reheating isn’t recommended as it can affect texture and flavor. Instead, simply allow frozen slices to thaw slowly in the fridge, then serve chilled. The creaminess and freshness are best enjoyed cold.
FAQs
Can I use regular cream cheese or does it need to be full fat?
For the best texture and flavor, full-fat cream cheese is recommended. It delivers the smooth, creamy consistency that a No-Bake Pistachio Cheesecake Recipe needs. Lower fat versions might result in a less rich and slightly watery filling.
Is it possible to substitute the pistachio spread?
If you can’t find pistachio spread, you can try finely ground pistachios mixed with a little honey or a subtle nut butter, but the flavor and color won’t be quite the same. The spread is integral to giving this cheesecake its signature pistachio punch.
How long does it take for the cheesecake to set properly?
It’s best to refrigerate the cheesecake for at least 8 hours, ideally overnight. This chilling time allows the filling to firm up and the crust to hold its shape, yielding perfect slices without crumbling or sagging.
Can I make this recipe vegan or dairy-free?
While this recipe relies on cream cheese and heavy cream, vegan alternatives do exist. You can experiment with vegan cream cheese and coconut cream, but keep in mind texture and flavor might differ significantly from the classic No-Bake Pistachio Cheesecake Recipe.
What is the best way to crush biscuits without a food processor?
A rolling pin inside a sealed plastic bag works wonderfully. Just crush gently and repeatedly until you get fine crumbs. This simpler method is perfect for those who prefer not to use electrical appliances and still want a consistent crumb texture.
Final Thoughts
Sharing this No-Bake Pistachio Cheesecake Recipe feels like handing over a secret to a cherished friend. It’s incredibly simple yet effortlessly impressive, blending creamy richness with nutty undertones and that delightful crunch. The joy lies in the ease of preparation and the sublime result — a dessert you’ll want to make again and again. So go ahead, dive in, and treat yourself and your loved ones to this little pistachio delight that truly shines without ever needing the oven.
Print
No-Bake Pistachio Cheesecake Recipe
- Prep Time: 25 minutes
- Cook Time: 0 minutes
- Total Time: 8 hours 25 minutes
- Yield: 8 to 8 servings
- Category: Dessert
- Method: No-Cook
- Cuisine: Western
Description
This no-bake pistachio cheesecake is a creamy, indulgent dessert featuring a buttery biscuit crust, a smooth pistachio-flavored cream cheese filling, and a delightful pistachio topping garnished with fresh strawberries. Perfect for those who want a rich, elegant dessert without needing to turn on the oven.
Ingredients
For the crust
- 200 grams biscuits
- 45 grams melted butter
For the filling
- 500 grams cream cheese (room temperature)
- 150 grams pistachio spread
- 100 grams powdered sugar
- 200 grams heavy whipping cream (35%, cold)
For topping
- 100 grams pistachio spread
- Fresh strawberries (for garnish)
Instructions
- Prepare the crust: Crush the biscuits using a food processor, blender, or rolling pin until finely ground. Melt the butter and combine it thoroughly with the crushed biscuits until the mixture resembles wet sand. This mixture will form the crispy, buttery base of the cheesecake.
- Form and chill the crust: Lightly grease a cheesecake pan and press the biscuit mixture firmly into the bottom and slightly up the sides of the pan for an even, solid crust. Place the pan in the freezer to let the crust firm up while you make the filling.
- Mix cream cheese and pistachio spread: In a clean bowl, combine the room-temperature cream cheese with the pistachio spread. Mix until fully incorporated and smooth without lumps, ensuring a rich base for the cheesecake filling.
- Whip the cream: In a cold, dry bowl, whisk the heavy cream with powdered sugar until it reaches soft peaks—light and airy but not overwhipped. Set aside for folding into the filling.
- Fold whipped cream into filling: Gently fold the whipped cream into the cream cheese and pistachio mixture in three parts, taking care to maintain the airy texture. Avoid overmixing to keep the filling light and fluffy.
- Assemble the cheesecake: Pour the filling evenly over the chilled biscuit crust and smooth the surface with a spoon. Cover the pan with plastic wrap or a tray to protect it, then refrigerate for at least 8 hours or overnight to set completely and develop flavors.
- Add topping and serve: Once set, evenly spread the pistachio spread over the top of the cheesecake, tilting the pan as needed. Garnish with fresh strawberries or crushed pistachios for presentation. Slice and serve chilled for a delicious and elegant dessert.
Notes
- Ensure the cream cheese is at room temperature for smoother mixing.
- Do not overwhip the cream to prevent it from turning into butter.
- Press the crust firmly to create a stable base that holds the filling well.
- Allow the cheesecake to chill for the full recommended time for the best texture.
- Use quality pistachio spread for the best flavor.
- Store leftovers covered in the refrigerator and consume within 3 days.

