
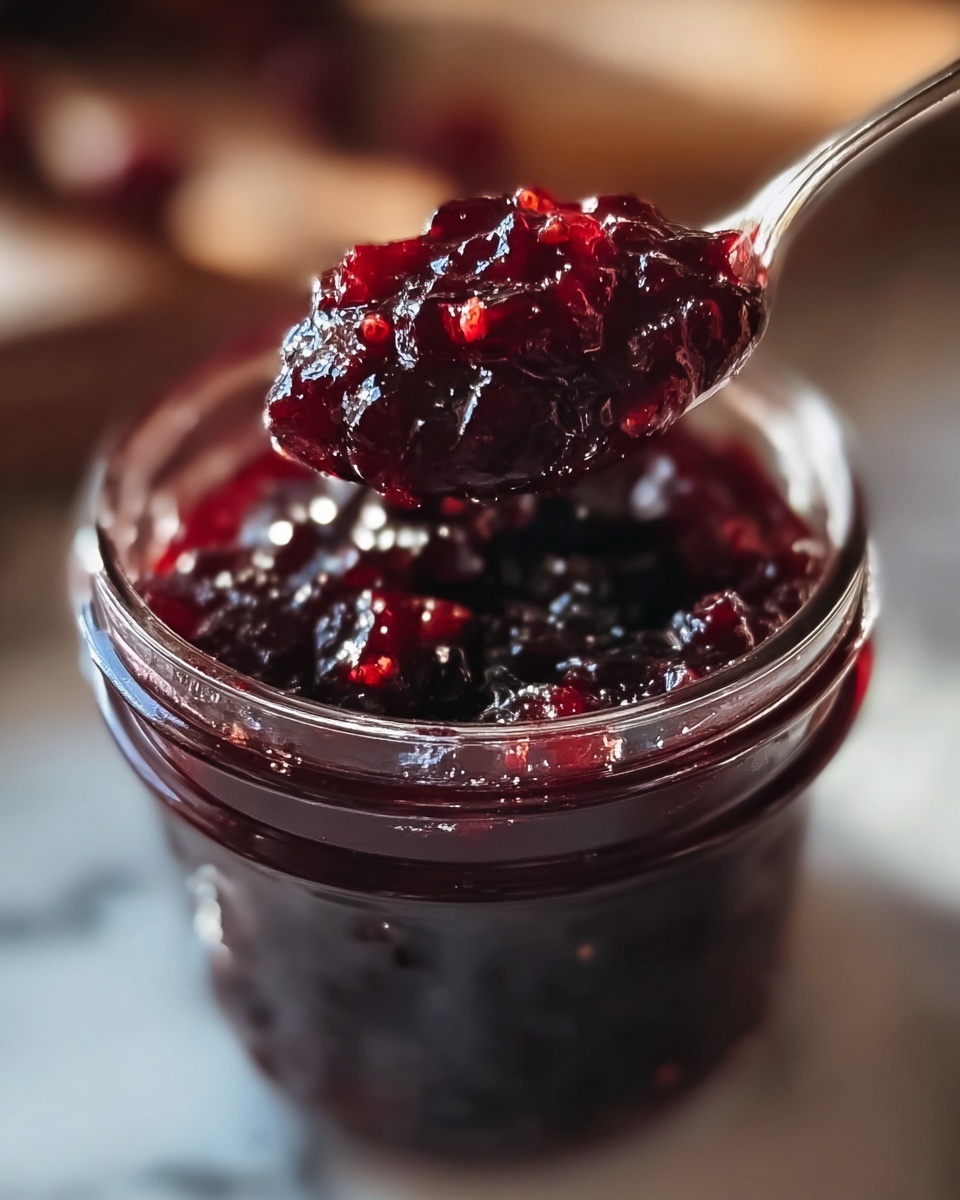
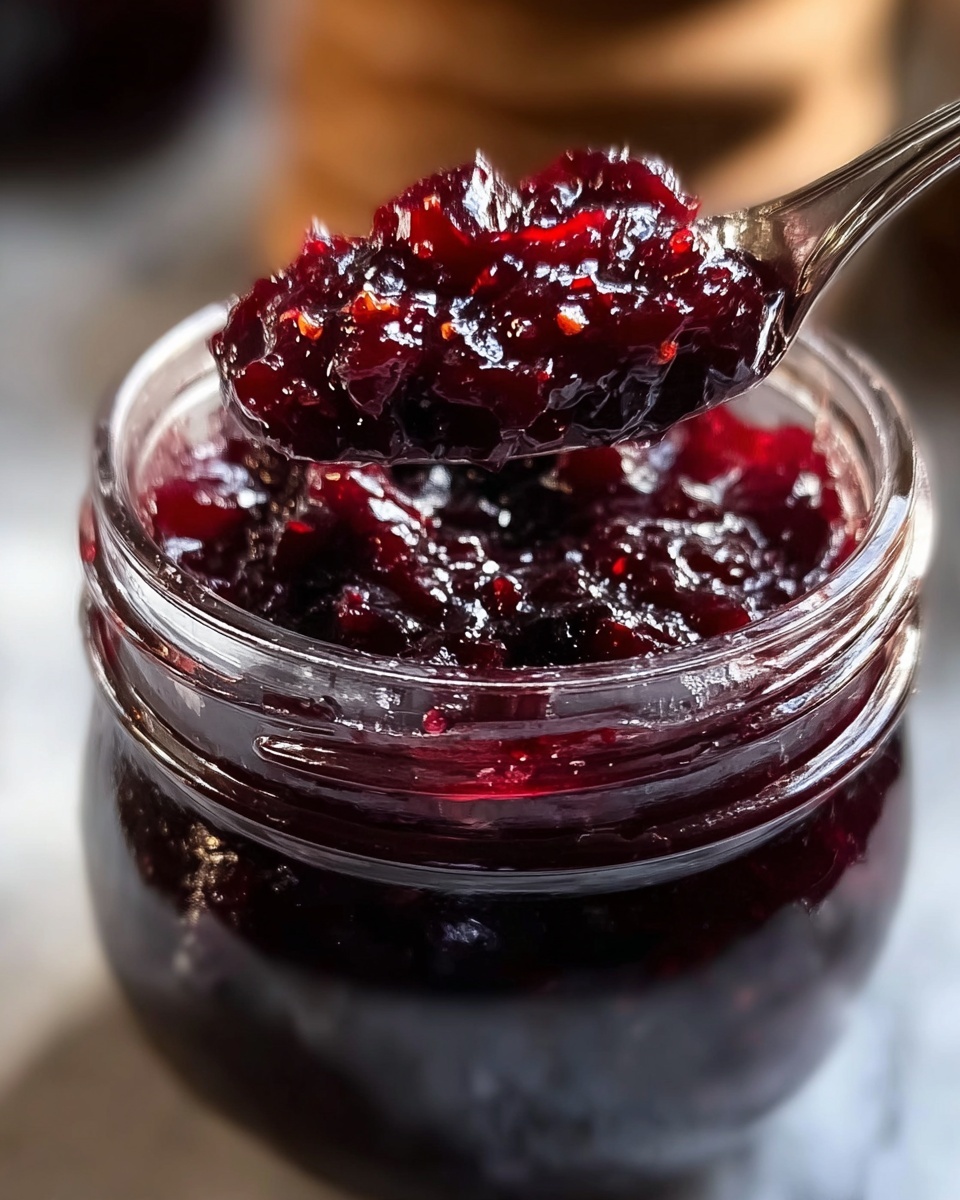
If you have ever craved the vibrant, slightly tart burst of fresh blackberries captured in a jar, then you are in for a treat with this Best Homemade Blackberry Jam Recipe. It’s the perfect way to bring sunshine to your breakfast table or afternoon tea, offering a luscious, fruit-forward flavor blended with just the right amount of sweetness and a hint of zesty lemon. This recipe balances simplicity with classic techniques, delivering a beautifully textured jam that glistens with natural color and warm memories of summer afternoons.
Ingredients You’ll Need
Creating the Best Homemade Blackberry Jam Recipe is delightfully straightforward because it uses just a few essential ingredients that work together harmoniously to build flavor, texture, and a perfect set. Each component plays its own vital role, whether it’s brightness, sweetness, or preserving that fresh-picked essence.
- 4 cups fresh blackberries: The star of the show, carefully rinsed to keep their juicy integrity intact and provide a natural sweetness balanced by tartness.
- 2 tablespoons lemon juice: Adds a pop of acidity to brighten the jam and activates the pectin for that lovely firm texture.
- 1 package (1.75 ounces) fruit pectin: The magic ingredient that ensures your jam sets perfectly each time without fuss or guesswork.
- 5 cups granulated sugar: Sweetens and preserves your jam, enhancing the blackberry depth while helping it gel to the ideal consistency.
How to Make Best Homemade Blackberry Jam Recipe
Step 1: Prepare the Blackberries
Start by rinsing the blackberries thoroughly and mashing them in a large pot with a potato masher or fork. The goal is to break them down enough to release their juices but leave some chunky bits that give your jam a delightful texture. This early step sets the foundation for everything that follows.
Step 2: Add Lemon Juice and Pectin
Mix in the lemon juice and fruit pectin with your mashed blackberries. The lemon juice not only balances the sweetness but also helps the pectin do its job, creating that satisfyingly thick finish everyone loves in jam.
Step 3: Bring to a Rolling Boil
Place the pot over medium-high heat and stir continuously until the mixture reaches a full rolling boil, which means the bubbles keep rising even when stirring. This is essential for activating the pectin properly to ensure your jam sets up perfectly.
Step 4: Incorporate Sugar and Boil Again
Quickly add in all the sugar at once, stirring until fully dissolved. Return your pot to a hard boil and cook the jam for 1–2 minutes while stirring constantly. This step crystallizes the flavors and thickens your jam beautifully.
Step 5: Finish and Jar
Remove the pot from the heat and carefully skim off any foam that has formed on top. Ladle the hot jam into sterilized jars, leaving about 1/4 inch of space at the top. Wipe the jar rims clean before sealing with lids. If you plan to keep your jam long-term, process the jars in a boiling water bath for 10 minutes. If not, simply let them cool and store the jars in the refrigerator.
How to Serve Best Homemade Blackberry Jam Recipe
Garnishes
A small sprig of fresh mint or a thin twist of lemon zest adds a pop of color and a refreshing aroma that pairs wonderfully with the rich blackberry jam, elevating your presentation effortlessly.
Side Dishes
This jam shines alongside warm toast, freshly baked scones, or spread over soft cream cheese for a sophisticated appetizer. Its tanginess complements cheeses, nutty crackers, and even roasted meats if you want to experiment beyond breakfast.
Creative Ways to Present
Try swirling the blackberry jam into Greek yogurt or oatmeal for a burst of flavor and color, or use it as a luscious topping on vanilla ice cream or panna cotta. It’s also fantastic spooned over pancakes or dolloped into homemade pastries before baking.
Make Ahead and Storage
Storing Leftovers
Once opened, store any leftover jam in the refrigerator where it will remain fresh for up to three weeks. The sealed jars, if processed correctly, can stay shelf-stable for up to a year, preserving that fresh-picked blackberry goodness for months.
Freezing
If you want to keep your jam longer without canning, freezing is a great option. Pour your cooled jam into freezer-safe containers, leaving some space for expansion. Frozen jam maintains its flavor for up to six months and can be thawed overnight in the fridge when you’re ready to indulge.
Reheating
When serving chilled jam straight from the fridge or freezer, you can gently warm it in a small saucepan over low heat or microwave in spurts until it reaches your desired consistency and warmth—perfect for glazing desserts or spreading smoothly on warm toast.
FAQs
Can I make this jam seedless?
Absolutely! For a smooth, seedless texture, strain the mashed blackberries through a fine mesh sieve before cooking. This step removes seeds but still keeps all the fantastic blackberry flavor intact.
Can I reduce the sugar in this recipe?
You can try reducing sugar, but keep in mind that sugar is important not only for sweetness but for helping the jam set properly. Less sugar may result in a looser jam that doesn’t store as well, so if you reduce it, expect a softer consistency.
What if I don’t want to can my jam?
If you’re not planning to can, simply cool the jam completely in sterilized jars and store in the refrigerator. It will keep fresh and delicious for several weeks, perfect for frequent use without long-term storage.
How do I know when the jam is set?
A good test is to put a small spoonful of jam on a chilled plate and let it cool for a minute. If it wrinkles when pushed with a finger, it’s set. If it’s still runny, a bit more cooking at a boil will help it thicken further.
Can I use frozen blackberries?
Yes, frozen blackberries work well especially when fresh berries are not in season. Just thaw them first and drain excess juice if needed. The jam may cook a little faster since frozen berries often release more liquid.
Final Thoughts
This Best Homemade Blackberry Jam Recipe is truly a treasure to have in your culinary repertoire, offering a vibrant taste of summer in every spoonful. Whether you gift it to friends, spread it on your morning toast, or use it in creative dishes, this jam will quickly become one of your most loved homemade preserves. Go ahead and dive in—it’s a joyful, rewarding experience that tastes as wonderful as it feels to make from scratch.
Print
Best Homemade Blackberry Jam Recipe
- Prep Time: 15 minutes
- Cook Time: 15 minutes
- Total Time: 30 minutes
- Yield: 6 half-pint jars
- Category: Condiment
- Method: Boiling
- Cuisine: American
- Diet: Vegan, Gluten Free
Description
Enjoy the rich, sweet, and tangy flavors of this best homemade blackberry jam made from fresh blackberries, lemon juice, fruit pectin, and sugar. Perfect for spreading on toast, adding to desserts, or gifting to friends, this classic American condiment delivers a vibrant summertime taste with a smooth yet textured consistency.
Ingredients
Ingredients
- 4 cups fresh blackberries, rinsed
- 2 tablespoons lemon juice
- 1 package (1.75 ounces) fruit pectin (like Sure-Jell)
- 5 cups granulated sugar
Instructions
- Mash Blackberries: In a large pot, mash the blackberries using a potato masher or fork until they are mostly broken down while leaving some chunks for texture.
- Add Lemon Juice and Pectin: Stir in the lemon juice and the fruit pectin to the mashed berries and mix well.
- Bring to Boil: Place the pot over medium-high heat and bring the mixture to a full rolling boil, stirring constantly to avoid scorching.
- Add Sugar: Once boiling, add all the sugar at once and stir continuously until it is fully dissolved and the mixture returns to a hard boil.
- Cook the Jam: Maintain the hard boil and cook for 1 to 2 minutes while stirring continuously to thicken the jam.
- Remove Foam: Take the pot off the heat and skim off any foam that has formed on the surface to ensure a clear jam.
- Jar the Jam: Ladle the hot jam into sterilized jars, leaving about 1/4 inch of headspace at the top.
- Seal and Process (Optional): Wipe the rims of the jars clean, seal with lids, and if you plan on storing for longer, process the jars in a boiling water bath for 10 minutes to preserve.
- Cool and Store: If not canning, allow the jars to cool completely, then store the jam in the refrigerator and enjoy.
Notes
- This recipe yields about 6 half-pint jars of jam.
- For a seedless jam, strain the mashed berries through a fine mesh sieve before cooking.
- You can adjust the sweetness to taste, but reducing sugar may affect the jam’s ability to set properly.

