
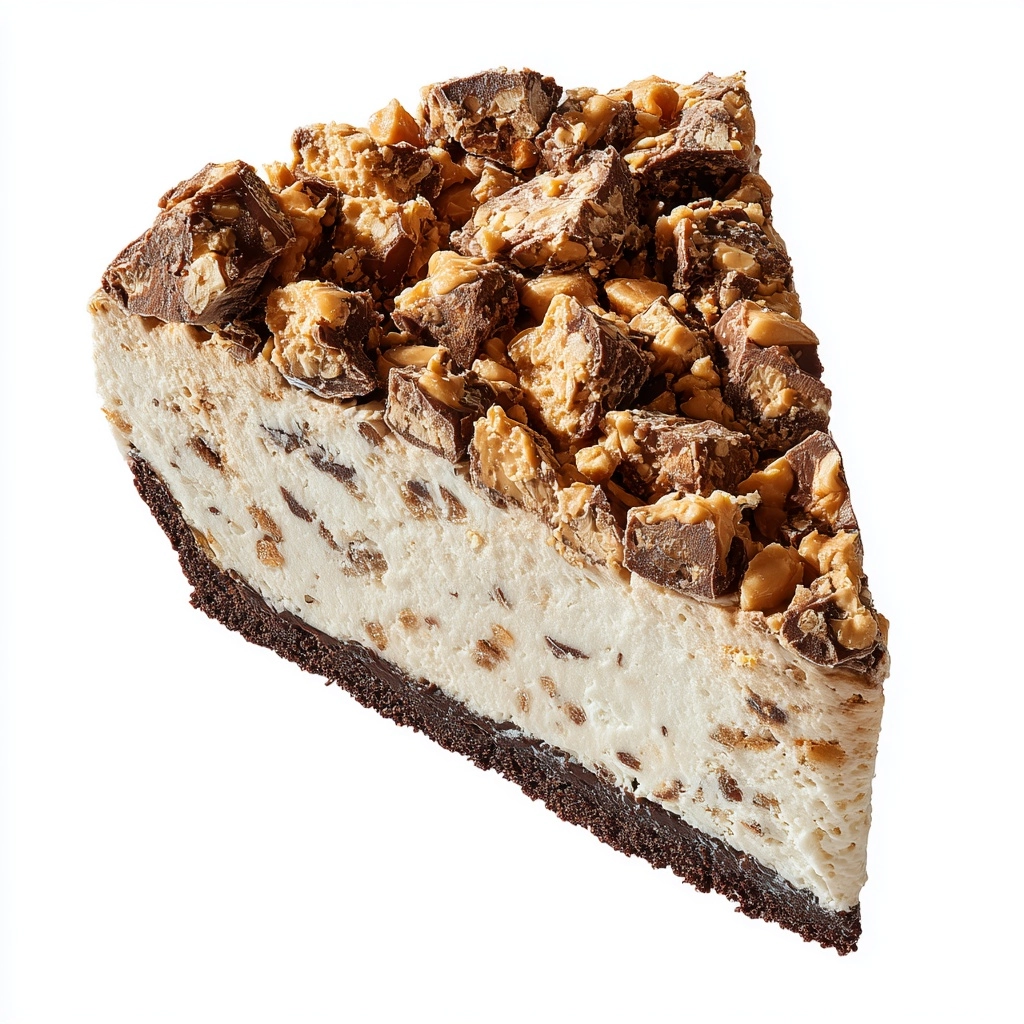
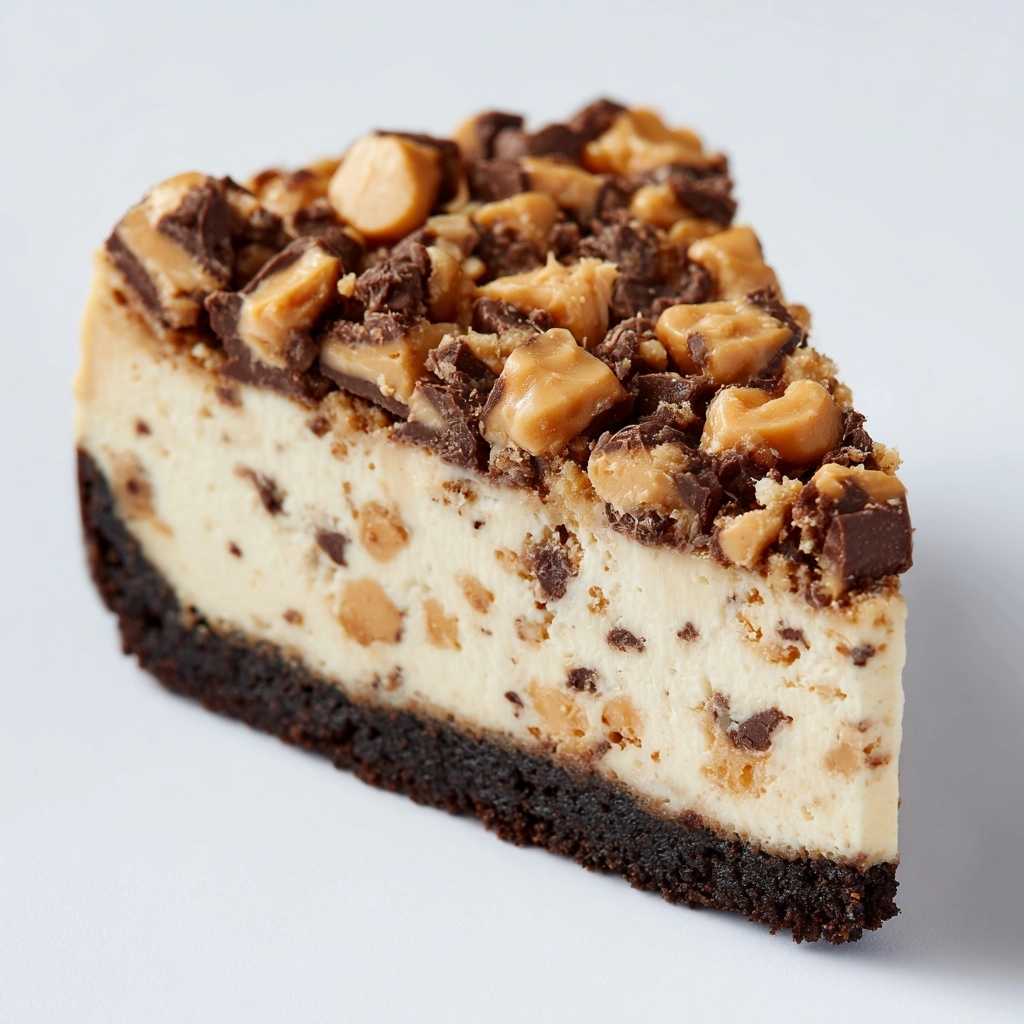
If you’re searching for a show-stopping, fuss-free dessert, look no further than this Butterfinger Pie (No-Bake)! Creamy, dreamy, and loaded with the irresistible crunch of Butterfinger candy bars, this pie comes together in minutes with no oven required. Each slice is a blend of peanut butter-chocolate goodness and cloud-like filling nestled in a buttery graham cracker crust, perfect for potlucks, parties, or just a treat-yourself kind of evening.
Ingredients You’ll Need
The magic of this Butterfinger Pie (No-Bake) is that every ingredient is humble, yet absolutely vital for achieving that classic, crave-worthy flavor and creamy texture. Let’s break down what you’ll need and why each one matters!
- Graham cracker crust (9-inch, prepared): The crunchy foundation and sweet balance for the fluffy filling – you can use store-bought or make your own if you want extra homemade flair.
- Cream cheese (8 ounces, softened): This is what gives your pie body and a lovely, tangy-rich flavor; be sure it’s nicely softened so your filling is super smooth and free of lumps.
- Powdered sugar (1 cup): It sweetens everything gently and dissolves perfectly into the cream cheese, keeping things velvety.
- Vanilla extract (1 teaspoon): A splash of vanilla brings warmth and aroma, tying all those creamy elements together.
- Whipped topping (8-ounce tub, such as Cool Whip): This lightens the filling with airy sweetness, creating that sliceable, luscious texture.
- Butterfinger candy bars (6 fun size or 2 full size, crushed): The star of the show! Butterfinger pieces give crunchy, peanut-buttery bursts throughout every bite.
- Additional crushed Butterfinger for topping (optional): Sprinkle extra on top for color, crunch, and instant eye appeal.
How to Make Butterfinger Pie (No-Bake)
Step 1: Beat the Cream Cheese
Start by adding your softened cream cheese to a large mixing bowl. Using a hand mixer (or plenty of elbow grease and a sturdy spatula), beat the cream cheese until it is completely smooth. This step ensures your pie filling will be fluffy and free of pesky lumps, setting you up for creamy perfection.
Step 2: Mix In Sugar and Vanilla
Sift in the powdered sugar and add the vanilla extract to your bowl of cream cheese. Beat these together until the mixture becomes silky and homogenous. The powdered sugar sweetens everything without making it gritty, while the vanilla infuses a subtle, decadent aroma that makes the kitchen smell like a bakery.
Step 3: Fold in the Whipped Topping
Grab your whipped topping and gently fold it into the cream cheese mixture using a spatula. Go slow and use a gentle hand: this step is all about preserving that precious, billowy airiness so the finished Butterfinger Pie (No-Bake) practically melts in your mouth.
Step 4: Add Crushed Butterfinger Bars
Add in the crushed Butterfinger candy bars (reserving a bit if you want to sprinkle on top later!). Stir just until those glorious chocolate-peanut butter flecks are mixed throughout the filling. Every bite should be bursting with little chewy, crispy Butterfinger treasures.
Step 5: Fill and Top the Pie
Spoon the loaded filling into your ready-made graham cracker crust. Use a spatula to smooth out the top, then finish by scattering extra crushed Butterfinger bars all over. This irresistible topping hints at what’s inside and seriously amps up the crunch factor.
Step 6: Chill Until Set
Cover the pie loosely with plastic wrap and refrigerate for at least 4 hours (overnight is fine, too) so everything firms up and those flavors really meld together. Once chilled, simply slice and serve your Butterfinger Pie (No-Bake) straight from the fridge for the best creamy consistency!
How to Serve Butterfinger Pie (No-Bake)
Garnishes
The crowning touch for Butterfinger Pie (No-Bake) is a final flurry of crushed Butterfinger bars right before serving — it’s both a visual delight and satisfying crunch. For extra flair, drizzle with a little chocolate or caramel sauce or add a dollop of extra whipped topping. A sprinkle of chopped roasted peanuts also plays up the candy bar’s signature flavor.
Side Dishes
This pie is truly the star of any dessert table! Pair it with a scoop of vanilla ice cream if you want to double down on creamy goodness, or serve alongside a strong cup of coffee to balance the sweetness. For summer parties, a platter of fresh berries adds a bright, fresh contrast to every slice.
Creative Ways to Present
Try making Butterfinger Pie (No-Bake) in individual jars for portable, personal servings that look absolutely adorable! Layer chunks of graham cracker and filling, or serve mini-pies in ramekins. You can even cut hearts or other shapes out of the finished pie for holidays or birthdays — it’s impossible not to fall in love with these special touches.
Make Ahead and Storage
Storing Leftovers
Leftover Butterfinger Pie (No-Bake) keeps beautifully in the refrigerator. Simply cover the dish tightly with plastic wrap or transfer to an airtight container, and enjoy within 3-4 days for the best flavor and texture. The crust stays crisp, and the filling maintains its rich, creamy quality.
Freezing
If you want a firmer, icebox-style pie or plan to prep ahead for a party, you can freeze this dessert! Cover well and store for up to a month. Thaw in the fridge overnight when ready to serve; the pie slices even more cleanly when slightly chilled from the freezer.
Reheating
There’s no need to reheat Butterfinger Pie (No-Bake), since it’s served cold or just slightly thawed. If the pie has been frozen, let it sit in the refrigerator for a few hours before slicing. No oven, no fuss—just instant dessert happiness.
FAQs
Can I use homemade whipped cream instead of whipped topping?
Absolutely! If you prefer, substitute freshly whipped cream (beat about 1 cup of heavy cream with a few tablespoons of powdered sugar) for the tub of whipped topping. Just whip it until stiff peaks form and fold in as you would the Cool Whip.
Do I have to use a graham cracker crust?
Not at all! While graham cracker crust gives a classic flavor, you can swap in a chocolate cookie crust or even a homemade pretzel crust if you like a salty-sweet combo. Just make sure whatever crust you use is fully set and sturdy enough for the rich filling.
What’s the best way to crush Butterfinger bars?
Place your Butterfingers in a zip-top bag and gently crush them with a rolling pin or the bottom of a glass. You want a mix of big, crispy chunks and smaller, melt-in-your-mouth candy dust for the ultimate texture in every bite.
Can I make this pie in advance?
Yes! Butterfinger Pie (No-Bake) actually improves as it sits, with flavors melding and the filling firming up. Make it up to 2 days ahead and store covered in the fridge until ready to serve—so it’s perfect for stress-free entertaining.
Is this recipe vegetarian?
Yes, it’s totally vegetarian as written, since none of the core ingredients contain meat or gelatin. Always double-check your candy bars and whipped topping brand if you’re preparing for strict vegetarians, but most standard products are safe!
Final Thoughts
If you love recipes that combine convenience, flavor, and a little bit of nostalgia in every bite, this Butterfinger Pie (No-Bake) is going to become your new go-to. It’s quick to make, even quicker to disappear, and sure to draw rave reviews from kids and adults alike. Give it a try, and get ready to wow everyone at your next gathering!
Print
Butterfinger Pie (No-Bake) Recipe
- Prep Time: 15 minutes
- Cook Time: 0 minutes
- Total Time: 4 hours 15 minutes (including chilling time)
- Yield: 8 servings
- Category: Dessert
- Method: No-Bake
- Cuisine: American
- Diet: Non-Vegetarian
Description
Indulge in the creamy, crunchy decadence of this no-bake Butterfinger Pie. With a luscious cream cheese filling loaded with crushed Butterfinger candy bars, all nestled in a graham cracker crust, this dessert is a true crowd-pleaser.
Ingredients
Graham Cracker Crust:
- 1 (9-inch) prepared graham cracker crust
Filling:
- 8 ounces cream cheese, softened
- 1 cup powdered sugar
- 1 teaspoon vanilla extract
- 1 (8-ounce) tub whipped topping (such as Cool Whip)
- 6 Butterfinger candy bars (fun size or 2 full size), crushed
- Additional crushed Butterfinger for topping (optional)
Instructions
- Prepare the Filling: In a large bowl, beat the softened cream cheese until smooth. Add the powdered sugar and vanilla extract, mixing until fully combined and creamy.
- Add Whipped Topping: Gently fold in the whipped topping until no streaks remain.
- Incorporate Butterfinger: Stir in the crushed Butterfinger candy bars, reserving a small amount for topping if desired.
- Fill the Crust: Spoon the mixture into the prepared graham cracker crust, smoothing the top evenly.
- Top and Chill: Sprinkle additional crushed Butterfinger on top for extra crunch and flavor. Cover and refrigerate for at least 4 hours or until set.
- Serve: Slice and serve chilled.
Notes
- You can freeze the pie for a firmer texture.
- For a homemade touch, use a chocolate cookie crust or make your own graham cracker crust.
Nutrition
- Serving Size: 1 slice
- Calories: 420
- Sugar: 32g
- Sodium: 270mg
- Fat: 25g
- Saturated Fat: 14g
- Unsaturated Fat: 9g
- Trans Fat: 0g
- Carbohydrates: 44g
- Fiber: 1g
- Protein: 5g
- Cholesterol: 35mg


