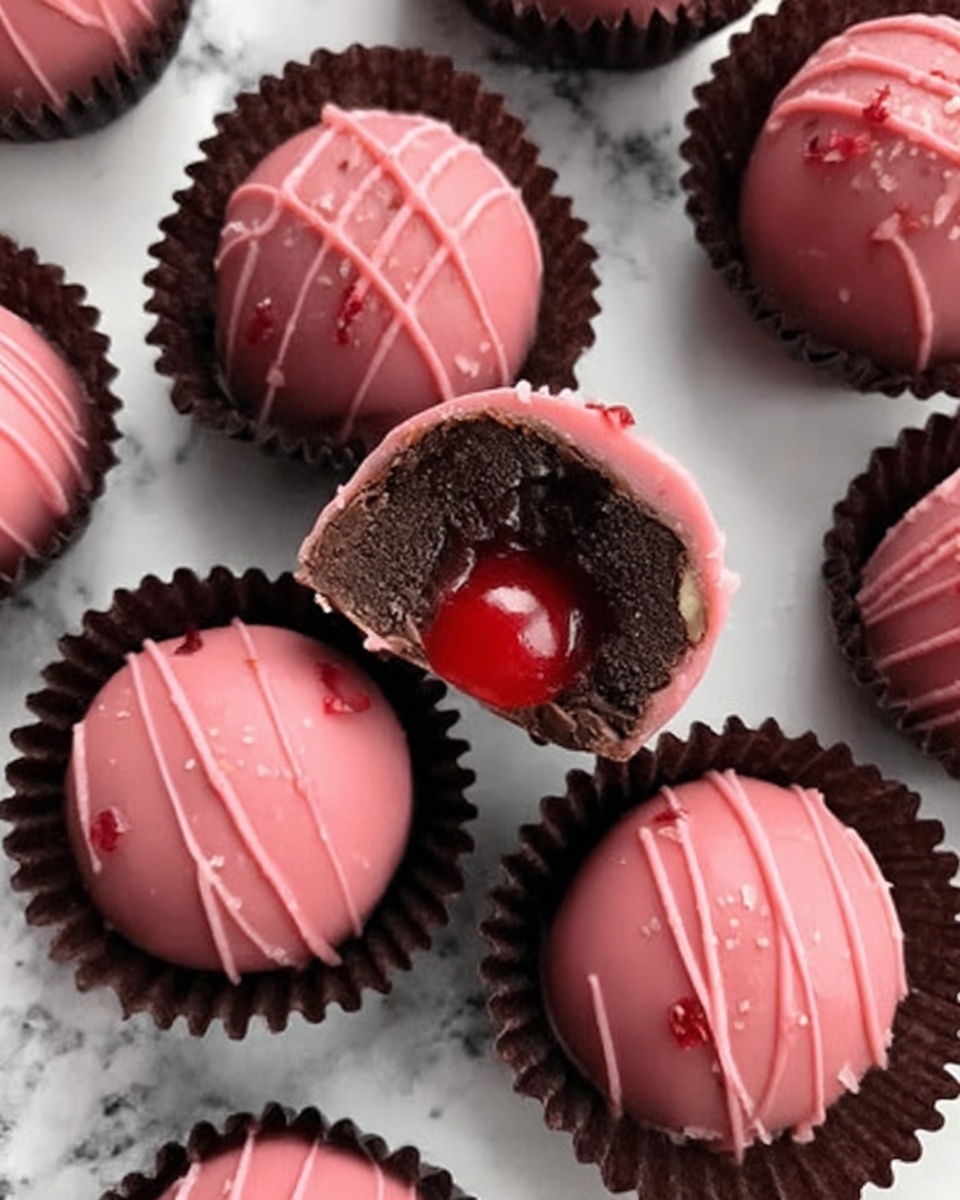
If you have a sweet tooth and love that perfect balance of fruity and chocolatey goodness, the Cherry Mash Truffles Recipe is going to become your new obsession. This delightful treat brings together the bright, juicy flavor of maraschino cherries with a luscious chocolate and peanut coating, creating little bites of heaven. Whether you want something fancy for a party or just a lovely homemade indulgence, these truffles hit all the right notes in flavor, texture, and visual appeal.
Ingredients You’ll Need
Each ingredient in this Cherry Mash Truffles Recipe plays an important role, from adding creamy texture to creating bursts of flavor. You don’t need anything fancy, just simple, well-chosen ingredients that come together to make magic.
- Maraschino cherries (10 oz jar, drained and finely chopped): Their sweetness and juiciness are the heart of the truffles, giving that signature cherry mash flavor.
- Powdered sugar (2 cups): This smooth, fine sugar adds sweetness without grittiness, perfect for the creamy truffle base.
- Unsalted butter (½ cup, softened): It brings richness and helps bind the ingredients while keeping the flavor balanced.
- Vanilla extract (1 teaspoon): Just a touch enhances all the flavors and adds a warm aroma.
- Semisweet chocolate chips (1 cup): These provide that deep chocolate flavor with a slight bitterness to contrast the sweet cherry filling.
- Milk chocolate chips (1 cup): Creamy and sweet, these melt beautifully and make the coating irresistibly smooth.
- Creamy peanut butter (½ cup): Adds a nutty richness that complements the cherries and chocolate perfectly.
- Chopped peanuts (1 cup): For a delightful crunch and a bit of texture to finish off the coating.
How to Make Cherry Mash Truffles Recipe
Step 1: Prepare the Cherry Filling
Start off by beating the softened butter in a large bowl until it becomes creamy and light. This will make the texture of your truffle centers smooth and velvety.
Step 2: Add Sweetness and Flavor
Gradually add the powdered sugar to the butter, beating continuously to avoid lumps, until your mixture is perfectly smooth. Then, stir in the finely chopped maraschino cherries and a splash of vanilla extract, mixing everything together until the filling has a uniform cherry mash texture.
Step 3: Shape and Chill
Roll the cherry filling into about 1-inch balls. This size is ideal for bite-sized truffles. Place them on a baking sheet lined with parchment paper and pop the tray into the freezer for at least an hour. This firm chill is crucial—it makes dipping the truffles in chocolate much easier without losing their shape.
Step 4: Create the Chocolate Coating
While the cherry centers chill, melt the semisweet and milk chocolate chips with the peanut butter in a microwave-safe bowl. Heat in 30-second bursts, stirring in between to ensure the mixture is silky smooth. Once melted, fold in the chopped peanuts—this adds an irresistible crunch and nutty richness to your coating.
Step 5: Coat the Truffles
Using a fork or toothpick, dip each frozen cherry ball into the melted chocolate-peanut mixture. Make sure each ball is fully coated for the perfect outer shell. Then, set the coated truffles back onto the parchment-lined tray.
Step 6: Set and Finish
Return the tray to the refrigerator and let the truffles chill for at least 30 minutes until the chocolate hardens. This step locks in the luscious layers and results in that satisfying snap when you bite in. Once set, transfer the truffles to an airtight container—then get ready to enjoy!
How to Serve Cherry Mash Truffles Recipe
Garnishes
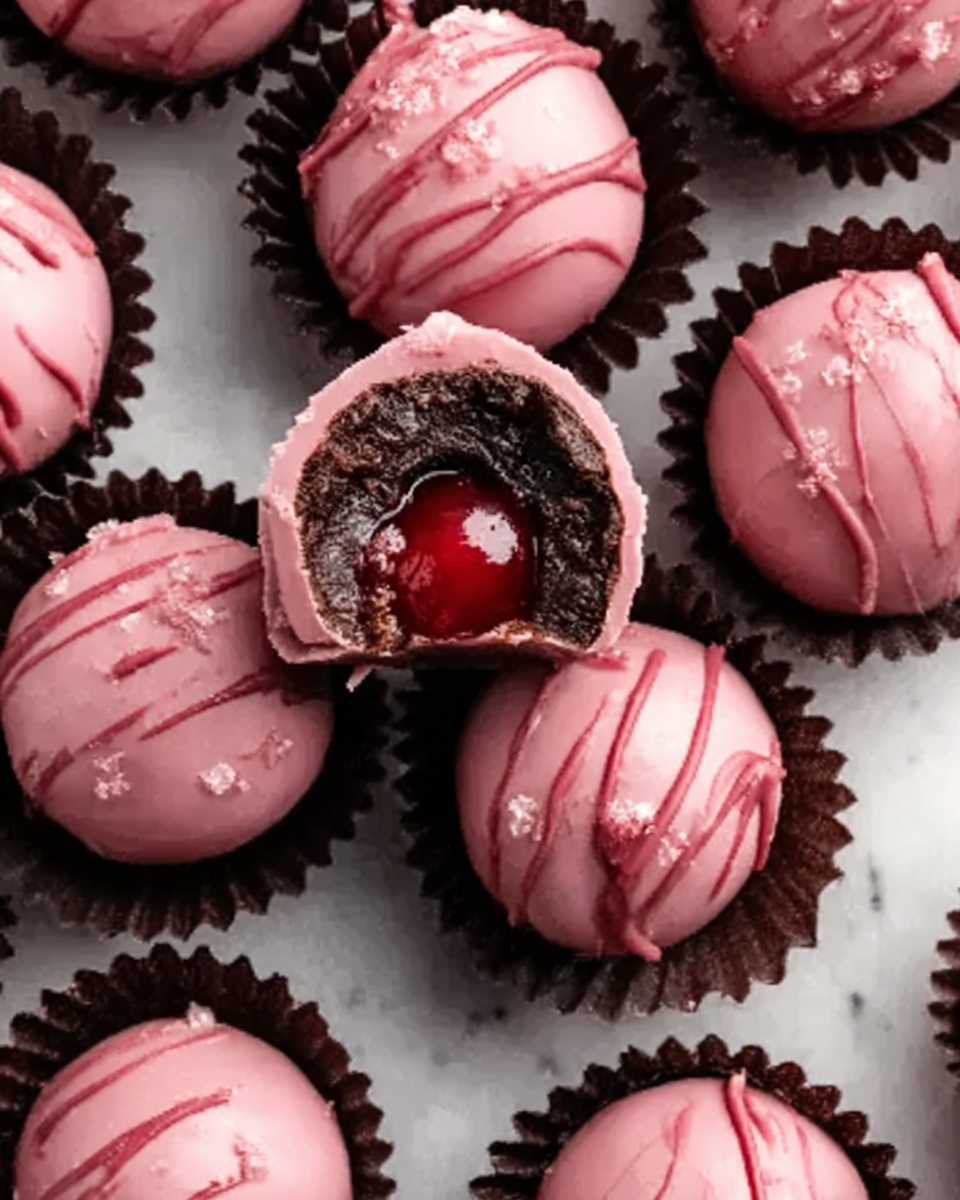
To make your Cherry Mash Truffles even more eye-catching, consider rolling the finished truffles in finely chopped nuts, colorful sprinkles, or a dusting of cocoa powder. Fresh mint leaves or a drizzle of white chocolate add festive touches that impress every time.
Side Dishes
These truffles pair beautifully with a light cup of coffee, a creamy latte, or even a glass of dessert wine. For a fun twist, serve them alongside warm fruit compote or a simple whipped cream to balance the richness.
Creative Ways to Present
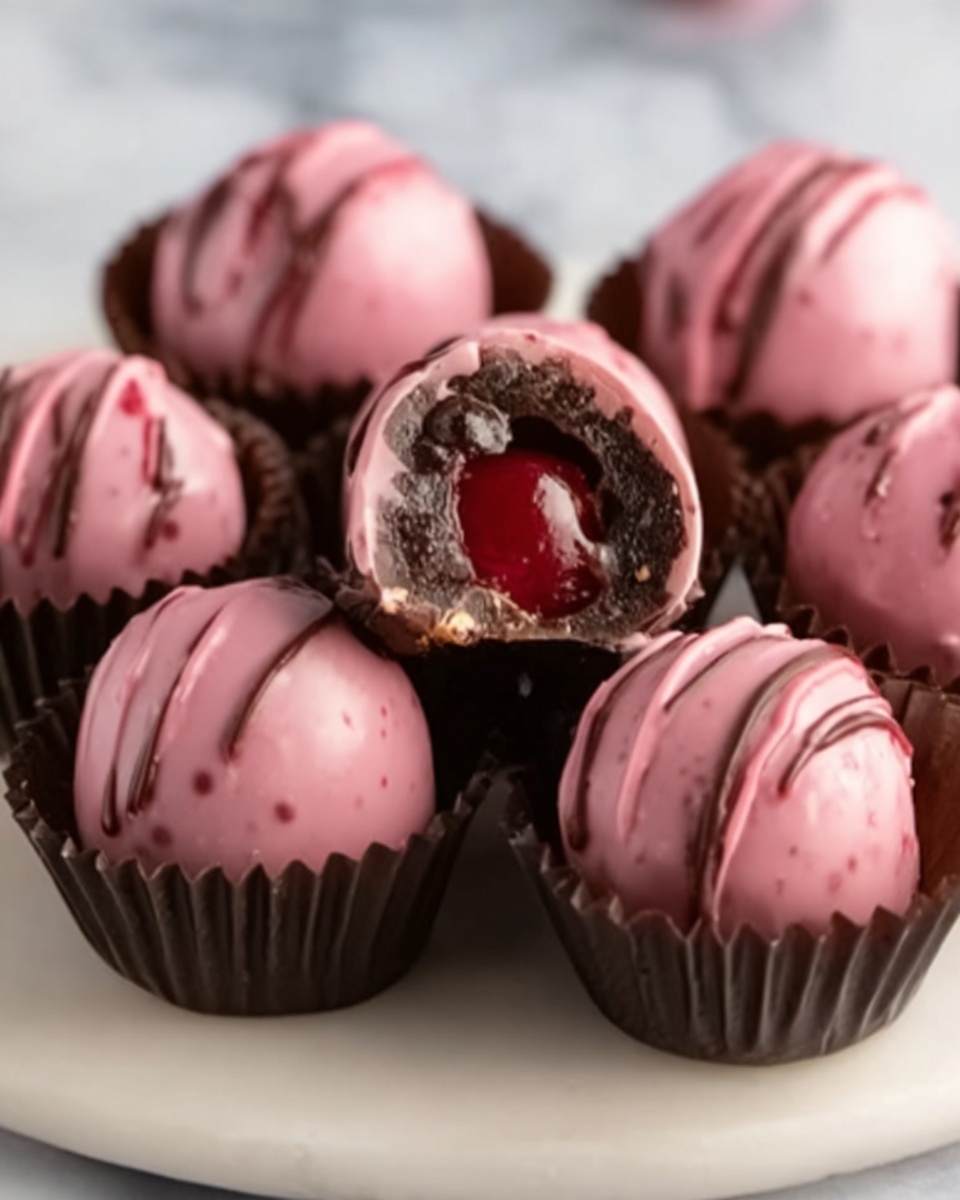
Presentation makes all the difference when sharing these beauties. Try placing the Cherry Mash Truffles in mini cupcake liners or on a decorative platter sprinkled with edible flowers. If you’re feeling extra fancy, serve them on a tiered dessert stand for a charming party spread.
Make Ahead and Storage
Storing Leftovers
Because these truffles are rich and chocolate-coated, storing them properly is key. Keep leftover Cherry Mash Truffles Recipe in an airtight container in the refrigerator to maintain freshness and prevent melting or sogginess. They should stay delicious for up to one week.
Freezing
If you want to prepare a batch in advance, the truffles freeze wonderfully. Lay them out in a single layer on a tray until solid, then transfer to an airtight container or zip-top freezer bag. When properly stored, they can last for up to three months without any loss of flavor.
Reheating
When it’s time to enjoy frozen truffles, simply thaw them overnight in the refrigerator. Avoid microwaving as this can ruin the texture and cause the chocolate to melt unevenly. Letting them come to temperature slowly preserves that perfect cherry mash experience.
FAQs
Can I substitute fresh cherries for maraschino cherries?
Fresh cherries can add a lovely natural flavor, but maraschino cherries provide that specific sweet and slightly syrupy bite essential to this recipe. Using fresh cherries will change the texture and sweetness, so if you try it, consider adding a bit more powdered sugar to compensate.
Is it possible to make these truffles nut-free?
Absolutely! Simply omit the peanut butter and chopped peanuts from the coating. You can replace peanut butter with sunflower seed butter or another nut-free spread if you want to keep some creaminess without allergens.
How long does it take to make the Cherry Mash Truffles Recipe?
While the hands-on preparation takes about 30 minutes, you need to allow chilling time for the filling and the coating to set properly, totaling around 1 hour and 45 minutes.
Can these truffles be made gluten-free?
Yes, this recipe is naturally gluten-free as long as you check your chocolate chips and peanut butter labels to ensure they haven’t been processed with gluten-containing ingredients.
What’s the best way to roll the cherry mixture into balls?
Using slightly damp hands helps prevent sticking and results in smooth, evenly shaped truffles. If the mixture feels too sticky, a quick chill in the fridge can make rolling easier.
Final Thoughts
Sharing this Cherry Mash Truffles Recipe feels like passing along a little slice of happiness. The blend of cherries, chocolate, and peanuts creates a flavor and texture combo that’s simply unforgettable. Whether it’s a special occasion or a cozy night in, these truffles are a surefire way to brighten your day and delight your taste buds. I cannot wait for you to try making them—once you do, I bet they’ll become a treasured favorite too!
Print
Cherry Mash Truffles Recipe
- Prep Time: 30 minutes
- Cook Time: 1 hour 15 minutes (including freezing and setting time)
- Total Time: 1 hour 45 minutes
- Yield: 24 servings
- Category: Dessert
- Method: No-Cook
- Cuisine: American
Description
These Cherry Mash Truffles are delightful bite-sized treats featuring a creamy cherry filling coated in a rich peanut butter chocolate shell with crunchy peanuts. Perfect for parties or a sweet snack, they combine the sweetness of maraschino cherries with decadent chocolate and peanut butter for an irresistible flavor and texture.
Ingredients
Cherry Filling
- 1 (10 oz) jar maraschino cherries, drained and finely chopped
- 2 cups powdered sugar
- ½ cup unsalted butter, softened
- 1 teaspoon vanilla extract
Chocolate Coating
- 1 cup semisweet chocolate chips
- 1 cup milk chocolate chips
- ½ cup creamy peanut butter
- 1 cup chopped peanuts
Instructions
- Prepare the Cherry Filling: In a large mixing bowl, beat the softened butter until creamy using a hand mixer or stand mixer.
- Add Sugar: Gradually add the powdered sugar to the butter, continuing to beat until the mixture is smooth and well combined.
- Mix in Cherries and Vanilla: Stir in the finely chopped maraschino cherries and vanilla extract until fully incorporated, creating a cherry-flavored dough.
- Form Cherry Balls: Roll the cherry mixture into 1-inch diameter balls with your hands and place them on a parchment-lined baking sheet to prevent sticking.
- Freeze Cherry Balls: Freeze the cherry balls for at least 1 hour until they are firm enough to handle for coating.
- Prepare Chocolate Coating: In a microwave-safe bowl, melt the semisweet chocolate chips, milk chocolate chips, and creamy peanut butter together in 30-second intervals, stirring after each until the mixture is smooth and fully combined.
- Add Peanuts: Stir the chopped peanuts into the melted chocolate and peanut butter mixture to add crunchy texture.
- Coat the Truffles: Using a fork or toothpick, dip each frozen cherry ball into the melted chocolate mixture making sure it is completely coated.
- Place on Parchment: Transfer the coated truffles back onto the parchment-lined baking sheet to set.
- Refrigerate to Set: Refrigerate the coated truffles for at least 30 minutes or until the chocolate coating is firm and solid.
- Store and Serve: Once set, store the truffles in an airtight container and serve chilled or at room temperature for a rich, delicious treat.
Notes
- Ensure cherries are finely chopped so the filling is smooth and easy to roll.
- Freezing the cherry balls before dipping helps the coating stick better and prevents melting.
- You can substitute chopped peanuts with other nuts or omit them for a nut-free version.
- Store truffles in the refrigerator for up to one week for optimal freshness.
- For a glossy finish, temper the chocolate chips before adding peanut butter.
