“`html
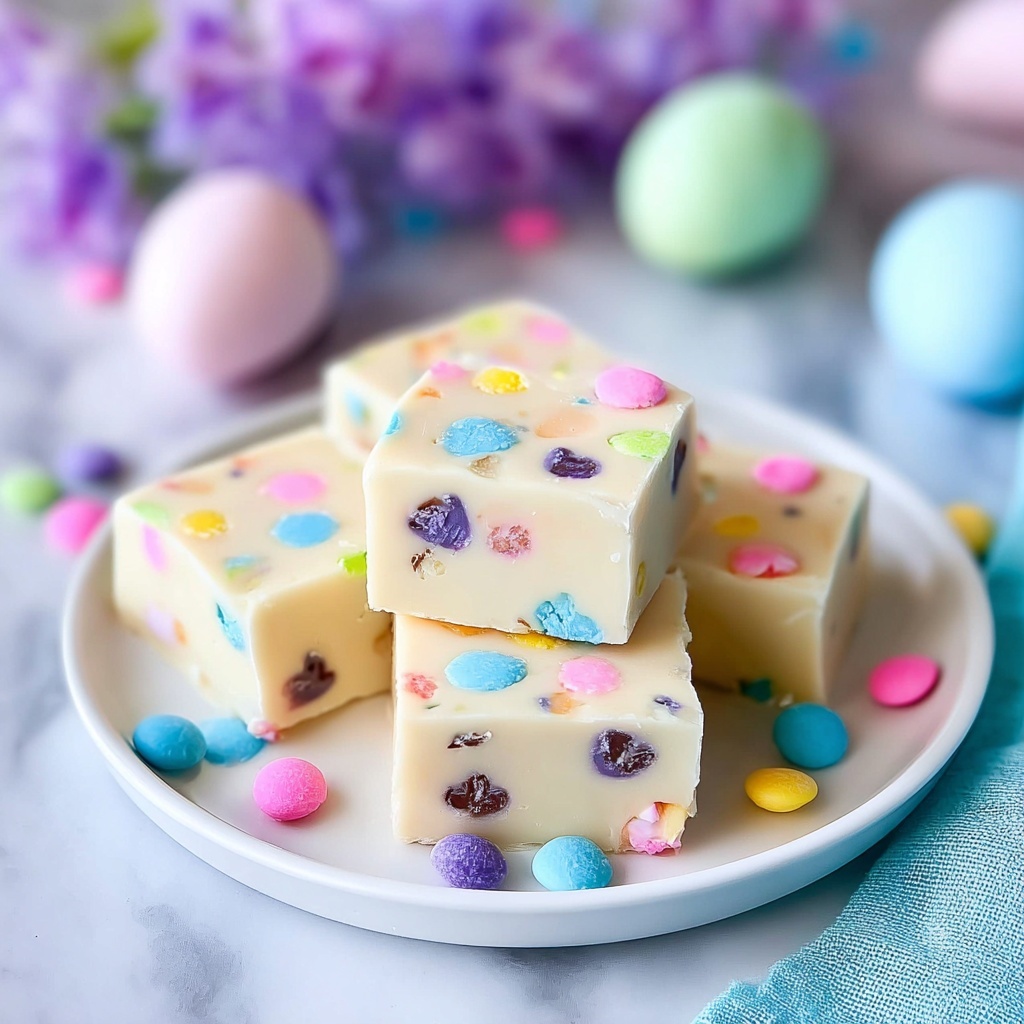
If you’re looking for a sweet treat that perfectly captures the playful spirit of spring celebrations, this Easy Easter Fudge Recipe is just what you need. It’s a delightful, colorful confection that combines creamy white chocolate with festive Easter candies to create a melt-in-your-mouth experience that’s both simple to make and an absolute joy to share. Whether you’re prepping for an Easter gathering or just craving a fun, seasonal dessert, this fudge will quickly become your go-to because it’s as easy as it is irresistibly delicious.
Ingredients You’ll Need
The beauty of this Easy Easter Fudge Recipe lies in its straightforward, yet thoughtfully chosen ingredients. Each brings its own magic: creamy white chocolate for richness, sweetened condensed milk for that velvety smooth texture, and the colorful Easter candies add playful bursts of crunch and whimsy that also make the dish look fantastic.
- White chocolate chips: Provides the creamy, luscious base of the fudge — use high-quality chips for best flavor.
- Sweetened condensed milk: Adds sweetness and helps the fudge achieve that coveted silky texture.
- Butter: Enhances creaminess and prevents the fudge from being too dense.
- Easter M&M’s: Bring fun, colorful crunch and a classic chocolate-y surprise in every bite.
- Easter Shimmery Whopper Eggs: Impart a nostalgic malted crunch and their festive shimmer adds a touch of magic.
- Easter sprinkles: Sprinkle in cheerful colors and a slight sugary texture that make the fudge visually irresistible.
How to Make Easy Easter Fudge Recipe
Step 1: Prepare Your Pan
First things first, line an 8×8 square pan with parchment paper. This little prep move ensures your fudge won’t stick and will come out as neat squares, making cleanup a breeze.
Step 2: Melt the Base
In a medium pot over low to medium heat, combine the white chocolate chips, sweetened condensed milk, and butter. Stir constantly — this is important because you want a smooth, fully melted mixture without any lumps. Trust me, this part is super satisfying as it slowly transforms into a shiny, creamy batter you’ll want to dive into.
Step 3: Mix in the Candy
After your fudge base is perfectly smooth, stir in 1 cup each of the Easter M&M’s, Whopper eggs, and sprinkles. This step infuses the fudge with pockets of colorful crunch that’ll surprise you in every bite, distributing the festive vibes throughout.
Step 4: Pour and Decorate
Transfer the fudge mixture evenly into your prepared pan. Now for the fun part — sprinkle the remaining candies and sprinkles on top, gently pressing them into the surface so they stick. This step makes your fudge not only taste fantastic but look like a vibrant Easter celebration on a platter.
Step 5: Chill and Set
Let the fudge sit at room temperature overnight. This patience pays off big time because it allows the fudge to fully harden into that perfect, sliceable texture.
Step 6: Slice and Enjoy
Once your fudge is set, carefully lift it out of the pan using the parchment paper and cut into 1-inch squares. Voila! You’ve got a tray full of festive, tempting bites ready for sharing or savoring solo.
How to Serve Easy Easter Fudge Recipe
Garnishes
While the fudge already dazzles with candy toppings, a light dusting of edible glitter or a few fresh mint leaves can add an elegant touch, perfect if you’re serving guests and want to elevate presentation without losing that cheerful Easter vibe.
Side Dishes
This fudge pairs beautifully with a refreshing glass of cold milk, a cup of hot tea, or a rich espresso. The creamy sweetness of the fudge contrasts wonderfully with these beverages, balancing flavors and keeping your palate interested.
Creative Ways to Present
Consider arranging your squares in colorful, festive cupcake liners for an adorable grab-and-go treat. For gift-giving, stack pieces in a decorated box with parchment paper or cellophane wrap tied with a ribbon — it makes for a charming homemade gift anyone would be thrilled to receive.
Make Ahead and Storage
Storing Leftovers
Leftover fudge keeps well stored in an airtight container at room temperature for up to a week. Just be sure to keep it in a cool spot to prevent melting or sticking together.
Freezing
If you want to hold on to your batch longer, wrap individual fudge squares tightly in plastic wrap and place them in a freezer-safe container. Frozen fudge keeps well for up to 3 months and thaws quickly at room temperature when you’re ready to enjoy it.
Reheating
Since fudge is best enjoyed chilled or at room temperature, reheating isn’t necessary. If you want a softer texture, simply let the fudge sit out for a few minutes to warm slightly — it’ll soften just enough for a melt-in-your-mouth bite without losing its firm charm.
FAQs
Can I substitute other candies for the Easter M&M’s or Whopper Eggs?
Absolutely! Feel free to swap in any seasonal or favorite candy pieces you have on hand. Just be mindful of how different textures might affect the overall bite, but part of the fun is making this Easy Easter Fudge Recipe your own.
Is it necessary to use sweetened condensed milk?
Yes, this ingredient is crucial because it helps achieve that creamy, dense fudge texture. Regular milk won’t give the same result, and using it can cause the fudge not to set properly.
Can I make this fudge vegan or dairy-free?
You can experiment with vegan white chocolate chips and dairy-free condensed milk alternatives, but results might vary. It’s worth a try if you’re catering to dietary needs, just keep an eye on texture and sweetness levels.
How long does the fudge take to set?
Allowing it to set overnight at room temperature is ideal and gives the best texture. If you’re short on time, refrigeration for a few hours can also work, but the texture might be slightly different.
Can I double the recipe?
Yes, doubling the ingredients works well, just use a larger pan or two pans to ensure even thickness and proper setting. Adjust the cooling time if your fudge layer is thicker.
Final Thoughts
This Easy Easter Fudge Recipe is a celebration of sweetness, color, and festive joy wrapped into every square. It’s one of those desserts that’s fun to make, wonderful to share, and perfect for bringing a smile to anyone’s face. I truly hope you try it out and add your own creative twist — it’s a delightful tradition waiting to happen in your kitchen!
“`
Print
Easy Easter Fudge Recipe
- Prep Time: 10 minutes
- Cook Time: 10 minutes
- Total Time: 20 minutes plus overnight setting
- Yield: 64 1-inch squares
- Category: Dessert
- Method: Stovetop
- Cuisine: American
Description
This Easy Easter Fudge Recipe is a delightful no-bake treat featuring creamy white chocolate fudge loaded with festive Easter M&M’s, Whopper Eggs, and colorful sprinkles. Perfect for holiday celebrations, this fudge is simple to prepare and yields 64 bite-sized squares that combine smooth texture and fun candy crunch.
Ingredients
Fudge Base
- 3 cups white chocolate chips
- 1 (14 oz) can sweetened condensed milk
- 4 tablespoons butter
Mix-ins and Toppings
- 2 cups Easter M&M’s, divided
- 2 cups Easter Shimmery Whopper Eggs, divided
- 2 cups Easter sprinkles, divided
Instructions
- Prepare the pan: Line an 8×8 inch square pan with parchment paper to ensure the fudge can be easily removed after setting.
- Melt the fudge mixture: In a medium pot over low to medium heat, combine the white chocolate chips, sweetened condensed milk, and butter. Stir constantly until the mixture is fully melted and smooth, ensuring no lumps remain.
- Add candies: Stir in 1 cup each of the Easter M&M’s, Whopper Eggs, and sprinkles until these mix-ins are evenly distributed throughout the warm fudge base.
- Transfer and top: Pour the fudge mixture into the prepared pan. Evenly sprinkle the remaining candies and sprinkles on top, gently pressing them into the surface to adhere.
- Set the fudge: Leave the fudge on the counter overnight to allow it to harden completely without refrigeration.
- Slice and serve: Once the fudge is set and firm, remove it from the pan using the parchment paper. Cut into 1-inch squares to yield 64 pieces ready for serving.
Notes
- Use parchment paper to prevent sticking and for easy removal.
- Maintain low to medium heat while melting to avoid burning the white chocolate.
- Press candy toppings gently to prevent uneven surfaces but avoid embedding them too deep.
- Allow fudge to set fully at room temperature; refrigeration is not necessary but can speed up the process.
- Store fudge in an airtight container at room temperature for up to one week.


