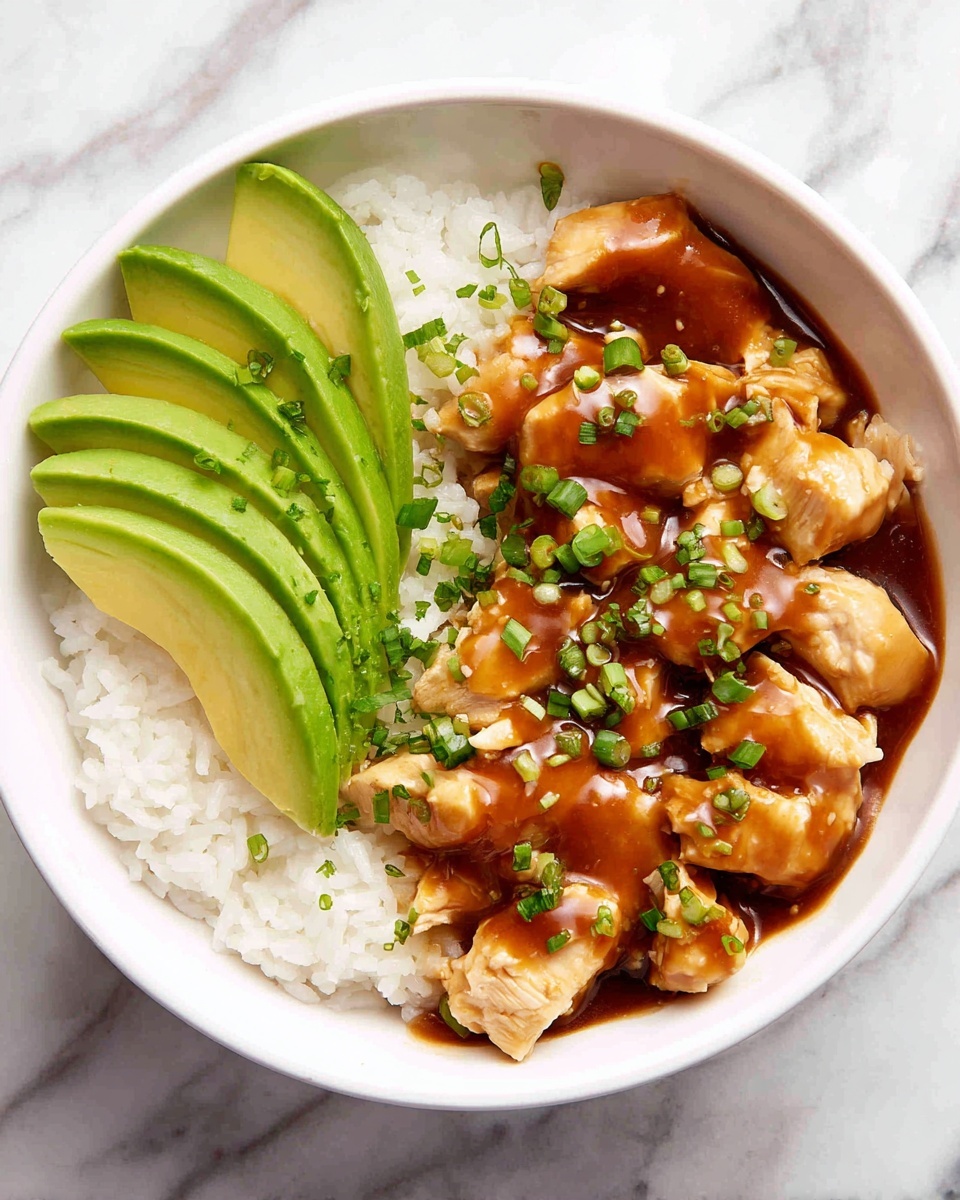
If you’ve ever wanted a meal that combines comforting textures with bold, irresistible flavors, then this Easy Sticky Chicken Rice Bowl Recipe is your new best friend in the kitchen. Imagine tender, sticky chicken glazed with a luscious sauce, nestled atop fluffy rice—the perfect harmony of sweet, savory, and satisfying all in one bowl. It’s not only simple to make but also promises to become a cherished staple whether for a weeknight dinner or a casual get-together with friends. Let me walk you through every delicious step of this delightfully easy recipe!
Ingredients You’ll Need
For this Easy Sticky Chicken Rice Bowl Recipe, we’re keeping it straightforward with ingredients that bring out amazing flavors without fuss. Each item plays a crucial role—from creating that signature sticky glaze to balancing the hearty chicken and fluffy rice base.
- Chicken thighs (boneless, skinless): Perfectly juicy and tender, they soak up the sticky sauce beautifully.
- White rice: Fluffy and neutral, it provides the perfect base to showcase the sticky chicken.
- Soy sauce: Adds savory depth and a touch of umami to the sticky glaze.
- Honey or brown sugar: For natural sweetness with a rich caramel undertone that thickens into a luscious sauce.
- Garlic and ginger: Aromatic essentials that elevate every bite with warmth and zest.
- Rice vinegar or lime juice: Introduces a bright, tangy contrast that keeps the flavors lively.
- Green onions: Fresh and crunchy garnish that adds color and a mild onion bite.
- Sesame seeds: Toasted for a nutty finish and extra texture.
- Optional chili flakes or sriracha: To dial up the heat if you love a little kick.
How to Make Easy Sticky Chicken Rice Bowl Recipe
Step 1: Prepare the Rice
Start by cooking your rice according to package instructions or your preferred method. Aim for fluffy, separate grains rather than sticky clumps—this will perfectly absorb that amazing sticky chicken sauce later on.
Step 2: Marinate the Chicken
Combine soy sauce, honey or brown sugar, minced garlic, grated ginger, and a splash of rice vinegar in a bowl. Toss the chicken thighs in this marinade and let them soak up those vibrant flavors for at least 15 minutes, or longer if you have the time.
Step 3: Cook the Chicken
Heat a non-stick pan over medium heat with a little oil. Add the chicken thighs and cook them until they’re golden on the outside and cooked through inside, roughly 5-6 minutes per side depending on thickness.
Step 4: Make the Sticky Glaze
Remove the chicken and pour the marinade mixture into the pan. Cook it over medium-high heat, stirring constantly, until it thickens into a glossy, sticky glaze that clings perfectly to the chicken.
Step 5: Combine and Coat
Return the chicken to the pan, coating each piece thoroughly with the thickened glaze. This step ensures every bite is bursting with that signature sticky, sweet-savory flavor.
Step 6: Assemble the Bowl
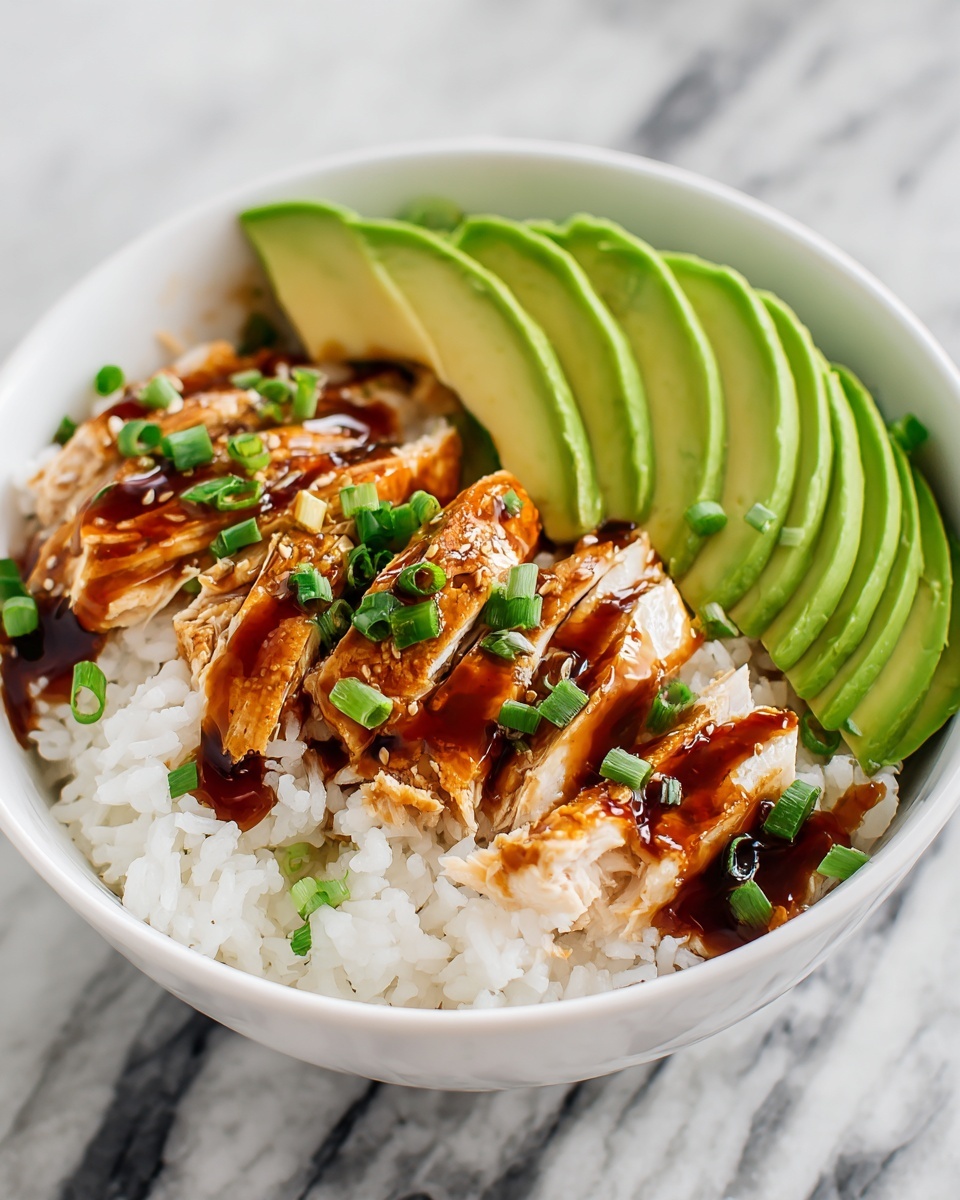
Serve a generous portion of fluffy rice in a bowl, then nestle the sticky chicken on top. Garnish with chopped green onions, toasted sesame seeds, and a sprinkle of chili flakes if you dare for an added pop of spice.
How to Serve Easy Sticky Chicken Rice Bowl Recipe

Garnishes
Fresh garnishes are everything here. I love a sprinkle of sliced green onions and toasted sesame seeds for a nutty crunch. If you’re feeling adventurous, add a drizzle of sriracha or chili oil to balance out the sweetness with some heat.
Side Dishes
Keep it simple with steamed or sautéed greens like bok choy or snap peas—they bring freshness and a subtle bitterness that perfectly contrasts the sticky chicken. A light cucumber salad with rice vinegar dressing also pairs beautifully.
Creative Ways to Present
For a fun twist, serve this Easy Sticky Chicken Rice Bowl Recipe in cute mini bowls layered with colorful veggies like shredded carrots, edamame, or radishes. Arrange the chicken in slices or chunks artfully for that wow factor at the table.
Make Ahead and Storage
Storing Leftovers
This dish keeps well for up to 3 days in an airtight container in the refrigerator. Make sure the chicken and rice are chilled separately if you want to maintain the best texture.
Freezing
You can freeze the chicken and the sauce separately from the rice for up to 2 months. Freeze in portion-sized containers so you can thaw just what you need without waste.
Reheating
Reheat the chicken and rice gently in a covered pan or microwave, adding a splash of water or broth to the rice to bring back fluffiness. You want to warm everything thoroughly without drying out that sticky glaze.
FAQs
Can I use chicken breasts instead of thighs?
Absolutely! Chicken breasts can work, but thighs tend to stay juicier and better absorb the sticky glaze, so they’re my personal favorite for this recipe.
Is this recipe gluten-free?
To make it gluten-free, just swap out regular soy sauce for tamari or another gluten-free soy sauce alternative, and double-check the other ingredients.
Can I make this recipe vegetarian or vegan?
You can substitute the chicken with tofu or tempeh, and use maple syrup instead of honey. Just be mindful that cooking times and texture will vary.
What’s the best rice to use?
Jasmine or long-grain white rice works beautifully here for that lovely fluffy texture, but feel free to use brown rice or even cauliflower rice if you prefer.
How sticky is the sauce really?
The sauce reduces down to a thick, glossy glaze that clings to every bite of chicken—perfectly sticky without being syrupy or overly sweet.
Final Thoughts
There’s something incredibly comforting about a bowl of sticky, flavorful chicken atop warm rice, and this Easy Sticky Chicken Rice Bowl Recipe nails it every time. It’s quick to throw together, endlessly adaptable, and absolutely delicious. I can’t wait for you to try it and make it your own new favorite weeknight dinner!
Print
Easy Sticky Chicken Rice Bowl Recipe
- Prep Time: 1 hour 15 minutes
- Cook Time: 25-30 minutes
- Total Time: 1 hour 40 minutes to 1 hour 45 minutes
- Yield: 1 large loaf (8-10 servings)
- Category: Baking
- Method: Baking
- Cuisine: American, Easter Traditional
- Diet: Vegetarian
Description
This festive Easy Sticky Chicken Rice Bowl recipe is actually a traditional braided Easter bread studded with colorful dyed hard-boiled eggs. The bread is soft, slightly sweet, and enriched with milk, butter, and eggs, making it a perfect centerpiece for spring celebrations. Its beautifully braided and circular shape adorned with pastel eggs makes it both visually appealing and delicious.
Ingredients
Dough Ingredients
- 4 cups all-purpose flour, plus extra for kneading
- 1/2 cup granulated sugar
- 1 packet (2 1/4 teaspoons) active dry yeast
- 1 teaspoon salt
- 1/2 cup milk, warmed to 110°F
- 1/2 cup water, warmed to 110°F
- 1/4 cup unsalted butter, softened
- 2 large eggs
- 1 teaspoon vanilla extract
- 1 teaspoon orange zest (optional, for flavor)
Additional Ingredients
- 1/4 cup sugar (for sprinkling)
- 4–6 hard-boiled eggs (dyed in pastel colors for Easter)
- 1 egg yolk (for egg wash)
Instructions
- Prepare the Dough: In a large bowl, combine the warm milk, warm water, and 1 tablespoon of sugar. Sprinkle the yeast over the mixture and let it sit for about 5-10 minutes until it becomes frothy, indicating the yeast is active.
- Mix the Ingredients: In a separate large bowl, whisk together the flour, remaining sugar, and salt. Add the yeast mixture, softened butter, eggs, vanilla extract, and optional orange zest. Mix everything until the dough begins to come together.
- Knead the Dough: Turn the dough onto a floured surface and knead for 5-8 minutes, or until smooth and elastic. Add extra flour if the dough is too sticky. Place the dough in a greased bowl, cover with a clean towel, and let it rise in a warm place for 1 to 1.5 hours or until doubled in size.
- Shape the Bread: Punch down the dough and divide it into three equal portions. Roll each portion into a long rope about 12-15 inches long. Twist the ropes together to form a braid and shape it into a circle, pinching the ends to seal.
- Add the Dyed Eggs: Gently press the hard-boiled, pastel-dyed eggs into the dough at evenly spaced intervals around the braid, ensuring they are securely nestled into the dough.
- Let the Dough Rise Again: Cover the braided loaf with a clean towel and let it rise for 30-45 minutes until puffed up and slightly doubled.
- Prepare the Egg Wash: In a small bowl, whisk the egg yolk with a tablespoon of water. Brush this mixture evenly over the entire loaf to achieve a shiny, golden-brown crust after baking.
- Bake the Bread: Preheat the oven to 350°F (175°C). Place the loaf on a parchment-lined baking sheet and bake for 25-30 minutes or until the bread turns golden brown and sounds hollow when tapped on the bottom.
- Cool and Serve: Transfer the bread to a wire rack and let cool completely before slicing. Enjoy the pastel eggs as part of the bread or keep them for decoration.
Notes
- Warming the milk and water to 110°F is crucial for activating yeast without killing it.
- Use fresh yeast for the best rise and fluffy texture.
- For extra flavor, orange zest is optional but recommended.
- If the dough feels sticky during kneading, add flour gradually to avoid a dense loaf.
- The dyed eggs must be hard-boiled and cooled before embedding to prevent cracking during baking.
- Baking time may vary slightly depending on your oven; check for a hollow sound when tapping the bottom to confirm doneness.
- Store leftover bread in an airtight container for up to 3 days or freeze for longer storage.


