
If you’ve ever dreamed of capturing the authentic taste of Japanese cuisine right in your own kitchen, then this Homemade Shoyu Ramen Noodles Recipe is an absolute game changer. Forget the instant stuff for a moment—making your own noodles from scratch adds a fresh springy texture and subtle flavor that elevates any bowl of ramen to something truly special. It’s an approachable, rewarding process that brings together simple ingredients in a way that feels both nostalgic and exciting. Let me take you through every step to craft these delicate, slurp-worthy noodles that perfectly soak up that savory shoyu broth you love.

Ingredients You’ll Need
Getting the ingredients right is key, but don’t worry—they’re straightforward and easy to find. Each brings something magical to the noodles, from texture and elasticity to flavor balance.
- 2 cups all-purpose flour: The foundation of your noodles that provides structure and chewiness.
- 1/2 teaspoon salt: Enhances flavor and tightens gluten for a better bite.
- 2 large eggs: Adds richness and helps bind the dough together.
- 1/4 cup water: Hydrates the flour and brings the dough to life.
- 1/2 teaspoon baking soda: Key for mimicking the alkaline texture traditional ramen noodles have.
How to Make Homemade Shoyu Ramen Noodles Recipe
Step 1: Gather Your Ingredients
First things first—collect everything you’ll need. Having all ingredients prepped and ready means your noodle-making adventure can flow smoothly from start to finish.
Step 2: Mix Salt and Flour
Place the flour in a big mixing bowl and sprinkle in the salt, then mix carefully to distribute that salt evenly throughout. This is crucial for consistent flavor and the right noodle texture.
Step 3: Beat the Eggs
Break two large eggs into a small bowl and beat them lightly with a fork until they blend into a uniform yellow. This ensures even moisture throughout the dough.
Step 4: Combine Eggs and Flour
Pour the beaten eggs into the flour mixture and stir gently at first, so your flour can absorb the egg without making a mess on the counter!
Step 5: Add Water Gradually
Slowly introduce the water while stirring to help the dough come together nicely without becoming too wet or sticky.
Step 6: Incorporate Baking Soda
Dissolve baking soda in a tablespoon of warm water, then add it to the dough to give the noodles that signature springiness and slightly alkaline bite typical of ramen.
Step 7: Form the Dough
Stir with a spoon or your hands until a rough dough forms, shaggy and a bit sticky at this stage.
Step 8: Knead the Dough
Transfer the dough to a floured surface and start kneading by folding and pressing, working it for about 8 to 10 minutes until smooth and elastic. This step develops the gluten, which is essential for chewy noodles.
Step 9: Adjust Consistency
If the dough is too sticky, lightly dust it with flour and keep kneading. You’re aiming for a dough that feels firm but pliable.
Step 10: Rest the Dough
Shape your dough into a ball, wrap it tightly in plastic wrap, and let it rest for at least 30 minutes at room temperature. This resting period lets the gluten relax and makes rolling out much easier.
Step 11: Roll Out the Dough
Remove the plastic and place the dough on a well-floured surface. Use a rolling pin to flatten it to approximately 1/16 inch thick—thin but sturdy enough to hold its shape.
Step 12: Cut the Noodles
Using a sharp knife or pasta cutter, slice the dough into long, fine strips—the classic ramen noodle size. Dust them lightly with flour to prevent sticking before cooking.
Step 13: Cook the Noodles
Bring a large pot of water to a rolling boil, add the noodles, and cook for 2 to 4 minutes until they’re tender yet still springy. Fresh noodles cook quickly, so keep an eye on them!
Step 14: Rinse and Drain
Drain the noodles and rinse briefly under cold water to halt the cooking and wash away excess starch, ensuring a clean texture that’s ready to soak up that savory shoyu broth.
How to Serve Homemade Shoyu Ramen Noodles Recipe
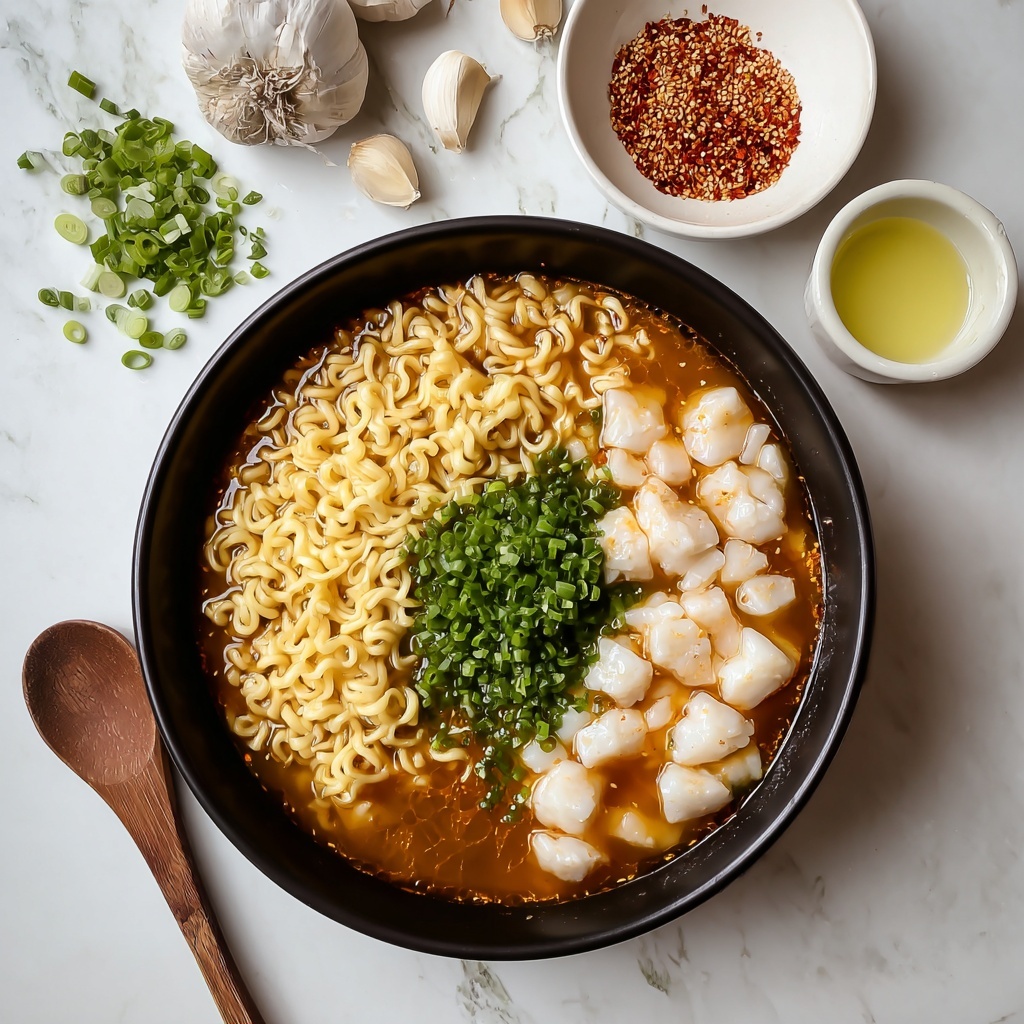
Garnishes
Top your bowl with classic garnishes like sliced green onions, a soft boiled egg, nori sheets, or bamboo shoots to boost flavor and add that authentic ramen experience.
Side Dishes
Serve alongside simple sides like pickled vegetables, edamame, or a light cucumber salad to complement the rich and flavorful noodles.
Creative Ways to Present
Try layering your noodles in a clear broth so you can admire the beautiful texture, or even toss them lightly in sesame oil and soy sauce for a chilled noodle salad version. The Homemade Shoyu Ramen Noodles Recipe is versatile and ready for your personal spin.
Make Ahead and Storage
Storing Leftovers
If you have leftover noodles, keep them in an airtight container in the refrigerator for up to two days to maintain their freshness and texture.
Freezing
You can freeze uncooked noodles by laying them flat on a baking sheet and freezing them individually before transferring to a sealed bag. They’ll keep for a month without losing their springy charm.
Reheating
When ready to enjoy again, briefly boil frozen noodles straight from the freezer for just a couple of minutes until tender, then drain and serve as desired.
FAQs
Can I use bread flour instead of all-purpose flour?
While bread flour has more protein which can make noodles chewier, all-purpose flour is preferred here for a balanced texture. You can experiment, but expect a slightly different bite.
Why do we add baking soda to the dough?
Baking soda mimics the alkaline water traditionally used in ramen, giving the noodles their signature springiness and slight yellow hue.
Can this dough be made vegan?
This recipe relies on eggs for structure and richness, but you can try substituting eggs with plant-based alternatives, though the texture will vary.
How thin should I roll the dough?
A thickness of about 1/16 inch is ideal—it’s thin enough for delicate noodles but thick enough to hold up during cooking without falling apart.
How long do homemade noodles last in the fridge?
Keep them well wrapped or in an airtight container and they should stay fresh for up to two days. Beyond that, they risk becoming dry or sticky.
Final Thoughts
Making your own noodles from scratch is such a satisfying accomplishment, and this Homemade Shoyu Ramen Noodles Recipe makes it approachable and fun. Once you taste those tender, springy noodles in your favorite broth, you’ll understand why it’s worth every minute. I hope you give this recipe a try and discover a new favorite way to enjoy ramen at home with warmth and joy!
Print
Homemade Shoyu Ramen Noodles Recipe
- Prep Time: 0h 20m
- Cook Time: 0h 5m
- Total Time: 0h 25m
- Yield: 4 servings
- Category: Noodles
- Method: Stovetop
- Cuisine: Japanese
Description
This recipe guides you through making homemade shoyu ramen noodles from scratch, combining simple ingredients like all-purpose flour, eggs, baking soda, and salt. Perfectly kneaded and rolled out, these noodles provide an authentic base for any ramen soup with a delicious chewy texture and fresh taste.
Ingredients
Dry Ingredients
- 2 cups all-purpose flour
- 1/2 teaspoon salt
- 1/2 teaspoon baking soda
Wet Ingredients
- 2 large eggs
- 1/4 cup water
- 1 tablespoon warm water (for dissolving baking soda)
Instructions
- Gather Ingredients: Start by gathering all your ingredients: 2 cups of all-purpose flour, 1/2 teaspoon of salt, 2 large eggs, 1/4 cup of water, and 1/2 teaspoon of baking soda.
- Mix Dry Ingredients: Place the all-purpose flour in a large mixing bowl and add the salt, making sure to evenly distribute the salt throughout the flour.
- Beat Eggs: In a separate small bowl, crack the two large eggs and beat them lightly with a fork until the yolks and whites are fully combined.
- Combine Eggs and Flour: Add the beaten eggs to the flour mixture, mixing gently at first to prevent the eggs from splattering.
- Add Water: Gradually pour in the 1/4 cup of water while stirring the dough, ensuring the water is incorporated into the mixture evenly.
- Dissolve Baking Soda: In a small dish, dissolve the 1/2 teaspoon of baking soda in a tablespoon of warm water, then add it to the dough mixture.
- Mix Dough: Use your hands or a spoon to continue mixing until the dough begins to come together and form a rough, shaggy mass.
- Knead Dough: Transfer the dough onto a clean, lightly floured surface and begin kneading it by folding it over onto itself and pressing down.
- Knead Until Smooth: Knead the dough for about 8 to 10 minutes, or until it becomes smooth, elastic, and no longer sticky.
- Adjust Flour if Sticky: If the dough feels too sticky, sprinkle a small amount of flour onto it and continue kneading until the desired consistency is reached.
- Shape and Wrap: Once the dough has reached the right texture, shape it into a ball and wrap it tightly in plastic wrap.
- Rest Dough: Allow the dough to rest for at least 30 minutes at room temperature.
- Prepare to Roll: After resting, unwrap the dough and place it onto a floured surface.
- Roll Out Dough: Use a rolling pin to roll out the dough into a thin sheet, aiming for a thickness of about 1/16 inch.
- Cut Noodles: Once the dough is rolled out, use a sharp knife or a pasta cutter to cut it into long, thin strips to form the noodles.
- Dust Noodles: Dust the noodles lightly with flour to prevent them from sticking together.
- Prepare Boiling Water: To cook the noodles, bring a large pot of water to a rolling boil.
- Cook Noodles: Add the noodles to the boiling water and cook for 2 to 4 minutes, or until they are tender but still firm to the bite.
- Drain and Rinse: Once the noodles are cooked, drain them carefully and rinse them briefly under cold water to stop the cooking process and remove excess starch.
Notes
- Dissolving baking soda in warm water activates its leavening properties, which helps create the characteristic chewy texture of ramen noodles.
- Resting the dough is crucial as it allows gluten to relax, making the dough easier to roll out thinly.
- Be sure not to overcook the noodles; they should retain a slight firmness for authentic ramen texture.
- Flouring the surface and noodles helps prevent sticking during rolling and cutting.
- Use a pasta cutter for uniform noodle thickness or a sharp knife if unavailable.


