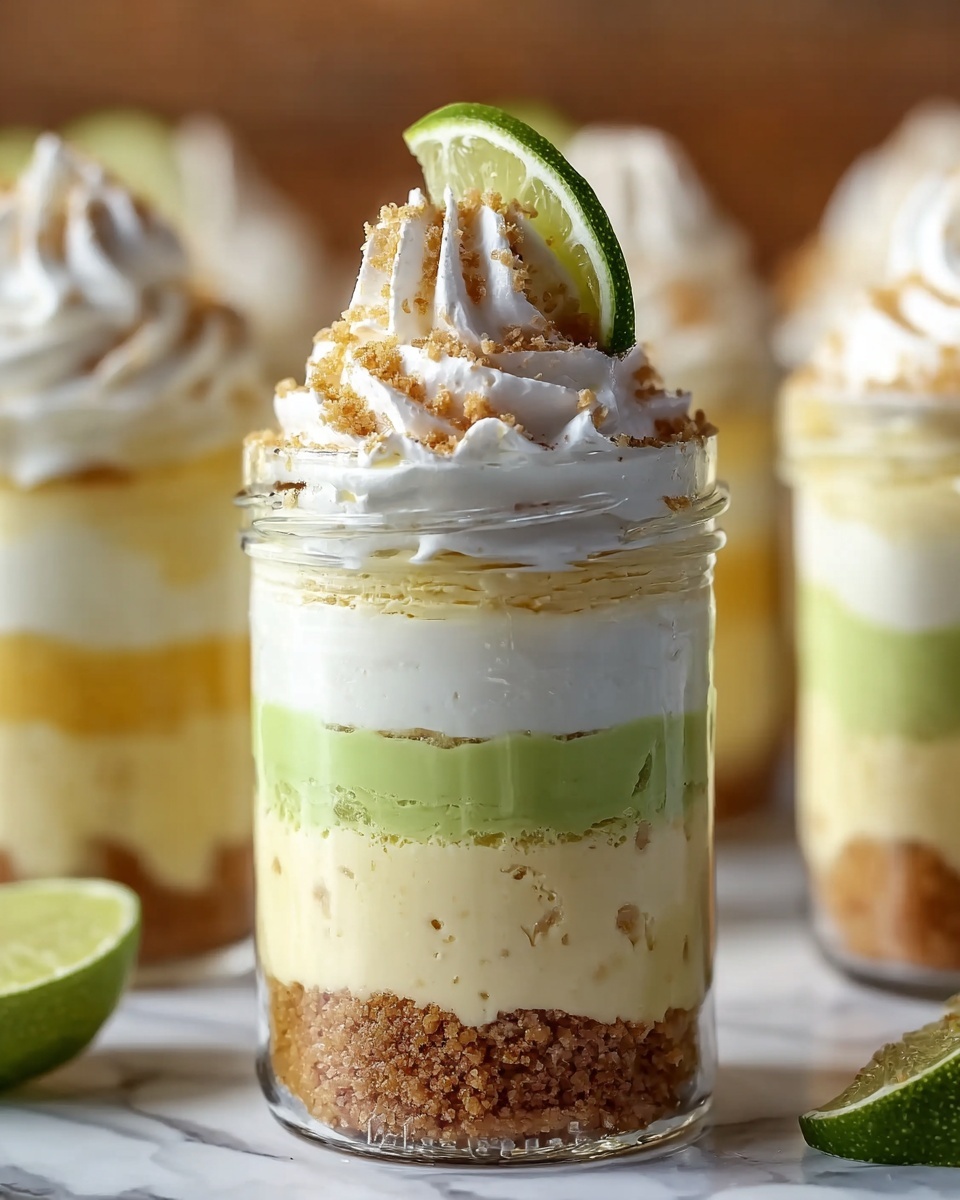
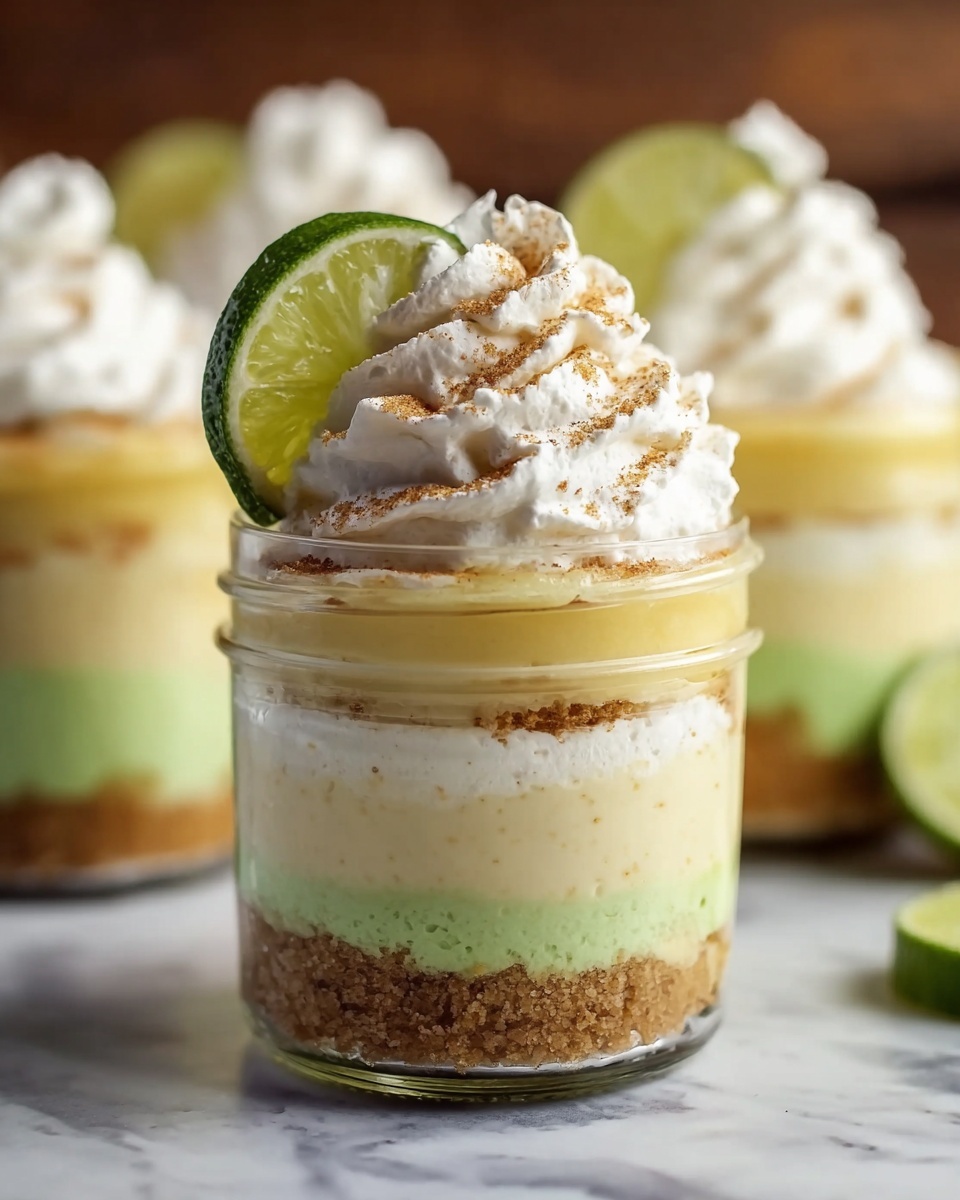
If you adore the vibrant, tangy flavors of classic Key Lime Pie but want a fun, portable twist, this Key Lime Pie Jars Recipe will quickly become your go-to dessert. Imagine layers of crisp graham cracker crust, luscious creamy lime filling, and airy whipped topping all nestled in individual jars — perfect for sharing at summer gatherings or savoring any day you crave a burst of citrusy delight. This recipe captures everything that makes Key Lime Pie irresistible, while presenting it in a charming, convenient way that’s sure to brighten any table.

Ingredients You’ll Need
These simple ingredients come together beautifully to create a dessert that is fresh, creamy, and perfectly balanced. Each item plays an essential role in building the texture, sweetness, and signature tang you expect from a Key Lime Pie.
- Graham cracker crumbs: The buttery, crunchy base that adds a familiar and satisfying texture to each jar.
- Granulated sugar: Provides the right amount of sweetness to balance the tartness of the lime.
- Unsalted butter, melted: Binds the crust together for that crisp, flavorful foundation.
- Sweetened condensed milk: Creamy and delightfully rich, it’s the heart of the pie’s indulgent filling.
- Key lime juice: Gives the pie its signature tang—with fresh juice popping brighter, but bottled works just as well!
- Lime zest: Adds a punch of citrus aroma and a vibrant burst of lime flavor that lifts every bite.
- Heavy cream, whipped: Lightens the filling and adds a lush texture, making the dessert feel airy and dreamy.
- Extra lime zest (optional): For a final decorative flourish that hints at the flavor waiting inside.
- Optional garnishes (graham cracker crumbs or lime slices): Adds visual appeal and a little extra crunch or tang for the perfect finishing touch.
How to Make Key Lime Pie Jars Recipe
Step 1: Prepare the Crust
Start by combining the graham cracker crumbs, sugar, and melted butter in a medium bowl. This mixture creates the crispy base your Key Lime Pie Jars will rest on. Once well combined, evenly divide the mixture among your jars or dessert cups, pressing it lightly to form a solid, even crust layer. This step sets the foundation for that perfect crunch beneath the creamy filling.
Step 2: Whisk the Filling
Next, grab a large bowl and whisk together the sweetened condensed milk, key lime juice, and lime zest until you get a smooth, thickened mixture. This is where the magic begins—the sweet yet tangy filling that defines the pie. To keep it light and fluffy, gently fold in the whipped heavy cream (or whipped topping) until everything is fully combined and silky smooth.
Step 3: Assemble the Jars
Spoon the luscious lime filling over the crust in each jar, filling them about two-thirds full. The creamy layer should smoothly nestle above the crunchy crust, creating a beautiful contrast in textures. Using around one-third of a cup per jar is a good guideline, but feel free to adjust depending on the size of your jars.
Step 4: Add the Whipped Cream
Now for the crowning touch: top each jar with a generous dollop of whipped cream. Spread it out evenly for a soft, snowy topping that will delight your eyes as much as your taste buds. This finishing layer makes the jars feel indulgently rich and inviting.
Step 5: Garnish and Chill
Sprinkle extra lime zest over the whipped cream, and add a pinch of graham cracker crumbs or a small lime slice for an extra splash of color and texture. Then, pop the jars into the fridge and let them chill for at least 2 hours. This step is essential as it allows the flavors to meld and the filling to set into the perfect creamy consistency.
Step 6: Serve and Enjoy
Once chilled and set, your Key Lime Pie Jars are ready to wow! Grab a spoon, dive in directly from the jars, and enjoy every tangy, creamy bite. These individual servings make dessert not only delicious but delightfully effortless to serve.
How to Serve Key Lime Pie Jars Recipe
Garnishes
Simple garnishes can elevate your Key Lime Pie Jars from charming to unforgettable. Fresh lime zest adds brightness and color, while a tiny slice of lime on the rim signals the fresh citrus essence inside. For texture lovers, a sprinkle of extra graham cracker crumbs introduces a pleasant crunch with every bite.
Side Dishes
Although the jars are decadent enough on their own, pairing them with light sides like fresh berries or a handful of toasted coconut can complement the citrus flavors beautifully. A crisp green salad or chilled tropical fruit salad can also turn the dessert into a well-rounded summer treat.
Creative Ways to Present
These jars are as versatile as they are delicious. Try layering the crust and filling in mini mason jars for party favors or picnic desserts, or create a Key Lime Pie bar where guests add their own garnishes. Transparent jars also allow the pretty layers and colors to shine, making the presentation part of the overall enjoyment.
Make Ahead and Storage
Storing Leftovers
Any leftover Key Lime Pie Jars should be tightly covered with plastic wrap or lids and stored in the refrigerator. They’ll keep well for 3 to 4 days, making them ideal for preparing ahead of time or enjoying over several nights.
Freezing
While freezing might slightly impact the texture of the whipped cream and crust, you can freeze the jars for up to a month if necessary. Thaw in the refrigerator overnight before serving, but keep in mind the crust might lose some of its crispness.
Reheating
This dessert is best enjoyed chilled, so reheating is not recommended. Simply allow the jars to sit at room temperature for 10 to 15 minutes if you prefer a slightly less cold dessert.
FAQs
Can I use regular limes instead of key limes?
Absolutely! Regular limes can be used if key limes are unavailable. The flavor will still be delightfully tangy, just slightly less intense. Adding extra lime zest can help boost the aroma and freshness.
Is it necessary to use heavy cream, or can I use whipped topping?
Heavy cream is preferred for a rich, authentic texture, but whipped topping is a convenient alternative that still yields deliciously creamy results. Choose whichever suits your taste and pantry!
How many jars does this recipe make?
This recipe yields 6 to 8 serving jars, depending on the size of your containers. It’s perfect for a small crowd or for making ahead to enjoy over time.
Can I make these jars without refrigeration?
Since the filling contains dairy and lime juice, refrigeration is necessary to ensure the dessert sets properly and remains safe to eat. Always chill them for at least 2 hours before serving.
What can I substitute for graham cracker crumbs in the crust?
If graham cracker crumbs aren’t available, crushed digestive biscuits or vanilla wafers work beautifully as a substitute, providing a similar sweetness and texture to the base layer.
Final Thoughts
There’s something wonderfully joyful about sharing these Key Lime Pie Jars Recipe with friends and family. The combination of creamy, tangy filling and crunchy crust all served in charming jars makes dessert effortless and memorable. Whether you’re new to key lime desserts or a longtime fan, this recipe is sure to brighten your day and inspire smiles at any occasion. Give it a try—you won’t regret it!
Print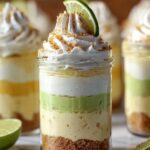
Key Lime Pie Jars Recipe
- Prep Time: 20 minutes
- Cook Time: 0 minutes
- Total Time: 2 hours 20 minutes (including chilling time)
- Yield: 6-8 servings
- Category: Dessert
- Method: No-Cook
- Cuisine: American
Description
These Key Lime Pie Jars are a delightful and easy-to-make no-bake dessert that combines a buttery graham cracker crust with a creamy, tangy key lime filling. Perfect for summer gatherings or whenever you want a refreshing treat, these mini pies are served in individual jars for a charming presentation and convenient portion control.
Ingredients
Crust
- 1 1/2 cups graham cracker crumbs (about 12 full crackers, crushed)
- 1/4 cup granulated sugar
- 6 tablespoons unsalted butter, melted
Filling
- 1 (14 oz) can sweetened condensed milk
- 1/2 cup key lime juice (fresh or bottled)
- 1 tablespoon lime zest (from key limes or regular limes)
- 1 cup heavy cream, whipped (or 2 cups whipped topping)
Topping & Garnish
- 1 cup whipped cream (or whipped topping)
- Extra lime zest (for garnish)
- Graham cracker crumbs or lime slices (optional, for garnish)
Instructions
- Prepare the crust: In a medium bowl, combine the graham cracker crumbs, granulated sugar, and melted butter. Mix until the crumbs are evenly coated and hold together when pressed. Divide this mixture evenly among 6 to 8 (8 oz) mason jars or dessert cups, pressing lightly into the bottom of each jar to form the crust layer, about 2 to 3 tablespoons per jar.
- Make the filling: In a large bowl, whisk together the sweetened condensed milk, key lime juice, and lime zest until the mixture is smooth and starts to thicken slightly. Gently fold in the whipped heavy cream or whipped topping until fully incorporated and creamy.
- Assemble jars: Spoon the key lime filling over the graham cracker crust in each jar, filling them about two-thirds full. This amount is approximately one-third cup per jar depending on the jar size.
- Add topping: Top each jar with a generous dollop of whipped cream or whipped topping, spreading it evenly for a smooth finish.
- Garnish and chill: Sprinkle extra lime zest and a pinch of graham cracker crumbs on top for decoration. You can also garnish with a small slice of lime for an elegant touch. Refrigerate the jars for at least 2 hours to allow the filling to set properly.
- Serve and enjoy: Serve the key lime pie jars chilled straight from the refrigerator. Enjoy each jar with a spoon for a refreshing and convenient dessert experience.
Notes
- You can use bottled key lime juice if fresh key limes are not available, but fresh juice will give the best flavor.
- For a lighter option, substitute whipped topping for heavy cream.
- These jars can be prepared a day in advance and kept refrigerated overnight.
- Use 8 oz jars for standard serving sizes; adjust filling quantity if using larger or smaller jars.
- Optional garnish like lime slices or extra lime zest adds a nice visual and flavor boost.


