
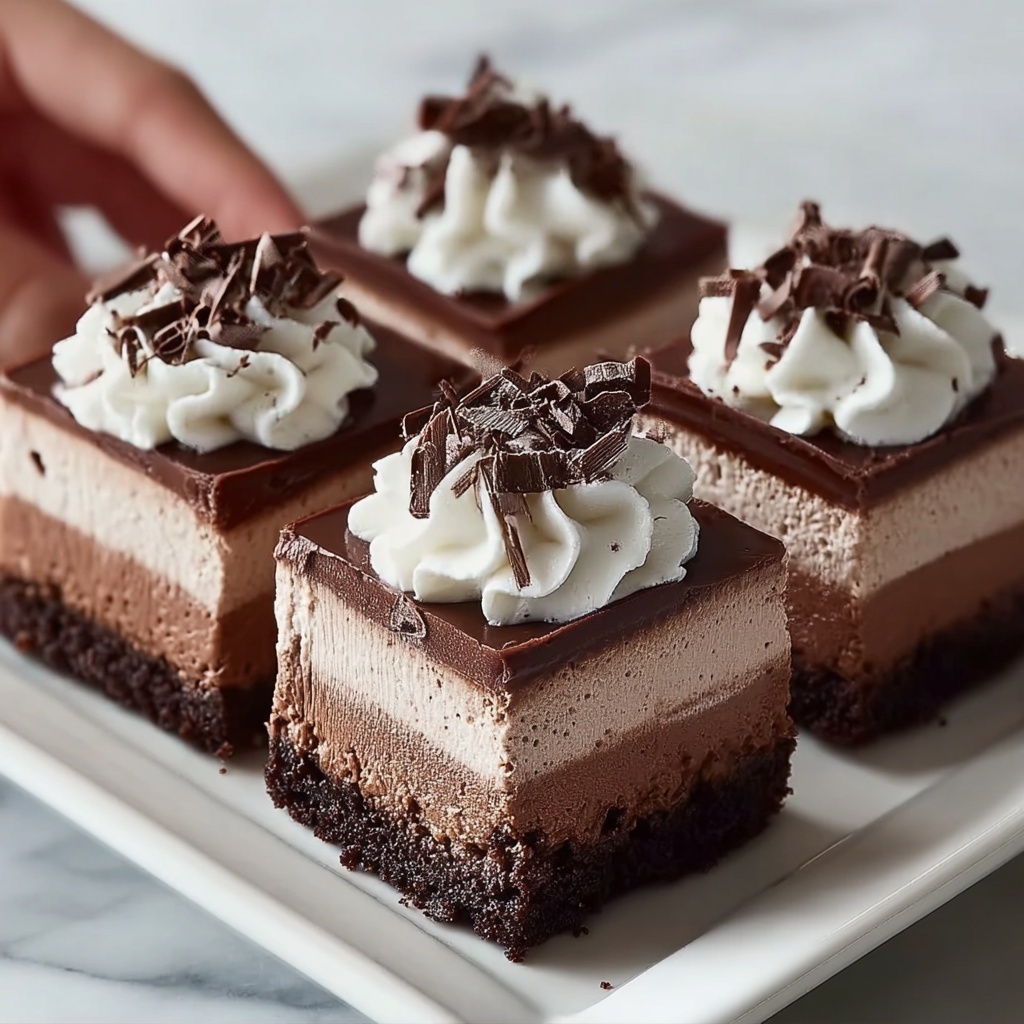
If you have a sweet tooth and love chocolate in all its creamy glory, you’re going to adore this No-Bake Chocolate Mousse Bars Recipe. Imagine a luscious mousse layered over a rich chocolate cookie crust, topped with a silky chocolate ganache and a dollop of whipped cream—it’s elegant, indulgent, and surprisingly simple to make without turning on your oven. Perfect for impressing guests or treating yourself on a cozy evening, this dessert combines classic chocolate flavors with fluffy texture, creating a slice of heaven in every bite.
Ingredients You’ll Need
Gathering the right ingredients is the first step to mastering this No-Bake Chocolate Mousse Bars Recipe. Each component plays a crucial role—from the crunchy chocolate cookie crumbs that form the sturdy base, to the silky heavy cream and melted chocolate that build the divine mousse and ganache layers. These simple ingredients come together to create a complex and satisfying dessert.
- 2 cups chocolate cookie crumbs: These crumbs give you a fudgy, crunchy crust that holds the mousse perfectly.
- ½ cup melted butter: Adds richness and helps bind the crust firmly together.
- 1 ½ cups heavy cream: Whipped with chocolate to create the light and airy mousse layer.
- 1 cup semisweet chocolate chips, melted: Essential for that deep chocolate flavor in the mousse.
- ¼ cup powdered sugar: Sweetens the mousse gently without overpowering the chocolate.
- 1 teaspoon vanilla extract: Enhances the chocolate’s richness and adds a warm note.
- ¾ cup semisweet chocolate chips: For the luscious chocolate ganache on top.
- ½ cup heavy cream: Heated to melt the chocolate, creating a glossy ganache layer.
- ½ cup whipped cream: Optional but highly recommended for that lovely finishing touch.
- Chocolate shavings or cocoa powder (optional): For garnish and extra chocolate goodness.
How to Make No-Bake Chocolate Mousse Bars Recipe
Step 1: Prepare the Crust
Start by mixing your chocolate cookie crumbs with the melted butter until every crumb is coated. This mixture will become the base of your bars, offering a crunchy contrast to the mousse. Pack this mixture firmly into the bottom of an 8×8-inch dish, ensuring an even and solid layer. Once set, pop it into the fridge to chill while you move on to the mousse filling.
Step 2: Make the Mousse
Next, whip together the heavy cream, melted semisweet chocolate chips, powdered sugar, and vanilla extract until the mixture turns fluffy and light. This step is where the magic happens—the mousse becomes airy yet intensely chocolatey. Once ready, spread it evenly over your chilled crust, creating a beautiful creamy layer that sits perfectly atop the crunchy base. Refrigerate again to allow it to set slightly before adding the next layer.
Step 3: Add the Chocolate Layer
For the final chocolate layer, warm the heavy cream until it’s just warm to the touch—never boiling. Pour it over the remaining semisweet chocolate chips and let it sit for a minute to melt the chips fully. Then stir the mixture gently until smooth and glossy. This ganache will provide a rich, shiny topping that finishes the bars beautifully. Spread it evenly over the mousse layer, then chill your creation for at least 4 hours or until fully set.
Step 4: Garnish and Slice
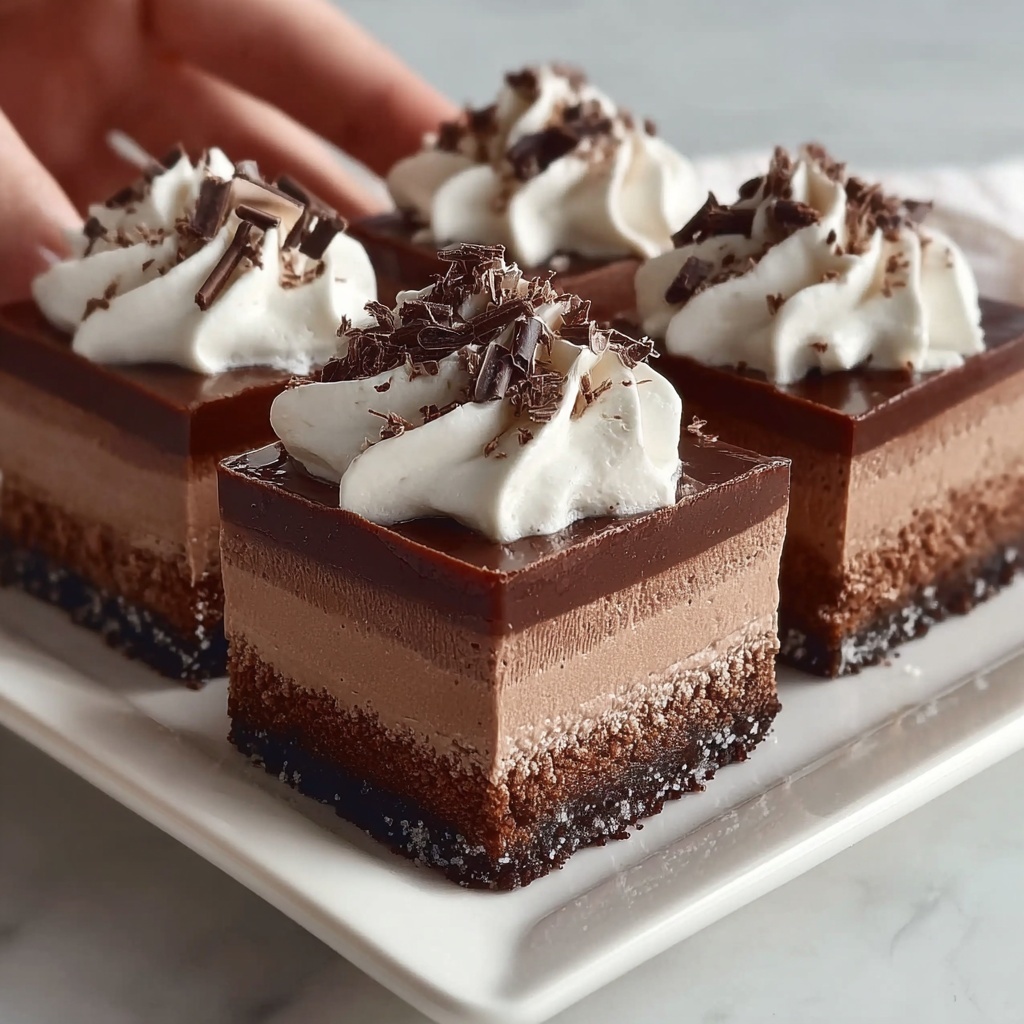
Once the bars have chilled and set, it’s time to serve. Top with a generous dollop of whipped cream and sprinkle chocolate shavings or a light dusting of cocoa powder for that elegant, café-style finish. Use a sharp knife to carefully slice into 12 decorative bars and get ready to indulge.
How to Serve No-Bake Chocolate Mousse Bars Recipe
Garnishes
Chocolate mousse bars are absolutely fabulous on their own, but adding garnishes can elevate the experience. Fresh berries, a sprig of mint, or a pinch of sea salt can add a delightful burst of flavor and a pop of color. Don’t forget the classic whipped cream and chocolate shavings to make every serving look as irresistible as it tastes.
Side Dishes
Serve these bars alongside a scoop of vanilla or coffee ice cream for a cool contrast in temperature and flavor. A delicate fruit salad or a light espresso also complements the richness of the bars beautifully, balancing the sweetness and helping to cleanse the palate.
Creative Ways to Present
Looking to impress for a party or special occasion? Layer your mousse bars in individual glass cups or small jars for a stylish presentation. You could also create mini versions using a muffin tin for portable, party-perfect treats. Drizzle a raspberry coulis or caramel sauce on top just before serving for a wow-worthy finish.
Make Ahead and Storage
Storing Leftovers
You can keep your No-Bake Chocolate Mousse Bars refrigerated in an airtight container for up to 3 days. The mousse stays creamy and the crust maintains its crunch, making them perfect for prepping ahead of time or enjoying as a treat throughout the week.
Freezing
If you want to save your bars for longer, freezing is a great option. Wrap them well in plastic wrap and foil before placing in the freezer. They’ll keep beautifully for up to 1 month. Thaw overnight in the fridge before serving to maintain that perfect mousse texture.
Reheating
These bars are best enjoyed chilled and are not meant to be reheated, as warming will melt the mousse and ganache, losing their smooth textures. Just take them out of the fridge a few minutes before serving if you prefer a slightly softer bite.
FAQs
Can I use a different type of chocolate?
Absolutely! While semisweet chocolate is recommended for its balance of sweetness and depth, you can use dark or milk chocolate depending on your preference. Just adjust the powdered sugar slightly to maintain the desired sweetness.
Do I need a special pan for this recipe?
Not at all. A standard 8×8-inch baking dish works perfectly, but any similar-sized square or rectangular dish will do. Just make sure your crust layer is packed firmly and evenly for the best results.
Can I substitute the heavy cream?
The heavy cream is key to achieving that luxuriously creamy mousse texture. Alternatives like coconut cream can work, but the flavor and consistency may change, giving a different but still delicious twist.
How long does it take to set in the fridge?
The mousse layer firms up fairly quickly, but the final set with the ganache layer requires at least 4 hours in the refrigerator to become perfectly sliceable. Patience here really pays off!
Is this recipe suitable for beginners?
Definitely! The No-Bake Chocolate Mousse Bars Recipe is straightforward, with clear steps and no baking involved, making it ideal even if you’re new to dessert making. You’ll feel like a pro by the time you’re slicing into these gorgeous bars.
Final Thoughts
There’s nothing quite as satisfying as a dessert that looks impressive but is easy to make, and this No-Bake Chocolate Mousse Bars Recipe hits that sweet spot perfectly. With layers of rich chocolate, light mousse, and a crunchy base, it’s a dessert that delights every sense and makes sharing with loved ones a joy. I can’t wait for you to try this at home and watch how this decadent treat quickly becomes a household favorite.
Print
No-Bake Chocolate Mousse Bars Recipe
- Prep Time: 15 minutes
- Cook Time: 0 minutes
- Total Time: 4 hours 15 minutes
- Yield: 12 bars
- Category: Dessert
- Method: No-Cook
- Cuisine: American
Description
These No-Bake Chocolate Mousse Bars feature a crunchy chocolate cookie crust topped with a light and fluffy chocolate mousse layer, finished with a smooth chocolate ganache and optional whipped cream and chocolate shavings. Perfect for chocolate lovers seeking a decadent dessert without turning on the oven.
Ingredients
Crust
- 2 cups chocolate cookie crumbs
- ½ cup melted butter
Mousse Filling
- 1 ½ cups heavy cream
- 1 cup semisweet chocolate chips, melted
- ¼ cup powdered sugar
- 1 teaspoon vanilla extract
Chocolate Layer
- ¾ cup semisweet chocolate chips
- ½ cup heavy cream
Topping
- ½ cup whipped cream
- Chocolate shavings or cocoa powder (optional)
Instructions
- Prepare the Crust: In a bowl, thoroughly mix the chocolate cookie crumbs with the melted butter until well combined and crumbly.
- Shape the Crust: Press the crumb mixture firmly and evenly into the bottom of an 8×8-inch dish to form a solid base.
- Chill the Crust: Place the crust in the refrigerator to chill and set while preparing the mousse filling.
- Make the Mousse: In a mixing bowl, beat the heavy cream, melted semisweet chocolate chips, powdered sugar, and vanilla extract together until the mixture becomes light and fluffy.
- Spread Mousse on Crust: Evenly spread the chocolate mousse over the chilled crust layer in the dish.
- Refrigerate Mousse Layer: Return the dish to the refrigerator to chill and firm up the mousse layer while preparing the chocolate ganache layer.
- Prepare the Chocolate Layer: Warm the heavy cream until it is hot but not boiling, then pour it over the semisweet chocolate chips and let it sit for about a minute.
- Make Ganache: Stir the cream and chocolate chips mixture gently until it is smooth and glossy.
- Spread Ganache: Evenly spread this chocolate ganache over the mousse layer in the dish.
- Chill to Set: Refrigerate the entire dessert for at least 4 hours, or until fully set and firm.
- Garnish: Before serving, optionally top the bars with whipped cream and sprinkle with chocolate shavings or cocoa powder for extra flair.
- Serve: Slice the dessert into 12 bars and enjoy your rich and creamy no-bake chocolate mousse bars.
Notes
- Ensure the cream for the ganache is warm but not boiling to avoid seizing the chocolate.
- Use a good quality semisweet chocolate for best flavor and texture.
- For easier slicing, let the bars chill overnight.
- Optional toppings like nuts or berries can add texture and flavor variations.
- Store leftovers covered in the refrigerator for up to 4 days.


