
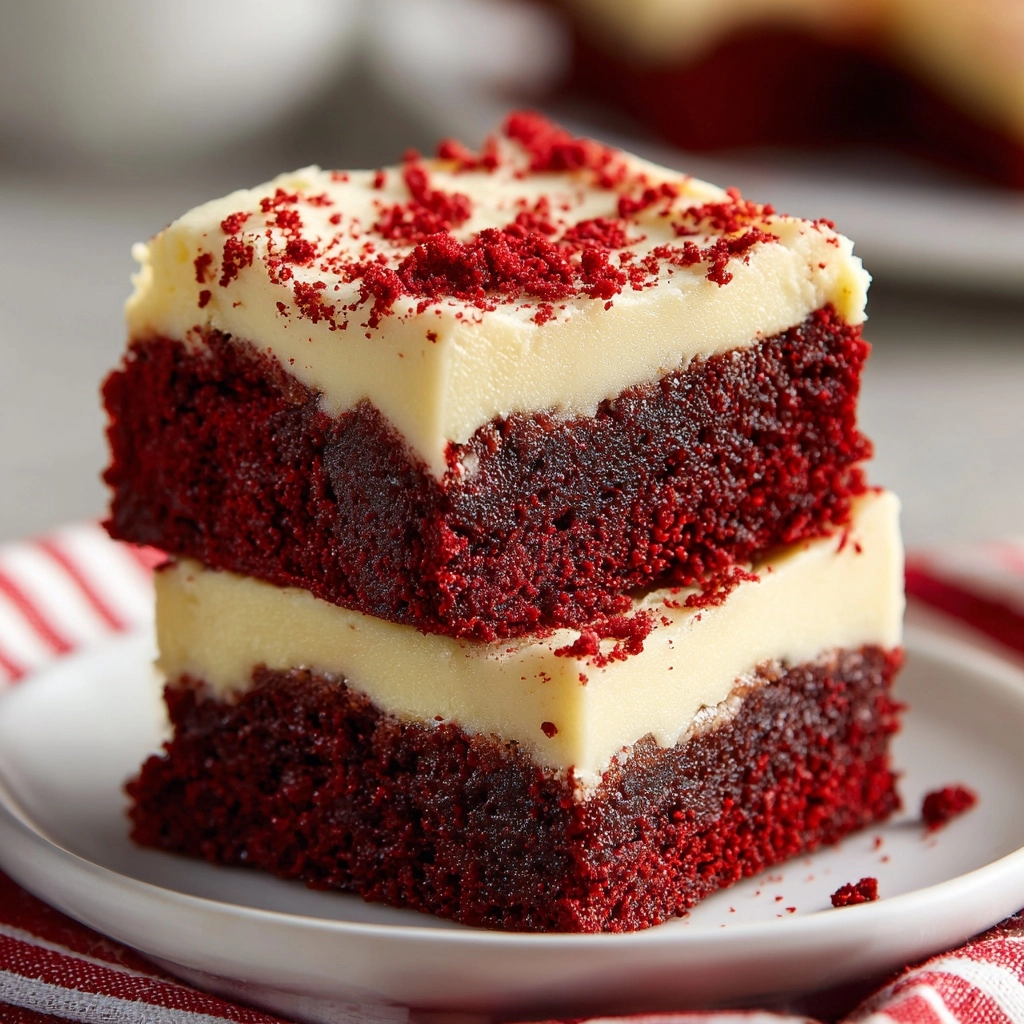
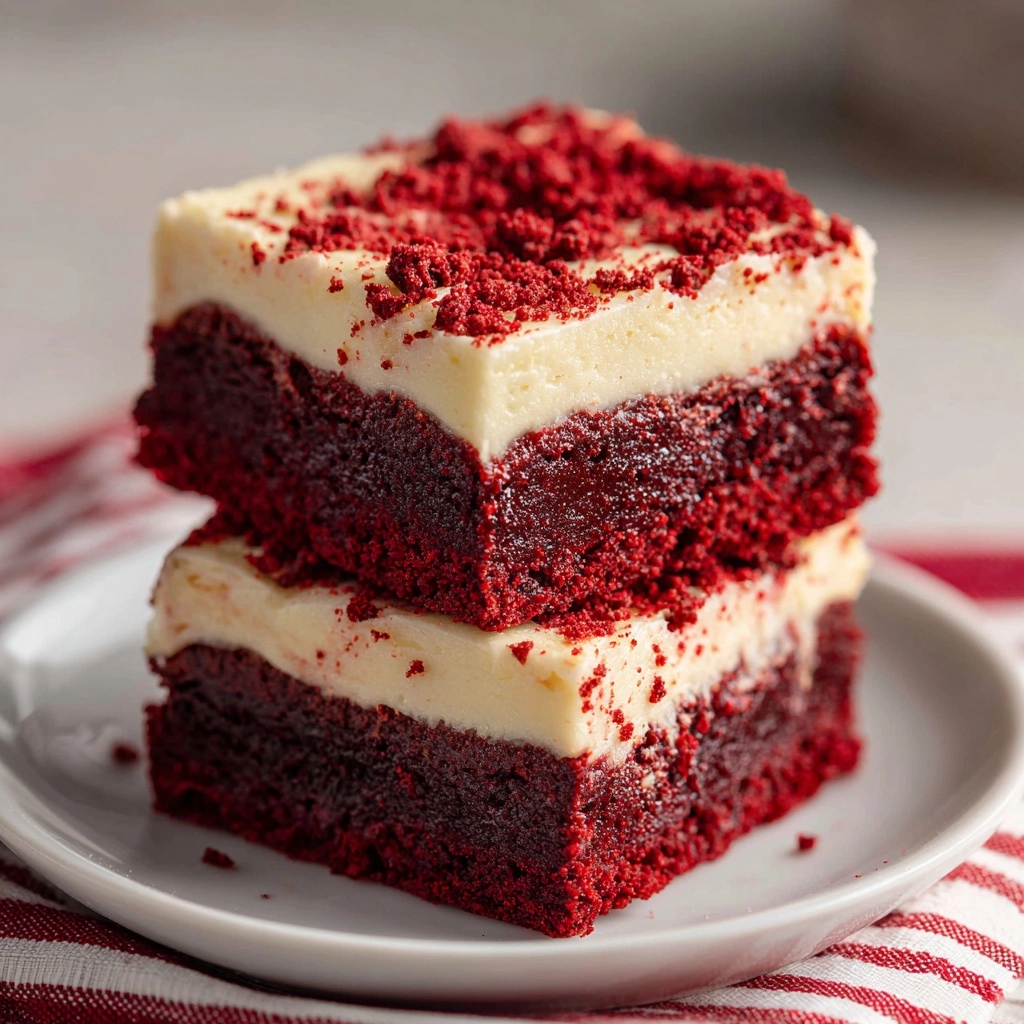
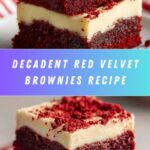
If you think classic brownies are indulgent, just wait until you sink your teeth into these Red Velvet Brownies! They deliver all the rich, fudgy decadence you crave—only with that iconic vibrant red hue and a subtle tang that sets red velvet apart from regular chocolate desserts. Whether you’re a lifelong fan of red velvet cake or just looking for a new twist on your favorite fudgy treat, this recipe is truly a showstopper. Imagine serving up ruby-red squares with snowy dollops of cream cheese frosting or melting pools of white chocolate chips. These brownies are as irresistible as they are eye-catching, and they’re guaranteed to become your new go-to for celebrations or cozy nights in.
Ingredients You’ll Need
The magic of these Red Velvet Brownies lies in their simple, pantry-friendly ingredients. Each one is chosen for the flavor, tender texture, or signature color it lends to the batch—so don’t skip a thing!
- Unsalted butter: Melted butter adds richness and helps create that fudgy texture we all love in brownies.
- Granulated sugar: Sweetens the batter just right, helping to balance out the cocoa and red velvet tang.
- Eggs: Provide structure and give the brownies their moist, chewy bite.
- Vanilla extract: Deepens the flavor, pairing perfectly with the cocoa and red tones.
- Red food coloring: Essential for that bold and dramatic red velvet look—liquid or gel both work!
- Distilled white vinegar: Just a splash gives authentic red velvet its signature hint of tang and helps intensify the color.
- All-purpose flour: The backbone of the batter, creating the structure while keeping things soft.
- Baking powder: A touch of lift so your brownies aren’t too dense.
- Salt: Balances out the sweetness and intensifies the other flavors.
- Unsweetened cocoa powder: Just enough for classic chocolate taste without overpowering the red velvet character.
- White chocolate chips or cream cheese chunks (optional): For an extra swirl, melty pools, or pretty toppers—these are a fun bonus!
How to Make Red Velvet Brownies
Step 1: Prepare the Baking Pan
Start by preheating your oven to 350°F (175°C). Line an 8×8-inch baking pan with parchment paper and give it a very light greasing. The parchment makes removing your brownies a breeze and ensures the deep red color stays stunning along every edge.
Step 2: Mix the Wet Ingredients
In a medium bowl, whisk together the melted butter and sugar until the mixture looks smooth, shiny, and a little bit fluffy. Then add the eggs, vanilla extract, red food coloring, and vinegar. Keep whisking until everything is fully combined—your batter should be a gorgeous, vibrant red at this stage.
Step 3: Sift and Add the Dry Ingredients
Grab a separate bowl and sift together the flour, cocoa powder, baking powder, and salt. Sifting helps prevent clumps, especially of cocoa or baking powder, and ensures your brownies come out with the perfect tender crumb. Gradually fold the dry ingredients into the wet mixture, stopping as soon as the last streak of flour disappears. You don’t want to over-mix!
Step 4: Add Mix-ins and Spread the Batter
Now’s the time to swirl in some cream cheese or sprinkle white chocolate chips across the top if you want to elevate your Red Velvet Brownies even more. Gently fold in your favorite mix-in, then spread the batter evenly into your prepared pan with a spatula. The batter will be thick, so coax it into all the corners for uniform baking.
Step 5: Bake and Cool
Bake for 25 to 30 minutes, or until a toothpick inserted into the center comes out with a few moist crumbs attached (no wet batter!). Be careful not to overbake—Red Velvet Brownies are at their best when slightly gooey and fudgy in the middle. Let the brownies cool completely in the pan before cutting into beautiful, even squares.
How to Serve Red Velvet Brownies
Garnishes
Bring out the best in your Red Velvet Brownies by topping them with a swirl of cream cheese frosting, a scattering of extra white chocolate chips, or even a dusting of powdered sugar. Simple sliced strawberries or raspberries add a touch of freshness and look gorgeous against the red background.
Side Dishes
For a decadent dessert platter, serve these brownies beside a scoop of vanilla bean ice cream or a glass of cold milk. If you really want to impress, a dollop of freshly whipped cream or a drizzle of chocolate sauce pairs beautifully with their fudgy texture and red velvet flavor.
Creative Ways to Present
Use cookie cutters to transform your Red Velvet Brownies into hearts, stars, or other fun shapes for holidays and birthdays. Or, build a brownie sundae with layers of brownie chunks, ice cream, and berries. For parties, cut smaller squares and stack them in a pyramid for a wow-worthy centerpiece.
Make Ahead and Storage
Storing Leftovers
Once fully cooled, store your Red Velvet Brownies in an airtight container at room temperature for up to 3 days. If you’ve added cream cheese swirls or frosting, keep them in the fridge and let them come to room temperature before serving for the best texture.
Freezing
Red Velvet Brownies freeze wonderfully. Cut them into squares, wrap individually in plastic wrap, and place in a freezer-safe bag or container. Freeze for up to 2 months; thaw at room temperature for a quick treat, or in the fridge overnight if they have a cream cheese swirl.
Reheating
If you want your brownies warm and gooey, a quick 10-second zap in the microwave does the trick. Be careful not to overheat, especially if they are frosted, as this can make the topping runny.
FAQs
Can I double the recipe for a larger crowd?
Absolutely! Just double all the ingredients and bake in a 9×13-inch pan. Keep a close eye on the baking time—the brownies may need a few extra minutes but watch for those telltale moist crumbs on a toothpick.
What if I don’t have red food coloring?
You can make the brownies without it, but you’ll lose that signature red velvet look. For a natural option, try beet juice powder, though the shade won’t be as vivid as traditional food coloring.
Are Red Velvet Brownies supposed to be fudgy or cakey?
This recipe gives you brownies that are rich, fudgy, and moist—not cakey! If you prefer a lighter texture, you can add an egg white or a little extra baking powder, but fans agree the dense bite is part of the appeal.
Can I use this recipe to make brownie bites in a muffin tin?
Yes, simply spoon the batter into greased muffin tin cups, filling them about 2/3 full. Bake for a shorter time, around 15-20 minutes, and keep an eye on them so they don’t overbake.
Is it possible to make Red Velvet Brownies gluten-free?
Definitely! Substitute a good 1:1 gluten-free flour blend for the all-purpose flour. Check that all other ingredients are gluten-free, and bake as directed. The fudgy texture should remain just as wonderful.
Final Thoughts
There’s something magical about the color, flavor, and pure delight these Red Velvet Brownies bring to any table. Whether it’s a holiday, a date night, or a casual get-together, you’ll find yourself reaching for this recipe again and again. Go ahead—treat yourself and your loved ones to a batch. They’re destined to become a new classic in your kitchen!
Print
Red Velvet Brownies Recipe
- Prep Time: 15 minutes
- Cook Time: 30 minutes
- Total Time: 45 minutes
- Yield: 16 brownies
- Category: Dessert
- Method: Baking
- Cuisine: American
- Diet: Vegetarian
Description
Indulge in the rich, vibrant flavors of these Red Velvet Brownies that are a delightful twist on the classic brownie. With a moist and fudgy texture, these brownies are sure to be a hit at any gathering or as a special treat for yourself.
Ingredients
Dry Ingredients:
- 3/4 cup all-purpose flour
- 1/4 teaspoon baking powder
- 1/4 teaspoon salt
- 2 tablespoons unsweetened cocoa powder
Wet Ingredients:
- 1/2 cup unsalted butter, melted
- 1 cup granulated sugar
- 2 large eggs
- 2 teaspoons vanilla extract
- 1 tablespoon red food coloring
- 1/4 teaspoon distilled white vinegar
Optional Toppings:
- 1/2 cup white chocolate chips or cream cheese chunks
Instructions
- Preheat the oven: Preheat the oven to 350°F (175°C) and prepare an 8×8-inch baking pan by lining it with parchment paper and greasing lightly.
- Mix wet ingredients: In a medium bowl, whisk together melted butter and sugar until smooth. Add eggs, vanilla extract, red food coloring, and vinegar, mixing until combined.
- Combine dry ingredients: In a separate bowl, sift together flour, cocoa powder, baking powder, and salt. Gradually fold the dry mixture into the wet mixture until just combined.
- Bake: Spread the batter into the prepared pan. Optionally, swirl in cream cheese or sprinkle white chocolate chips on top. Bake for 25 to 30 minutes until a toothpick comes out with a few moist crumbs.
- Cool and serve: Allow the brownies to cool completely before cutting into squares.
Notes
- Do not overbake to keep the brownies moist and fudgy.
- For a more pronounced cocoa flavor, increase cocoa powder to 3 tablespoons.
- Pair with cream cheese frosting for extra decadence.
Nutrition
- Serving Size: 1 brownie
- Calories: 160
- Sugar: 15 g
- Sodium: 80 mg
- Fat: 7 g
- Saturated Fat: 4 g
- Unsaturated Fat: 2 g
- Trans Fat: 0 g
- Carbohydrates: 23 g
- Fiber: 1 g
- Protein: 2 g
- Cholesterol: 30 mg
