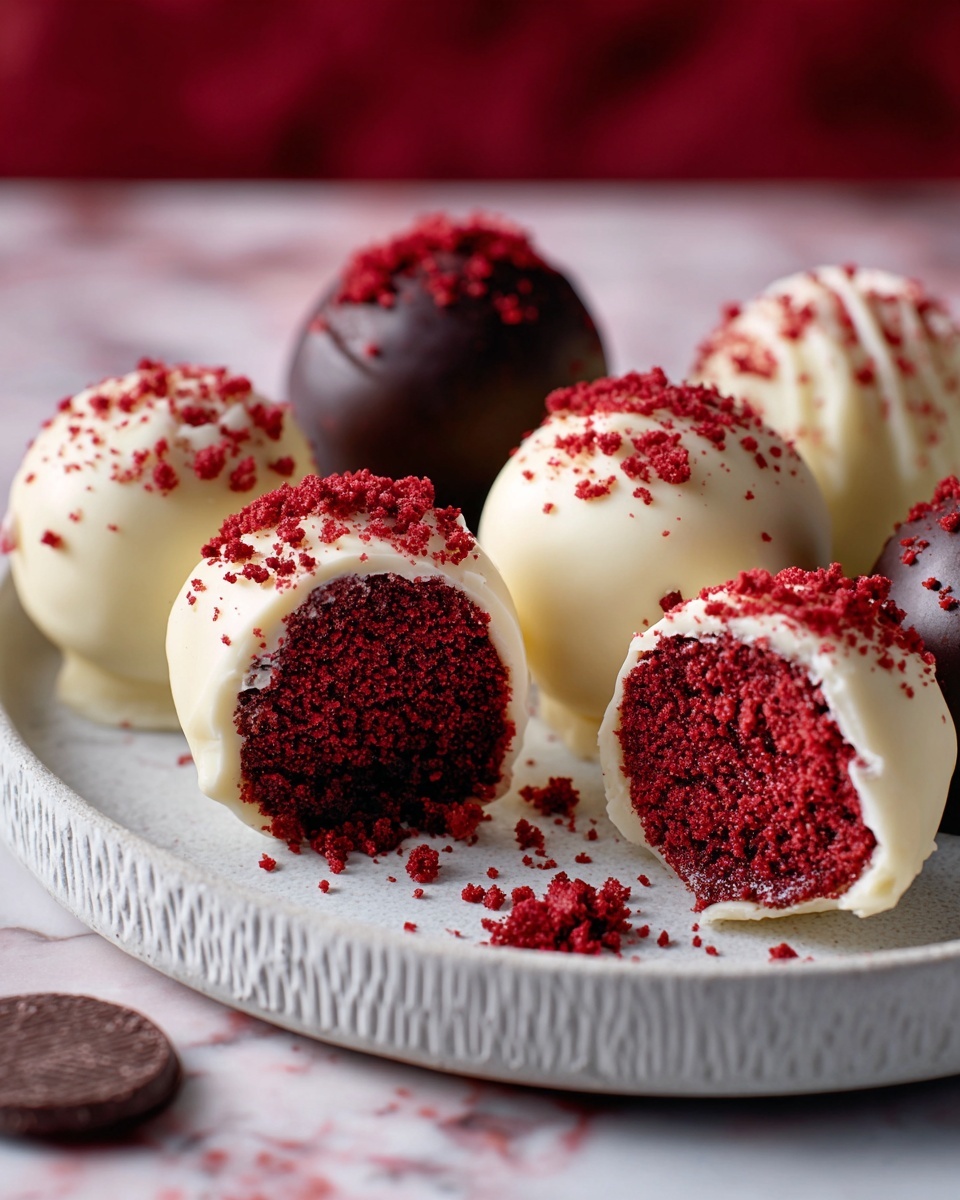
If you’re a fan of all things red velvet and love bite-sized indulgences, then the Red Velvet Cake Balls Recipe is about to become your new favorite treat. These little wonders combine the moist, tender crumb of red velvet cake with the creamy richness of cream cheese frosting, all wrapped in a glossy shell of chocolate or candy melts. Perfect for parties, gifts, or just sneaking one (or five!) when no one’s looking, these cake balls are irresistibly delightful and surprisingly simple to make. Let me take you through the whole process so you can enjoy these luscious bites whenever the craving strikes.
Ingredients You’ll Need
For this Red Velvet Cake Balls Recipe, you only need a handful of ingredients, each playing an essential role in creating that perfect balance of flavor, texture, and that signature red hue. The simplicity of the ingredients makes it easy to whip up these treats any time, while still producing a show-stopping result.
- Red velvet cake mix: This gives you the unmistakable flavor and vibrant color foundational to the dessert.
- Cream cheese frosting: The silky, tangy frosting binds the crumbled cake, keeping the balls moist and rich.
- Chocolate or candy melts: These provide a smooth, firm coating that seals in freshness and adds an elegant finish.
How to Make Red Velvet Cake Balls Recipe
Step 1: Bake the Cake
The first step is to bake your red velvet cake. Whether you choose a boxed mix or make one from scratch, bake it according to the instructions until perfectly done. Allow it to cool completely before moving on; this is crucial because warm cake would melt the frosting and make your mixture too sticky to work with.
Step 2: Combine Cake with Frosting
Once your cake is thoroughly cooled, crumble it into a large bowl using your hands or a fork. Add the cream cheese frosting and gently mix until the cake and frosting are uniformly combined. This luscious mixture is the heart of your cake balls, providing both flavor and just enough moisture to hold their shape.
Step 3: Shape into Balls
Next, roll the mixture into quarter-sized balls using your palms. Try to make each one as smooth and even as possible — this helps them look more polished and makes the coating step easier. Place each ball on a baking sheet lined with wax paper so they don’t stick.
Step 4: Chill to Set
Pop the baking sheet into the refrigerator for at least one hour. Chilling firms up the cake balls and makes dipping them into chocolate or candy melts a much cleaner, mess-free process.
Step 5: Melt the Coating
While the cake balls are chilling, gently melt your chocolate or candy melts according to the package instructions. Be patient here to avoid scorching the chocolate, which can ruin the smooth finish and flavor.
Step 6: Dip the Cake Balls
Once firm, take each cake ball and dip it into the melted chocolate until fully coated. Use a fork or dipping tool to lift them out, letting the excess drip off. Return the coated balls to the wax paper-lined sheet, ready to set.
Step 7: Let the Coating Harden
Allow the chocolate shell to completely harden at room temperature or in the fridge before enjoying or packaging. This crisp coating adds a delightful texture contrast to the soft, creamy inside.
How to Serve Red Velvet Cake Balls Recipe
Garnishes
Enhance the look and taste of your cake balls with beautiful garnishes like sprinkles, crushed nuts, or edible glitter. A touch of sea salt or a drizzle of white chocolate can add an unexpected pop of flavor that guests will love.
Side Dishes
These cake balls stand powerfully on their own, but if you want to serve them alongside something, try pairing with a hot cup of coffee, a creamy latte, or a rich, velvety milk. Fresh berries or whipped cream also complement the cream cheese frosting beautifully.
Creative Ways to Present
Make your Red Velvet Cake Balls Recipe shine by presenting them in colorful cupcake liners, arranging them on a tiered dessert stand, or even skewering them for easy grab-and-go party treats. Wrap them in clear cellophane tied with a festive ribbon for thoughtful homemade gifts.
Make Ahead and Storage
Storing Leftovers
If you have any of these irresistible Red Velvet Cake Balls left (and who wouldn’t?), store them in an airtight container in the refrigerator. They stay fresh for up to a week, preserving both flavor and texture impeccably.
Freezing
For longer storage, these cake balls freeze wonderfully. Place them on a tray to freeze initially, then transfer to a freezer-safe container or bag. When properly stored, they keep well for up to three months without losing their delicious charm.
Reheating
No need to reheat these treats! Let frozen cake balls thaw in the refrigerator overnight before serving. Enjoy them chilled or at room temperature to experience that perfect balance of creaminess and cake.
FAQs
Can I use homemade red velvet cake instead of boxed mix?
Absolutely! Homemade red velvet cake works beautifully in this recipe and gives you total control over the ingredients and flavor.
What kind of frosting is best for Red Velvet Cake Balls Recipe?
Cream cheese frosting is the classic choice because it complements red velvet’s flavor perfectly, adding a tangy richness that balances the sweetness.
Can I use different coatings instead of chocolate?
Yes! Candy melts, white chocolate, or even colored melts can be used to customize the look and taste of your cake balls.
How do I prevent my cake balls from cracking?
Make sure to chill the cake balls thoroughly before dipping, and handle them gently during coating. Using a good ratio of frosting to cake helps keep the mixture cohesive.
Are Red Velvet Cake Balls Recipe suitable for freezing?
Definitely. They freeze well when stored properly, and this makes them great for making ahead for special occasions or gifts.
Final Thoughts
If you’re searching for a fun, festive, and downright delicious treat to impress friends and family, the Red Velvet Cake Balls Recipe is your answer. They’re easy to make, endlessly customizable, and absolutely scrumptious in every bite. Give it a try — you might just find yourself hooked on these charming little delights!
Print
Red Velvet Cake Balls Recipe
- Prep Time: 1 hour 15 minutes
- Cook Time: 35 minutes (for baking cake)
- Total Time: 1 hour 50 minutes
- Yield: 45 cake balls
- Category: Dessert
- Method: Baking
- Cuisine: American
Description
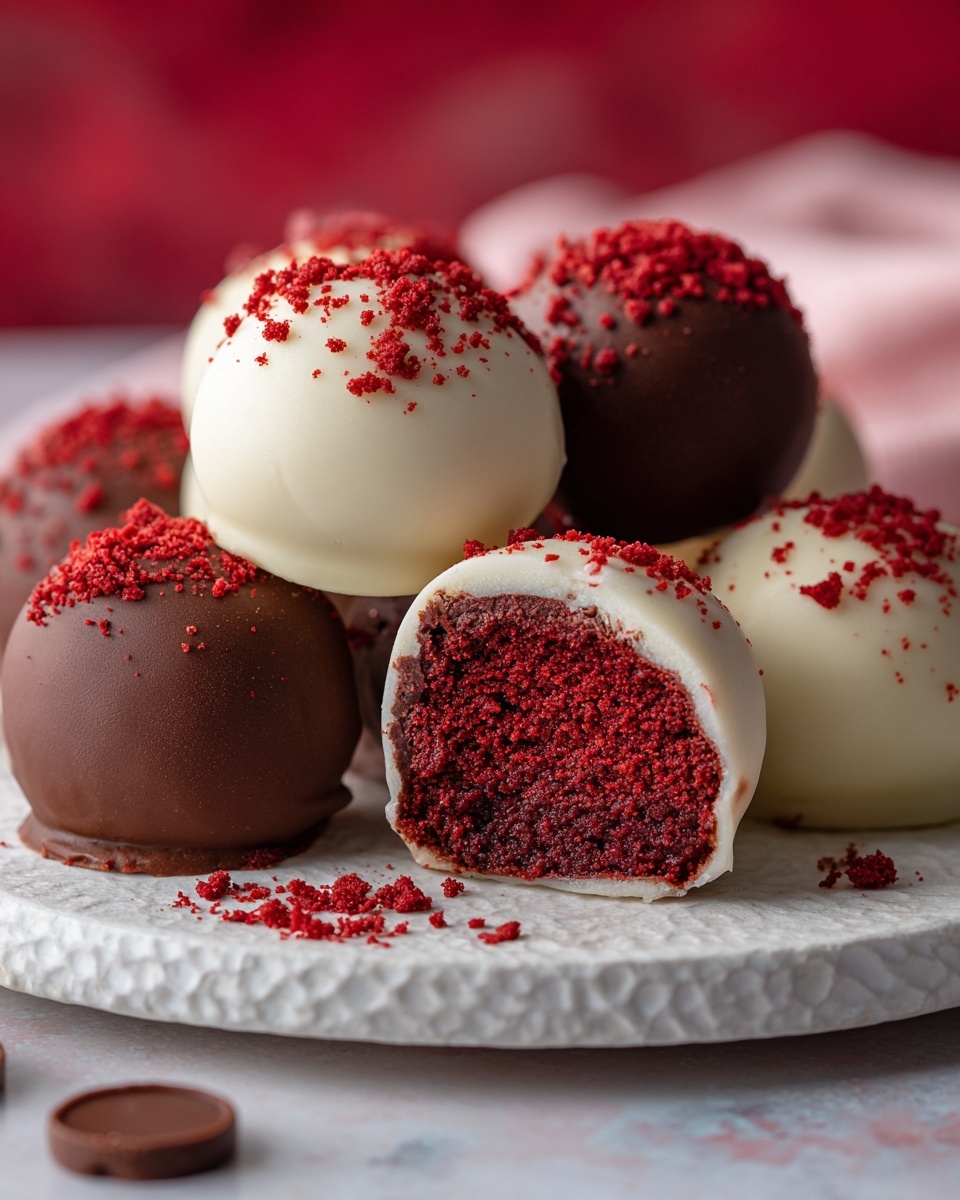
Delicious and visually stunning Red Velvet Cake Balls, perfect bite-sized treats made by combining moist red velvet cake with creamy frosting and coated in smooth chocolate or candy melts. These cake balls are easy to make and a delightful dessert for parties, holidays, or anytime you crave a sweet indulgence.
Ingredients
Red Velvet Cake
- 1 box red velvet cake mix (or homemade red velvet cake)
Frosting
- 1 can (16 oz) cream cheese frosting
Coating
- Chocolate or candy melts for coating (amount as needed)
Instructions
- Bake the cake: Prepare and bake the red velvet cake according to the package instructions or your homemade recipe. Allow the cake to cool completely to room temperature to ensure the cake balls hold their shape.
- Crumble and mix: Crumble the cooled cake into fine crumbs inside a large mixing bowl. Add the entire can of cream cheese frosting and mix thoroughly until the cake and frosting are well combined into a dough-like consistency.
- Form cake balls: Using your hands or a small scoop, roll the mixture into quarter-sized balls. Place each ball on a baking sheet lined with wax or parchment paper to prevent sticking.
- Chill: Refrigerate the cake balls for at least 1 hour. This chilling step firms them up and makes them easier to dip without falling apart.
- Melt coating: Melt the chocolate or candy melts according to the package instructions, usually by microwaving in short bursts and stirring until smooth.
- Dip the cake balls: Using a fork or dipping tool, coat each chilled cake ball by dipping it fully into the melted chocolate. Gently tap off any excess coating and return the coated ball to the lined baking sheet.
- Set the coating: Allow the chocolate coating to harden completely at room temperature or speed up the process by chilling the dipped cake balls in the refrigerator before serving or packaging.
Notes
- For best results, ensure cake is completely cooled before mixing to avoid melting the frosting.
- You can decorate the cake balls with sprinkles, drizzles, or colored candy melts for festive presentations.
- If the cake ball mixture is too sticky, refrigerate it a bit longer to firm up before rolling.
- Store finished cake balls in an airtight container in the refrigerator for up to 5 days.
- Use a stand or hand mixer for easier mixing of cake and frosting if preferred.

