“`html
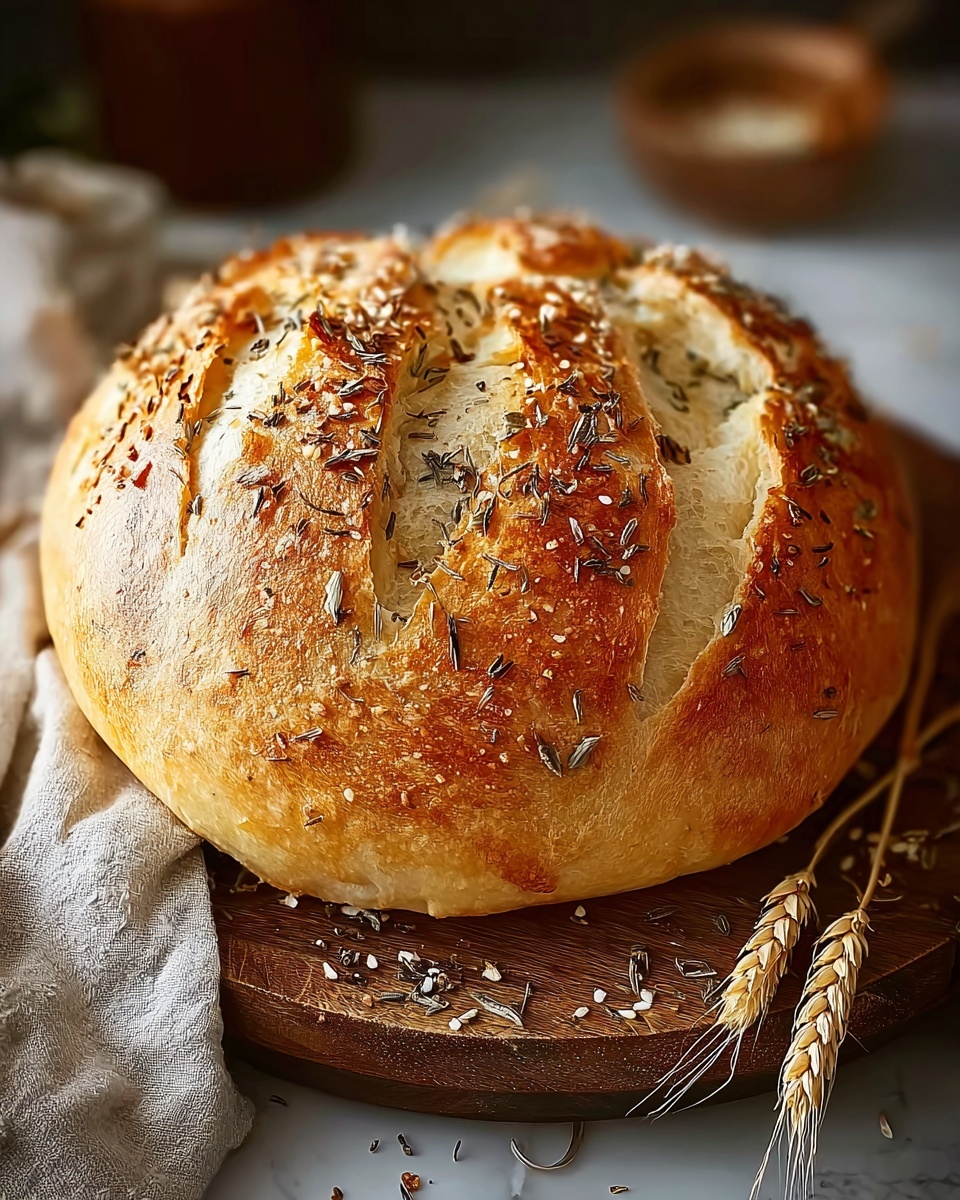
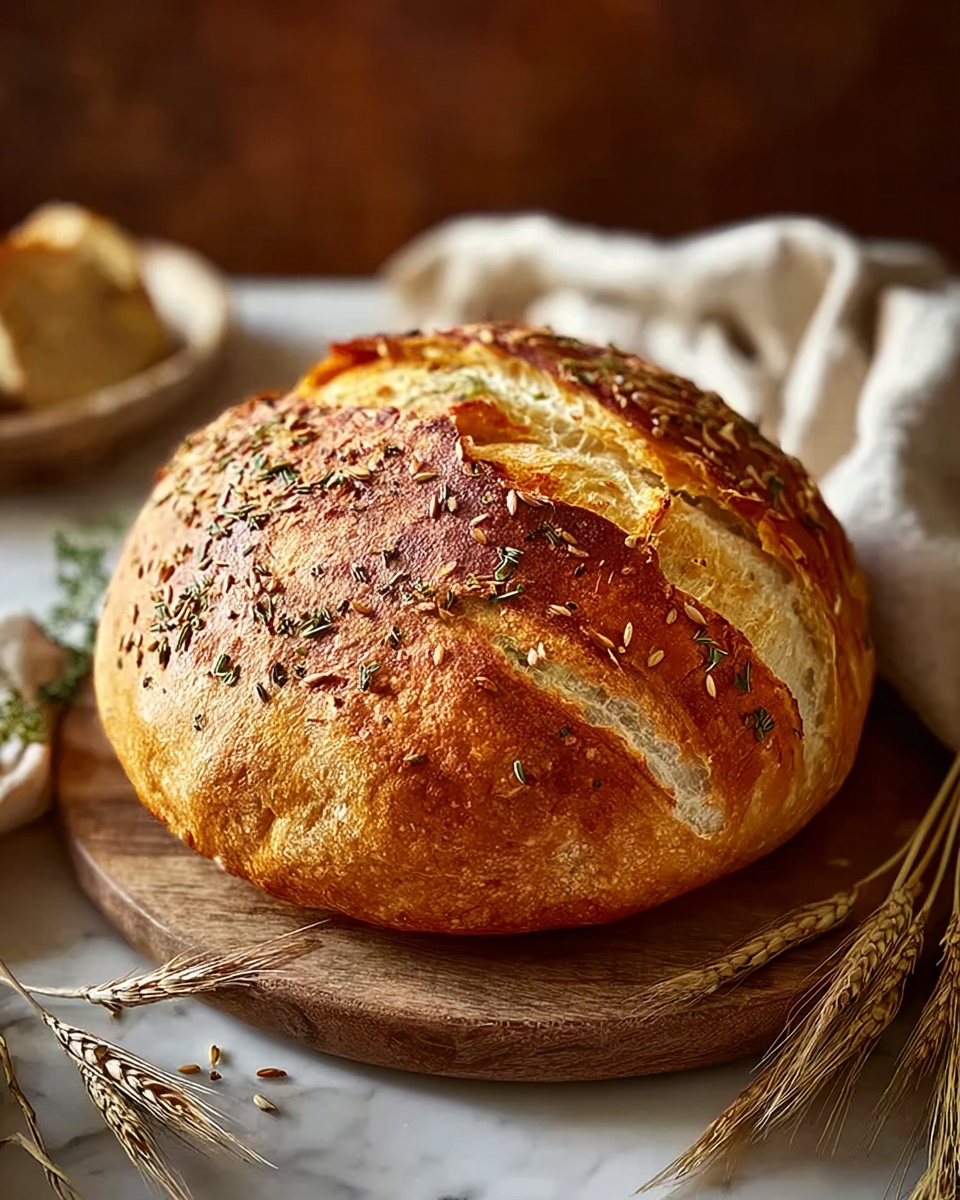
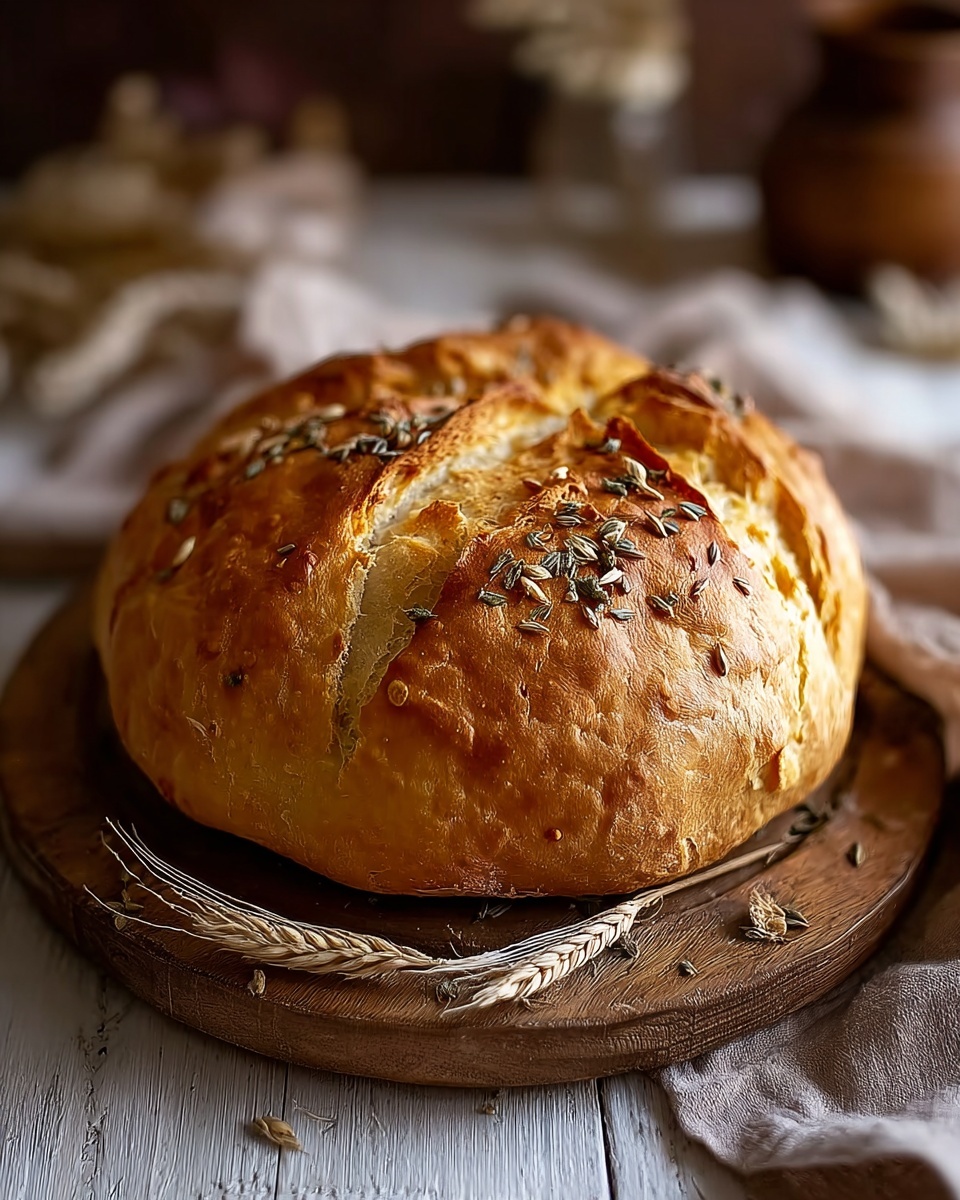
If you’ve ever dreamed of baking a loaf that fills your kitchen with the warm, comforting aroma of fresh bread while boasting hearty texture and wholesome flavor, then this Rustic German Whole-Wheat Bread Recipe is your new best friend. Rooted in tradition and simplicity, this bread combines nutty whole-wheat flour with a touch of bread flour to create a beautifully crusty yet tender loaf that’s perfect for everything from morning toast to savory sandwiches. Get ready to embrace the charm of rustic baking with a recipe that feels genuinely artisanal but is absolutely manageable in your own kitchen.
Ingredients You’ll Need
This Rustic German Whole-Wheat Bread Recipe uses a handful of humble ingredients that pack a big punch in taste and texture. Each element plays an essential role in creating that perfect balance of chewiness, crust, and flavor that defines rustic bread baking.
- 400 g whole-wheat flour: Provides the deep, earthy flavor and dense texture that makes this bread truly rustic.
- 100 g bread flour: Adds gluten strength, helping give the loaf a nice rise and a lighter crumb structure.
- 1 tsp sugar: A small touch to gently feed the yeast and enhance browning during baking.
- 2 tsp salt: Essential for bringing out all the flavors and balancing the natural sweetness of the grains.
- 1 tsp dry yeast: The magical agent that makes your dough rise and come alive with bubbles and character.
- 350 ml lukewarm water: Hydrates the flour perfectly and activates the yeast without shocking it.
How to Make Rustic German Whole-Wheat Bread Recipe
Step 1: Activate the Yeast
Start by combining lukewarm water, sugar, and dry yeast in a bowl. Give it a gentle stir and let it rest for 5 to 10 minutes until you see it foam up. This foamy texture is your green light that the yeast is active and ready to work its magic in your dough.
Step 2: Mix Dry Ingredients
While the yeast perks up, whisk together your whole-wheat flour, bread flour, and salt in a large bowl. Mixing these dry ingredients well at this stage helps ensure an even distribution of salt and creates a base ready to welcome the yeast mixture.
Step 3: Form the Dough
Pour your bubbly yeast mixture into the bowl with the flours. Stir everything until it comes together into a sticky, shaggy dough. A brief knead helps bring the dough into cohesion but keep it gentle—this is rustic bread, after all, not overly refined perfection.
Step 4: First Rise
Cover your bowl with a clean towel or plastic wrap and find a warm, cozy spot for the dough to rise. After about 1 hour, it should have doubled in size, becoming lighter and filled with those lovely gas bubbles that signal it’s developing flavor and texture.
Step 5: Shape the Loaf
Lightly flour your work surface to prevent sticking, then gently shape the dough into a rustic round loaf. Resist the temptation to over-knead here—part of this bread’s charm is its informal, artisanal look with some character and irregularities.
Step 6: Second Proof
Place the shaped loaf on parchment paper or into a proofing basket if you have one. Cover it loosely and let it rise again for 30 to 45 minutes. This second rise will give the bread an airy crumb and a puffier, inviting shape.
Step 7: Preheat Oven
Get your oven roaring at 230°C (450°F). If you’re lucky enough to have a Dutch oven, place it inside while preheating. This method traps steam, creating that irresistibly crusty exterior that rustic German bread is famous for.
Step 8: Score and Bake
Just before baking, use a sharp knife or bread lame to score the top of your dough. This incision allows the bread to expand beautifully without cracking randomly. Bake the loaf in your Dutch oven or on a hot baking tray for 35 to 40 minutes. Halfway through, remove the Dutch oven lid (if using) to let the crust get extra crisp and golden.
Step 9: Cool and Slice
Now comes the hardest part—waiting. Let your bread cool for at least 20 minutes before slicing to allow the crumb to set properly. The anticipation is worth it, promise!
How to Serve Rustic German Whole-Wheat Bread Recipe
Garnishes
Sprinkle a little flour dusting on top before baking for that classic rustic look, or brush a bit of olive oil right after baking for a subtle sheen and richer flavor on the crust. Toast with butter and a pinch of sea salt for a simple, soul-satisfying treat.
Side Dishes
This loaf partners beautifully with hearty soups like lentil or beef stew, sharp cheeses, and cured meats. A smear of tangy mustard or a slice of ripe tomato with fresh basil also complements its robust flavor perfectly, making it a versatile hero at the table.
Creative Ways to Present
Slice thick for open-faced sandwiches piled high with smoked salmon and cream cheese or cut into cubes for dipping into warm, melted cheese fondue. You can even turn the bread into crispy croutons by tossing with herbs and olive oil before a quick oven roast—delicious and zero waste!
Make Ahead and Storage
Storing Leftovers
If you have any leftovers (which is rare!), keep the bread in a paper bag or loosely wrapped in a kitchen towel at room temperature to preserve the crust’s texture while preventing it from drying out too quickly. Avoid airtight plastic storage bags as they can make the crust soggy.
Freezing
To store longer, slice the loaf and freeze it in a resealable bag. This way, you can take out just what you need without thawing the entire bread. Frozen slices defrost quickly at room temperature or can be toasted straight from the freezer for convenience.
Reheating
Bring your rustic loaf back to life by warming it in a 180°C (350°F) oven for 5 to 10 minutes. This crisp reheating technique restores the bread’s crusty exterior and soft crumb, making it taste freshly baked even after a day or two.
FAQs
Can I use all whole-wheat flour instead of mixing with bread flour?
Yes, but keep in mind that all whole-wheat flour will produce a denser, heavier loaf with a stronger nutty flavor. Mixing in bread flour helps lighten the texture and improve the rise, making the bread a bit fluffier yet still hearty.
Do I need a Dutch oven to bake this bread?
Not necessarily! A Dutch oven helps create steam which thickens the crust, but you can also bake on a preheated baking tray with a small pan of water in the oven to generate steam. Both methods will give you a lovely crust and rustic loaf.
How long can I keep the bread fresh?
At room temperature, this bread is best enjoyed within 2 to 3 days. Beyond that, it starts to dry out, but freezing is a great way to extend its shelf life while maintaining flavor and texture.
What is the best way to score the loaf if I don’t have a bread lame?
A sharp kitchen knife works just fine. Just make sure it’s very sharp and make confident, quick cuts to avoid dragging or tearing the dough. Scoring is important to control how the loaf expands in the oven.
Can I add seeds or nuts to the dough?
Absolutely! Adding sunflower seeds, flaxseeds, or chopped walnuts can introduce delightful texture and complexity. Just fold them in gently during the mixing stage to distribute evenly without overworking the dough.
Final Thoughts
Baking this Rustic German Whole-Wheat Bread Recipe is like opening a treasured book of old-world baking wisdom while making something fresh and nourishing right from your own kitchen. It’s approachable, rewarding, and endlessly adaptable to your tasting preferences. So don your apron, gather those simple ingredients, and enjoy the pure joy of homemade bread that tastes as good as it makes you feel. Happy baking!
“`
Print
Rustic German Whole-Wheat Bread Recipe
- Prep Time: 15 minutes
- Cook Time: 35–40 minutes
- Total Time: 1 hour 50 minutes to 2 hours (including rises)
- Yield: 1 loaf (10–12 slices)
- Category: Bread
- Method: Baking
- Cuisine: German
Description
This Rustic German Bread recipe yields a hearty, flavorful loaf with a crisp crust and dense crumb, combining whole-wheat and bread flours for an authentic traditional taste. The bread undergoes two rises for perfect texture and is baked in a hot Dutch oven for a crusty exterior, making it ideal for sandwiches or as a rustic accompaniment to meals.
Ingredients
Dry Ingredients
- 400 g whole-wheat flour
- 100 g bread flour
- 1 tsp sugar
- 2 tsp salt
- 1 tsp dry yeast
Wet Ingredients
- 350 ml lukewarm water
Instructions
- Activate the Yeast: Combine lukewarm water, sugar, and yeast in a bowl. Stir well and let sit for 5–10 minutes until the mixture becomes foamy, indicating the yeast is active.
- Mix Dry Ingredients: In a large mixing bowl, whisk together whole-wheat flour, bread flour, and salt to evenly distribute the ingredients.
- Form the Dough: Pour the yeast mixture into the flour mixture. Stir until a sticky dough forms, then knead briefly to combine all ingredients thoroughly without overworking.
- First Rise: Cover the bowl and place the dough in a warm location. Allow it to rise for about 1 hour or until it has doubled in size, developing flavor and texture.
- Shape the Loaf: Lightly flour a clean surface and shape the risen dough into a rustic round loaf. Handle gently to preserve air bubbles for a light crumb.
- Second Proof: Place the shaped dough on parchment paper or into a proofing basket. Cover and let it rise again for 30–45 minutes until puffed and ready to bake.
- Preheat Oven: Preheat your oven to 230°C (450°F). If using a Dutch oven, place it inside the oven during preheat to get it very hot for even baking.
- Score and Bake: Using a sharp knife, score the top of the dough to allow for expansion. Bake the loaf in the hot Dutch oven or on a hot baking tray for 35–40 minutes. Remove the lid halfway through baking if using a Dutch oven to enhance crust crispiness.
- Cool and Slice: Remove the bread from the oven and cool on a wire rack for at least 20 minutes before slicing to finish the baking process internally and avoid gummy texture.
Notes
- Make sure the water is lukewarm to properly activate the yeast without killing it.
- Using a Dutch oven helps achieve a crispy crust by trapping steam during baking.
- Do not over-knead the dough to maintain a rustic, open crumb texture.
- Allow the bread to cool completely before slicing to ensure the best texture.
- This bread freezes well; slice before freezing for convenience.


