
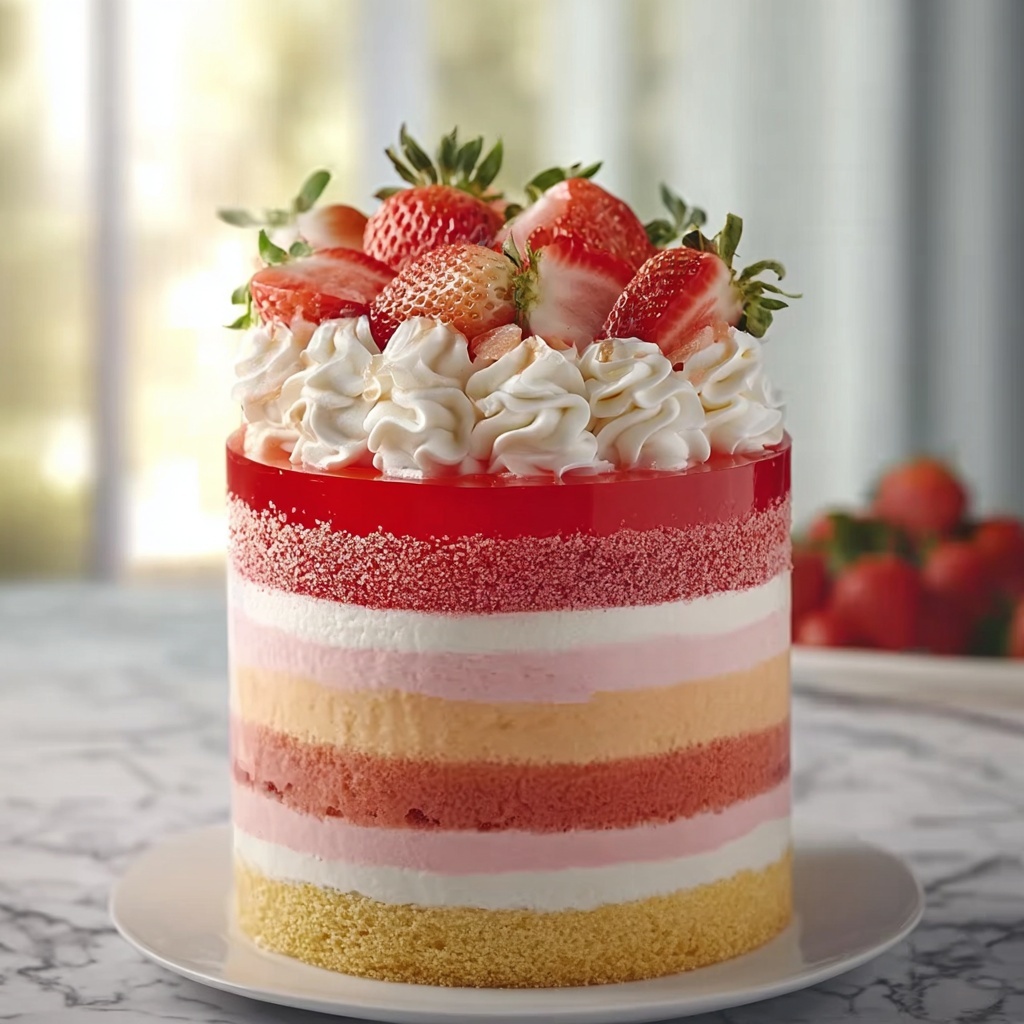
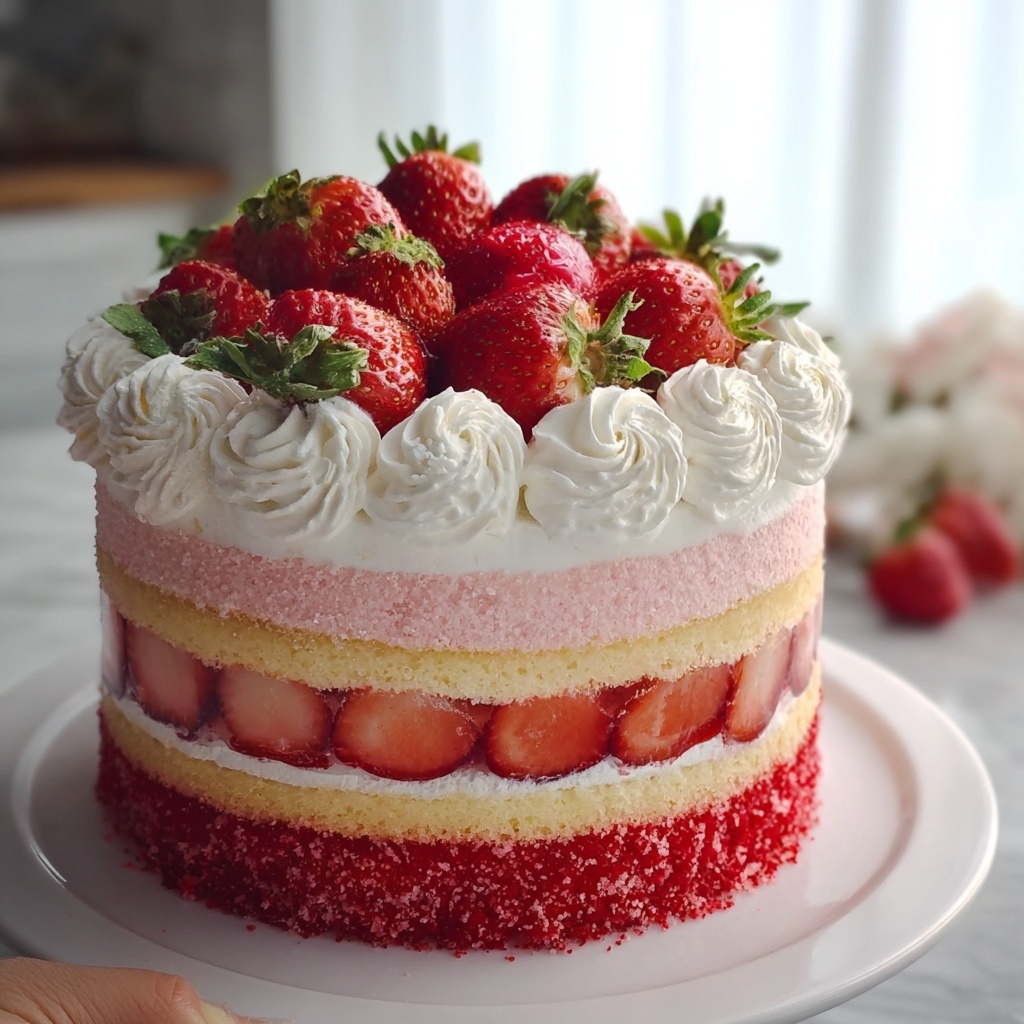
If you have ever dreamed of a cake that looks as delightful as it tastes, the Vanilla Strawberry Ombre Cake Recipe is here to make those dreams come true. This cake combines the luscious flavors of vanilla and fresh strawberry in a stunning ombre effect that graduates from delicate blush pink to creamy white. It’s not only a feast for your palate but also a centerpiece that will dazzle your guests. Perfect for celebrations or when you simply want to treat yourself, this recipe balances moist layers, rich but light frosting, and eye-catching color in a way that’s totally irresistible.
Ingredients You’ll Need
Every ingredient in this Vanilla Strawberry Ombre Cake Recipe plays a crucial role, from creating the perfect texture to delivering that signature fruity-sweet flavor and beautiful gradient look. These simple pantry staples and fresh additions come together effortlessly to produce magic in your kitchen.
- 2 ½ cups all-purpose flour: The foundation of your cake’s tender crumb and sturdy structure.
- 2 ½ teaspoons baking powder: Helps give your cake that wonderful, fluffy rise.
- ½ teaspoon salt: Balances sweetness and enhances flavor.
- 1 cup unsalted butter, softened: Adds richness and moisture for a soft, delicate texture.
- 1 ½ cups granulated sugar: Sweetens the cake and contributes to the light crumb.
- 4 large eggs: Bind the ingredients and add richness.
- 1 tablespoon vanilla extract: Gives the classic vanilla warmth throughout.
- 1 cup whole milk: Keeps the batter smooth and moist.
- 2 cups unsalted butter, softened (for frosting): Essential for that creamy, luscious buttercream.
- 4-5 cups powdered sugar: The sweetness and structure your frosting needs for perfect spreading consistency.
- 1 teaspoon vanilla extract (for frosting): Infuses the frosting with vanilla flavor.
- 1-2 tablespoons strawberry puree or extract: Brings the fresh strawberry essence and lovely pink hue to the frosting.
- Pink food coloring (optional): Perfect for creating that pretty ombre gradient in both batter and frosting.
- A pinch of salt (for frosting): Enhances all the buttery, fruity flavors in the icing.
How to Make Vanilla Strawberry Ombre Cake Recipe
Step 1: Prep Your Pans and Oven
Begin by preheating your oven to 350°F (175°C). It’s important to grease and flour three 8-inch round cake pans to ensure your layers come out clean and intact after baking. This step makes all the difference in achieving those perfect rounds needed for the ombre effect.
Step 2: Mix the Dry Ingredients
Whisk together the all-purpose flour, baking powder, and salt in a medium bowl. This ensures that your leavening agent and salt are evenly distributed throughout the flour, which gives you a uniform texture and rise.
Step 3: Cream Butter and Sugar
Using a large mixing bowl, beat the softened butter and granulated sugar together until light and fluffy. This aeration step is key for a tender, soft cake crumb that melts in your mouth.
Step 4: Add the Eggs and Vanilla
Incorporate the eggs one at a time, beating well after each addition so the batter stays smooth and emulsified. Stir in the vanilla extract to infuse the cake with that classic sweet aroma.
Step 5: Alternate Adding Dry Ingredients and Milk
Gradually mix in the flour mixture in three parts, alternating with the milk, starting and ending with the flour. This technique prevents overmixing while keeping the batter silky and tender.
Step 6: Divide and Color the Batter
Split the batter evenly into three separate bowls. Leave one plain for the lightest layer, add a few drops of pink food coloring to the second for a soft blush, and add more coloring to the third for a vibrant deeper pink. This gradient creates the signature ombre effect that’s so visually captivating.
Step 7: Bake the Layers
Pour each colored batter into its prepared cake pan. Bake for 25–30 minutes or until a toothpick inserted into the center comes out clean. This careful timing results in perfectly baked layers that are moist but fully set.
Step 8: Cool Completely Before Frosting
Allow the cakes to cool in their pans for about 10 minutes before transferring to a wire rack. It is essential to let them cool completely to avoid melting your frosting when you assemble the cake.
Step 9: Prepare the Frosting Base
Beat the softened butter in a large bowl until smooth and creamy. This sets the stage for an ultra-luxurious and spreadable buttercream that complements the cake layers perfectly.
Step 10: Add Powdered Sugar Gradually
Add powdered sugar one cup at a time, beating after each addition. This slow incorporation makes for a fluffy frosting that’s not too dense or overly sweet.
Step 11: Flavor the Frosting
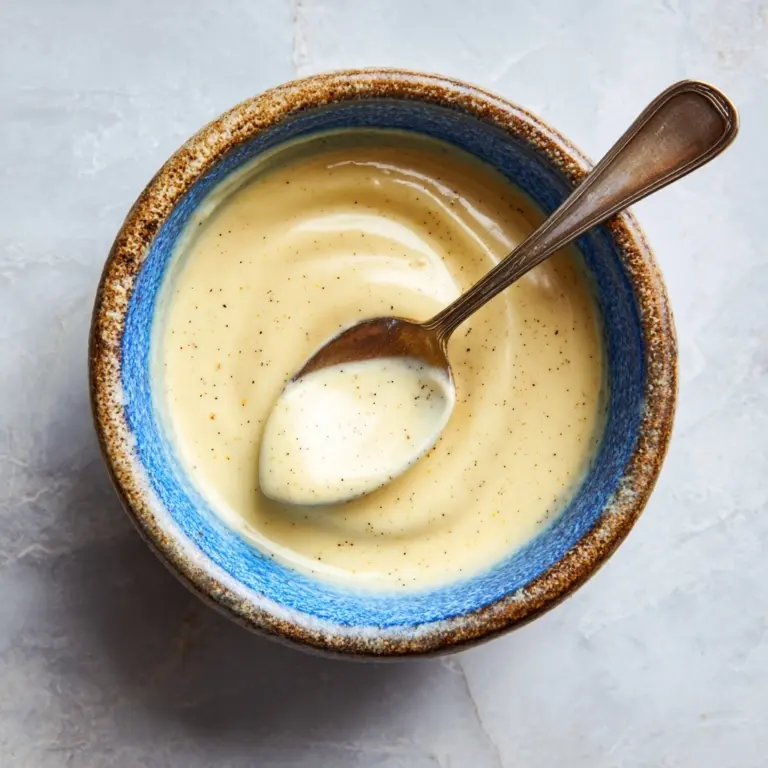
Stir in the vanilla extract, strawberry puree, and a pinch of salt. The strawberry puree imparts a subtle, fresh strawberry flavor and a hint of pink that’s perfect for the ombre touches.
Step 12: Color the Frosting for Ombre
Divide your frosting into three bowls. Leave one plain, add a little pink food coloring to the second, and add more to the third bowl. This mirrors your cake layers with beautiful color gradations and lifts the whole dessert visually.
Step 13: Begin Assembly with the Darkest Layer
On a cake stand or plate, place the darkest pink cake layer first. Spread a thin, even layer of the matching frosting over the top to add moisture and flavor between layers.
Step 14: Add the Medium Layer and Frost
Place the medium pink layer next and cover it with the medium-colored frosting. Carefully smoothing the frosting helps emphasize the smooth transition of colors in this ombre wonder.
Step 15: Top with the Lightest Layer
Finally, add the lightest layer of cake and cover the entire cake with the lightest frosting. This top layer sets the bright finish for your masterpiece.
Step 16: Create the Ombre Frosting Effect
Use a spatula to gently blend the frosting on the cake’s sides, going from darker to lighter shades. This blending creates that mesmerizing gradient, making the cake as stunning as it is scrumptious.
Step 17: Chill and Decorate
Refrigerate the cake for about 30 minutes to let the frosting set. Before serving, decorate with fresh strawberries or sprinkles for an extra pop of color and flavor — a charming finishing touch for this elegant cake.
How to Serve Vanilla Strawberry Ombre Cake Recipe
Garnishes
Enhance your cake’s beauty and flavor by adorning it with fresh strawberry slices or whole berries. A few edible flowers or white chocolate shavings can also add a sophisticated flair, elevating every slice into a work of art.
Side Dishes
This cake pairs beautifully with a light, refreshing side such as a simple mixed berry salad or a scoop of vanilla bean ice cream. The creamy contrast balances the sweet cake, making each bite feel indulgent yet balanced.
Creative Ways to Present
For a twist, serve individual mini versions of this ombre cake in clear glass jars to highlight the color layers. Alternatively, serve it atop a wooden cake board with a rustic linen napkin for a charming, homemade vibe that feels warm and inviting.
Make Ahead and Storage
Storing Leftovers
After enjoying your Vanilla Strawberry Ombre Cake Recipe, wrap leftovers tightly in plastic wrap or use an airtight container to keep it fresh. Store in the refrigerator where it will stay moist and flavorful for up to 3 days.
Freezing
You can freeze both the unfrosted cake layers and the assembled cake. Wrap each layer securely in plastic wrap and foil to prevent freezer burn, then freeze for up to 2 months. Thaw in the refrigerator overnight before frosting or serving.
Reheating
This cake is best served chilled or at room temperature, so no reheating is necessary. If you prefer a softer texture, leave it out for about 30 minutes before serving to bring out the full buttery flavors.
FAQs
Can I use frozen strawberries for the strawberry puree?
Absolutely! Just thaw and drain any excess juice before blending the strawberries into a puree. This will give your frosting a fresh strawberry flavor without adding too much liquid that could affect the texture.
Is the pink food coloring necessary for this recipe?
The pink food coloring is optional but highly recommended to achieve a true ombre effect. Natural strawberry puree adds subtle pink tones, but food coloring ensures the layers stand out beautifully and consistently.
How do I make sure my cake layers turn out perfectly even?
Use a kitchen scale to divide the batter evenly among your pans and tap the pans gently on the counter before baking to release air bubbles. This helps your layers bake uniformly in height and texture.
Can I make this cake vegan or dairy-free?
With some substitutions like plant-based butter, milk alternatives, and egg replacers, you can adapt this recipe to fit vegan or dairy-free diets. Just keep in mind that these changes might slightly alter texture and flavor.
What’s the best way to get smooth frosting for the ombre effect?
Use an offset spatula and a bench scraper to smooth and blend the frosting. Chilling the cake between layers of frosting can also help achieve clean, sharp color transitions.
Final Thoughts
Now that you’re armed with the Vanilla Strawberry Ombre Cake Recipe, there’s no better time to dive into crafting this stunning dessert. The joyful colors, combined with classic vanilla and fresh strawberry flavors, make it a show-stopping treat everyone will adore. So gather your ingredients, put on your apron, and prepare to wow your friends and family with a cake that tastes as incredible as it looks!
Print
Vanilla Strawberry Ombre Cake Recipe
- Prep Time: 20 minutes
- Cook Time: 30 minutes
- Total Time: 50 minutes
- Yield: 12 servings
- Category: Dessert
- Method: Baking
- Cuisine: American
- Diet: Vegetarian
Description
This Vanilla Strawberry Ombre Cake is a delightful and visually stunning dessert featuring three layers of soft vanilla sponge cake tinted in varying shades of pink for a beautiful ombre effect. Each layer is baked to perfection and frosted with a creamy strawberry-infused buttercream that balances sweetness with a fresh berry flavor. Perfect for celebrations or special occasions, this cake combines classic vanilla with a hint of strawberry for a charming and delicious treat.
Ingredients
For the Cake:
- 2 ½ cups all-purpose flour
- 2 ½ teaspoons baking powder
- ½ teaspoon salt
- 1 cup unsalted butter, softened
- 1 ½ cups granulated sugar
- 4 large eggs
- 1 tablespoon vanilla extract
- 1 cup whole milk
For the Frosting:
- 2 cups unsalted butter, softened
- 4–5 cups powdered sugar (adjust for desired consistency)
- 1 teaspoon vanilla extract
- 1–2 tablespoons strawberry puree (or strawberry extract)
- Pink food coloring (optional, for ombre effect)
- A pinch of salt
Instructions
- Prepare the cake pans: Preheat your oven to 350°F (175°C). Grease and flour three 8-inch round cake pans to ensure the cakes don’t stick.
- Mix dry ingredients: In a medium bowl, whisk together the flour, baking powder, and salt. Set this mixture aside for later use.
- Cream butter and sugar: In a large mixing bowl, beat the softened butter with the granulated sugar until the mixture is light, fluffy, and well combined.
- Add eggs and vanilla: Incorporate the eggs one at a time, mixing thoroughly after each addition to maintain a smooth batter. Stir in the vanilla extract for flavor.
- Combine dry and wet ingredients: Alternately add the dry flour mixture and whole milk to the wet ingredients in batches, beginning and ending with the dry mixture. Mix just until combined to keep the batter light.
- Create ombre layers: Divide the batter evenly into three bowls. Leave one bowl plain, add a few drops of pink food coloring to the second bowl, and more food coloring to the third bowl to create a gradient effect.
- Bake the cake layers: Pour each batter color into the prepared pans and bake for 25-30 minutes. Check doneness with a toothpick inserted in the center; it should come out clean.
- Cool cakes: Allow the cakes to cool completely on a wire rack before frosting to prevent melting or sliding of the icing.
- Prepare frosting: Beat the softened butter in a large bowl until smooth and creamy.
- Add powdered sugar: Gradually incorporate the powdered sugar, about one cup at a time, beating well after each addition until the frosting is fluffy.
- Flavor the frosting: Mix in the vanilla extract, strawberry puree or extract, and a pinch of salt to enhance the taste and balance sweetness.
- Create ombre frosting: Split the frosting into three bowls; keep one plain, lightly tint another with pink food coloring, and intensify the pink on the third for the ombre effect.
- Assemble the cake: Place the darkest pink cake layer on your serving plate or cake stand. Spread a thin layer of the darkest frosting over it.
- Add second layer: Place the medium pink cake layer on top and frost it with the medium-colored frosting evenly.
- Add top layer: Position the lightest cake layer on top, then cover the entire cake with the lightest frosting.
- Smooth ombre effect: Using a spatula, gently blend the frosting colors from dark to light around the cake to enhance the ombre look with a smooth gradient finish.
- Chill and decorate: Refrigerate the finished cake for about 30 minutes to set the frosting. Optionally, garnish with fresh strawberries or sprinkles before serving.
Notes
- For the best results, make sure all ingredients are at room temperature before beginning.
- If strawberry puree isn’t available, strawberry extract works well for flavoring the frosting.
- Adjust powdered sugar in the frosting to reach your preferred consistency; more sugar makes it stiffer, less makes it softer.
- Use gel food coloring for more vibrant colors without thinning the batter or frosting.
- The cake layers can be baked a day ahead and wrapped tightly; frost just before serving.
- Chilling the cake before serving helps the frosting set and makes slicing cleaner.


